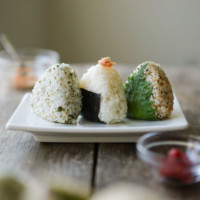
Onigiri - Japanese Rice Balls
Onigiri rice balls is a great way to make rice portable when you're on the go. This recipe teaches you how easy it can be to make onigiri at home with many different kinds of fillings.
Ingredients
- 4 c short grain rice cooked
Tuna filling
- 5 oz (141.7 g) can of tuna
- 2 tbsp Kewpie Japanese mayonnaise
- ½ tsp soy sauce
Salmon filling
- 7 oz filet of salmon
- 2 tsp salt
Okaku filling
- 5 g bonito flakes
- ½ tbsp soy sauce
- 2 tsp black sesame seeds
Kombu tsukudani filling
- 6 tsp kombu tsukudani
Ume (pickled plum) filling
- 6 oz ume (pickled plum)
Furikake filling
- 6 tsp furikake
Wrapping
- nori optional
- shiso leaves optional
Instructions
Onigiri preparation
- After cooking the short grain rice, add about half teaspoon of salt to the rice and mix. Taste the rice and adjust if you want more seasoning. Remember that you will also be adding filling with the rice so you don’t want to over salt the rice.
- Tuna filling: In a small bowl, add the canned tuna, Kewpie Japanese mayo, and soy sauce and mix together. I add about 1 ½ tsp of tuna filling into my onigiri.
- Salmon filling: Preheat the oven at 350 °F. Pat dry your filet and season with a generous amount of salt all over the fish. Marinate the salmon for one hour. Bake the salmon for 15 minutes, and then broil for an extra five minutes. Make sure to watch the fish so it doesn’t blacken. After the fish is done, use a fork to flake the fish into small pieces. I add about 1 ½ tsp of salmon filling into one onigiri.
- Ume pickled plum: Use your fingers to gently squeeze out the seed in a pickled plum. I use one to two pickled plum in each onigiri.
- Okaka filling: You can use store bought bonito flakes and mix one five gram packet with ½ tablespoon of soy sauce in a bowl. This should make the bonito flakes damp, but not too wet. I like to mix half a tablespoon of the okaka filling with ½ cup of rice directly and add some black sesame seeds to make one onigiri.
- Furikake filling: Add two to three teaspoons of furikake mix with ½ cup of rice and mix in a bowl with a spoon thoroughly. This makes one onigiri.
- Kombu tsukudani filling: Add two teaspoons of kombu with ½ cup of rice and mix in a bowl with a spoon. This makes one onigiri.
Forming onigiri
- For onigiri with fillings inside: Using the onigiri molds, add about ¼ cup of rice to the onigiri mold, then add the filling you desire, and top off with ¼ cup of rice. Make sure to fill the rice all the way up to the edge of the mold. Take the top and press down to make the shape. Turn the mold over and press the release button to release the onigiri.
- For onigiri with rice and fillings mixed together: Add the rice mixture into the onigiri mold and make sure to fill it all the way up to the edge of the mold. Take the top and press down to make the shape. Turn the mold over and press the release button to release the onigiri.
- Wrap your onigiri with nori. I like to cut rectangles of nori and place them in the middle of the onigiri. You can also use shiso leaves to add to the onigiri, too, by placing the leaf on the front side and folding it under the bottom. The rice should stick to the leaf easily.
- Additionally, you can add extra toppings and sprinkle or roll sesame seeds onto your rice balls.
- Eat the onigiri as soon as possible because they are meant to be eaten the same day as you make them.
Nutrition Facts
Calories: 417kcal | Carbohydrates: 80g | Protein: 12g | Fat: 4g | Saturated Fat: 1g | Polyunsaturated Fat: 2g | Monounsaturated Fat: 1g | Trans Fat: 1g | Cholesterol: 15mg | Sodium: 779mg | Potassium: 136mg | Fiber: 3g | Sugar: 1g | Vitamin A: 10IU | Vitamin C: 1mg | Calcium: 21mg | Iron: 5mg
Did you cook this recipe?Tag @HungryHuy or #hungryhuy--I'd love to see it!