Who doesn’t love juicy, sweet, and tangy tomatoes?! My favorite tomatoes are fresh-picked heirloom tomatoes from the farmers market because of their bright red and golden orange coloring, and their bright and rich flavor. Homegrown tomatoes give this same experience and you don’t even need a large garden bed to grow your tomato plants at all.
This guide will teach you how to grow tomatoes using pots or containers and soon you’ll be eating and cooking up a storm. My favorite recipes for these veggies are dậu sốt cà chua, Đậu hũ dồn thịt sốt cà chua, and pork sinigang.
Quick guide
| Common name | Tomato |
| Botanical name | Solanum lycopersicum |
| Hardiness zones | 3, 4, 5, 6, 7, 8, 9, 10, 11 |
| Sun exposure | Full sun* |
| Ideal temperature | 70℉ |
| Soil PH level | 6-6.8 |
| Seed planting depth | ¼ inch |
| Germination time | 7-10 days |
| Harvest time | 50-120 days depending on variety |
| Watering | 1 inch per week |
| Fertilizer | High in phosphorus and/or potassium, lower in nitrogen |
| Spacing / Container size | 3 ft between plants / 1 plant per 15-20 gallon container |
| Companion plants | Veggies: carrots, cucumbers, garlic, onions, peppers Herbs: basil, chives, parsley Flowers: nasturtiums, marigolds |
| Do not plant with | Brassicas, corn, fennel |
| Pests | Aphids, flea beetles, tomato hornworm, leaf miners |
| Disease | Blossom end-rot, early and late blight, powdery mildew |
Can you grow tomatoes in your zone?
Tomatoes grow best in warm weather and you can grow tomatoes in zones 3-10 as long as your temperature doesn’t dip below 55 ℉. They grow best in around 70-85 ℉, but the hotter the weather you want to make sure you use shade cloth or move them under a shaded area.
Since I’m in zone 10 I like starting them indoors in the early Spring and harden them off once it gets to be around 55 ℉ at night outside (or warmer). This ensures that I can have a long season. I’ve actually overwintered tomatoes in the past and had them come back to life in the Spring and fruit a plentiful harvest.
Type of soil to use for tomatoes
Tomatoes love loamy soil with a PH between 6.0-6.8–with this combination, the tomato roots take up as many nutrients in the soil as possible. To get an adequate loamy texture in my soil, I like to make my own potting mix with a combination of garden soil, compost, chicken or horse manure, coco coir, vermiculite, perlite, and worm castings.
How to plant tomatoes from seeds
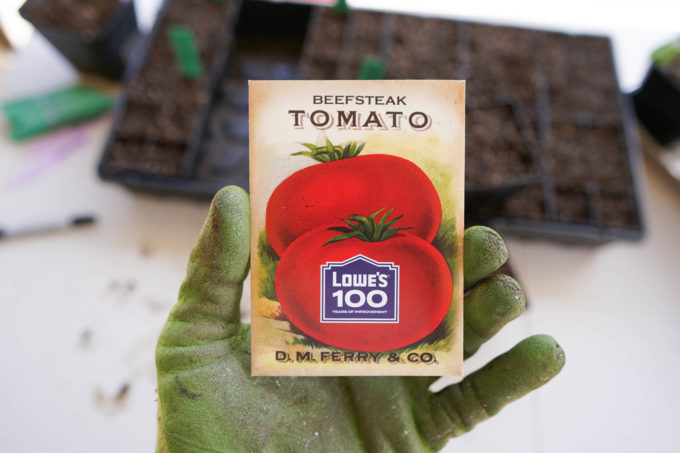
1. Choose a tomato variety. You really have an abundance of tomatoes to choose from. Some of my favorite varieties are celebrity, brandywines, and cherry tomatoes. I like buying seeds from San Diego Seed Company and Kitazawa Seed Company. They say that buying seeds from a local seed company is best because you know these seeds work well in your region.

2. Choose a seed starting tray. When I start my seedlings, I like using reusable seedling trays such as Epic Gardening’s 6-cell trays because they’re durable and I can reuse them in the future. I would not recommend using compostable peat moss trays because they dry out quickly and don’t compost quickly enough once you transplant the seedlings. This has caused some plants to not grow as substantially because they become root-bound.
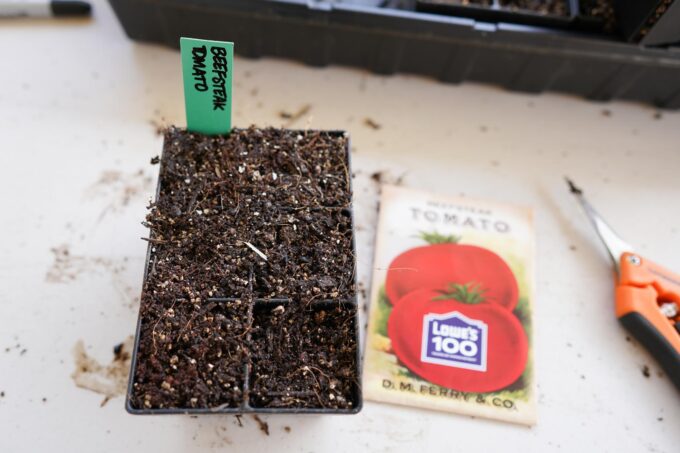
3. Moisten your soil, then add soil to the trays. This helps the soil from moving around or further compressing too much when you water the tops after planting the seeds. I’ve totally forgotten to pre-wet the soil before and ended up with concave cells in my trays. After adding the soil to your trays, don’t compact the soil–you want to keep a well-draining soil system so just lightly pat the soil into the trays.
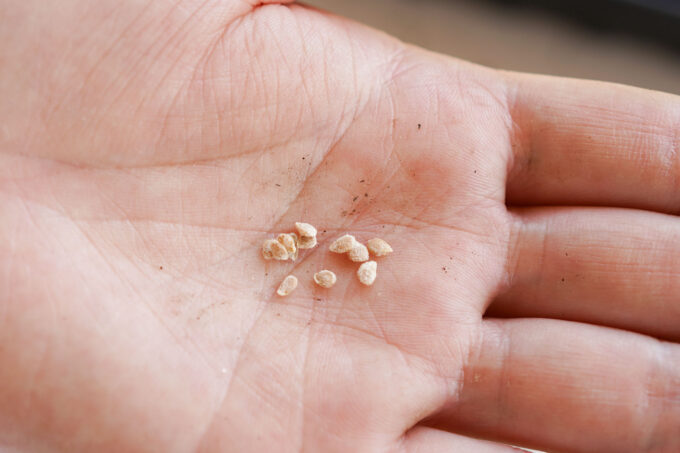
4. Make holes in the soil, drop seeds in. Check the seed packet to see how deep the seeds need to be planted, and make a crater in each seed cell at the specified depth. Plant about 2-3 tomato seeds at about ¼ inch depth and gently pat the soil over the holes without compacting it too much.
5. Keep the soil between 55-70 ℉ for proper germination. I use heating pads that gently warm the seedlings at a constant heat to properly germinate them.
I use Vivosun heating pads that warm the seedlings to 10 degrees above the current room temperature and top my seedling trays with a lid to keep a consistent level of humidity and warmth. I also use a shop light that is at least 3000 lumens so that the seedlings have a light source after they germinate. To learn more about starting seeds indoors, you can read a quick guide here.
Tomato seed germination period
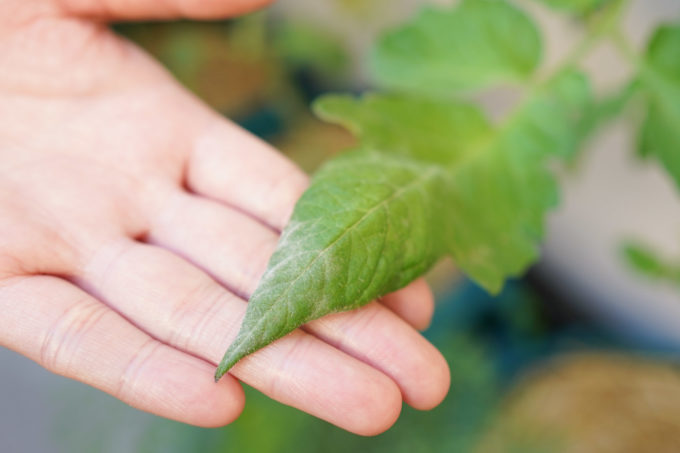
Germination: Tomatoes typically take anywhere between 7-10 days to germinate, which means they grow shoots and show their cotyledon leaves (the first leaves that come from inside the seeds that provide photosynthesis). True leaves grow above the cotyledon leaves. They typically look differently than cotyledons.
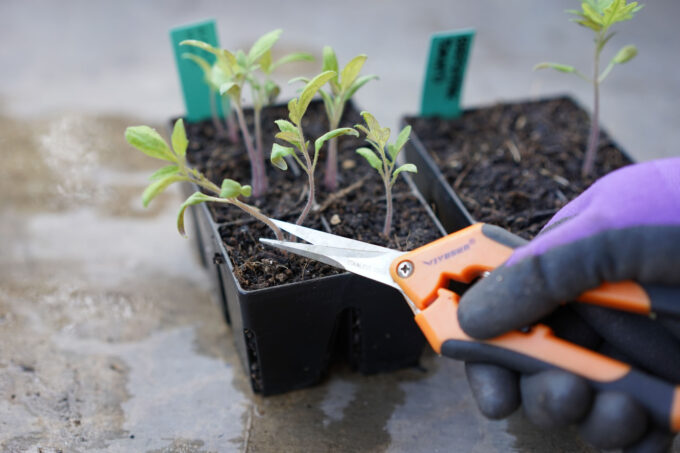
Thinning: Once your tomato plants have their first set of true leaves, it’s time to thin them! This process is necessary to make sure all your plants grow big and strong. Pick the strongest-looking seedling for every 3 inches of space or the strongest-looking one in every single cell. The seedling shouldn’t be too tall or long where it bends over, but it should have a healthy set of true leaves.
You can choose to snip off the weaker seedlings or replant them in new cells. I typically choose to snip them off because I don’t have too much room for too many plants.
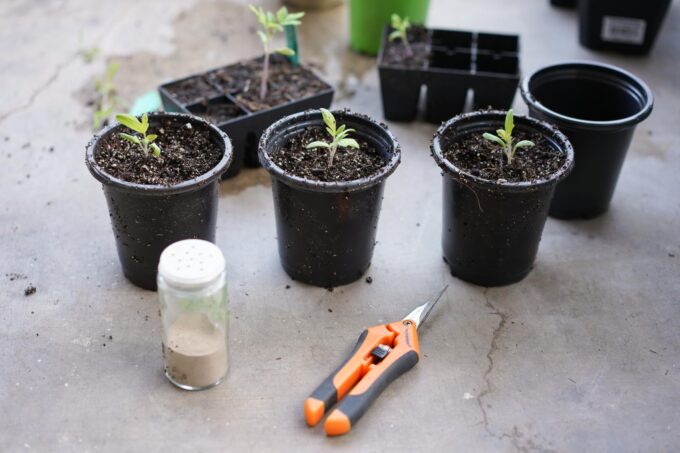
Repotting: When the seedlings are about 2-3 inches tall, I like to repot them into 3-4 inch diameter-sized pots so they can continue to grow bigger. To repot plants, I like to add a handful of soil into the new pot and make a hole big enough to fit one tomato plant. Sprinkle some mycorrhizae powder to make sure the roots grow strong and prevent root shock when transplanting. Then I plant my seedling and cover the sides with soil and gently press around so it stays intact. Water it carefully and watch it grow.
Hardening: Once the weather is above 55℉ throughout the night (ideally warmer), I begin the process of hardening off the seedlings. Hardening means helping the plants acclimate to the weather and conditions outside, so they don’t go into shock when you move them from the inside to the outside. Hardening takes about 1 week of transitioning the plants from indoor conditions to outdoor temperature and conditions.
- 1st day: Move them under a shaded area for about 2-3 hours and then move them inside.
- 2nd day: Do the same and then move them into direct sun for 2-3 hours.
- 3-4th days: Repeat this process for another day and check the plants to see if they are adjusting. If they look sun scorned (wilting too much, yellowing or edges are drying), bring them back into the shade for longer periods.
- 5th day: Leave them outside all day in part shade/part sun and bring them inside at night.
- 6th day: Leave them outside overnight. If your plants are unchanged the next morning, you’ve successfully hardened them off.
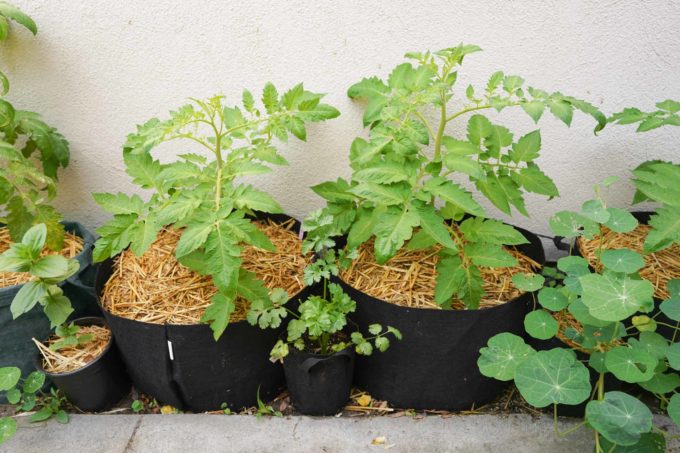
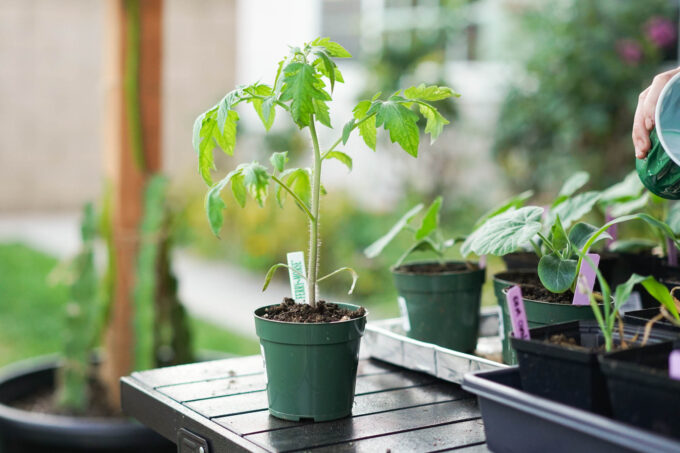
Transplanting: Once the seedlings are about 10-12 inches tall, I like to move them into their permanent containers. I like using 15-gallon fabric grow bags like these from Root Pouch because they’re movable, the fabric is breathable, and it prevents overwatering your plants. You can also plant tomatoes in other containers, like raised garden beds or stock tanks, just make sure you leave about 2-3 feet between each plant.
When you add the soil to the pot make sure to mix in some tomato-friendly fertilizer. I like adding Espoma Gardentone to my potting mix to make sure the tomato plants get some nutrients in their new container. After making a hole large enough for your plant, sprinkle the mycorrhizae powder again to prevent root shock.
One important part about tomatoes is that you can clip a few of the bottom branches and plant them deeper in the pot. The plant is able to grow roots on any portion of the stem that is buried below the soil and therefore the plant develops a stronger root system and sturdier stems; This helps support busy and large tomato plants. Once you plant your seedling in the pot, water it thoroughly and add mulch on top. Mulch helps keep the soil moist, I like to use straw that I found at my local farm store.
How to grow and care for tomatoes
Companion planting: Tomatoes do best planted near their friends:
- Veggies: carrots, cucumbers, garlic, onions, peppers
- Herbs: basil, chives, parsley
- Flowers: nasturtiums, marigolds
You don’t want them near brassicas, corn, or fennel because they attract some awful bugs that would damage the tomato plants.
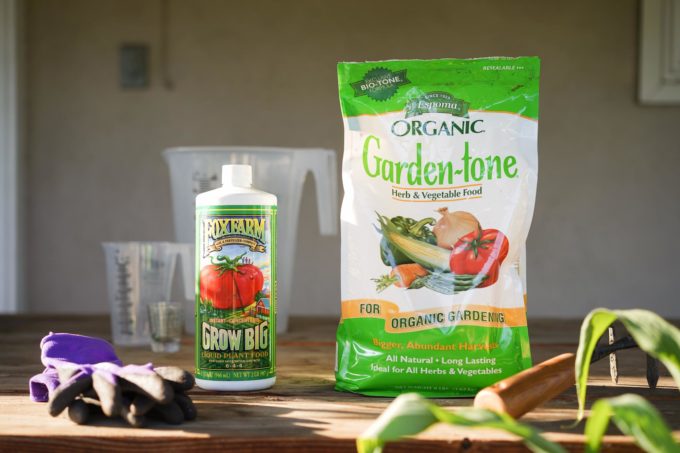
Fertilizers and frequency: Tomatoes are heavy feeders when it comes to fertilizer and nutrients, so you want to make sure to feed them throughout the growing season. I like using a fertilizer that is higher in phosphorus and potassium than nitrogen like Dr. Earth Tomato, Vegetable, and Herb or Espoma Gardentone.
If you want to use granular fertilizer, make sure to fluff up the soil around the plant and then sprinkle the appropriate amount of fertilizer around the plant (trying not to sprinkle on leaves or the stems). Mix the soil with the fertilizer and then water thoroughly.
You can also use liquid fertilizers that are concentrated versions of granular fertilizers. Make sure to read the directions because you may need to dilute it with water first. To use liquid fertilizer, I like to water my plant first to prep the soil and then add the fertilizer. Some brands like Dr. Earth also have an option to mix the granular fertilizer with water overnight to make “fertilizer tea.”
How often to water tomatoes: Water your tomato plant about 1 inch of water per week, but if you’re using a grow bag you want to touch the soil every other day to check the moisture level. Grow bags have a tendency to dry out faster since they’re made out of fabric, so it’s best to check on them every other day. Mulch helps keep the soil moist most of the time. The soil should be able to slightly clump.
Pruning and trellising: Tomato plants come in two main varieties: determinate and indeterminate. Determinate tomato plants, or bush tomato plants, grow to be about 3 feet tall. These plants have one large harvest and don’t necessarily need pruning because they don’t grow too much. You can choose to prune this bush variety if you want to control the growth.
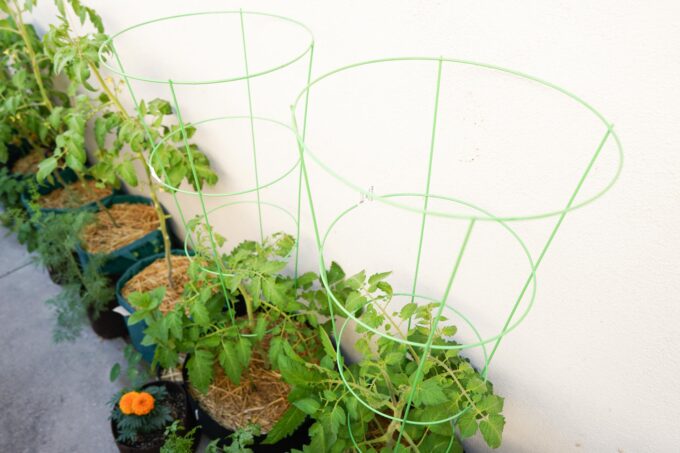
Indeterminate tomato plants grow upwards of 7 feet (or sometimes larger) and need pruning because they vine out. You typically want to provide them with a trellis to help support the plant and prune off stems known as “suckers.” Suckers are new leaves that grow in between a branch and the stem–they will eventually grow into their own branch or stem.
To control the plant growth (and redirect growth into already established branches or the main stem), you can pinch or cut off suckers as they grow. I like to use trellises, stakes, or twine attached to a tall structure to support these tomato plants.
Pests/Diseases: As much as well all love tomatoes, so do bugs. The most common bugs that are attracted to tomatoes are aphids (white or green tiny bugs that eat the leaves and cause them to yellow or curl), flea beetles (that eat the leaves), and leaf miners (that eat through the inside of the leave and it looks like white tunnels in the leaves).
Some common tomato plant diseases are blossom-end rot where the bottom of the tomato is affected and turns a dark brown, early or late blight where the leaves drop or the leaves look like they have mold on them, and powdery mildew where the leaves have what looks like white dust.
Harvesting tomato plants
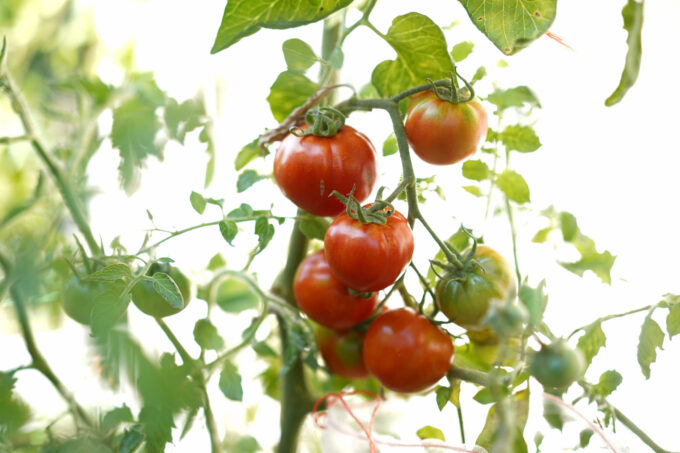
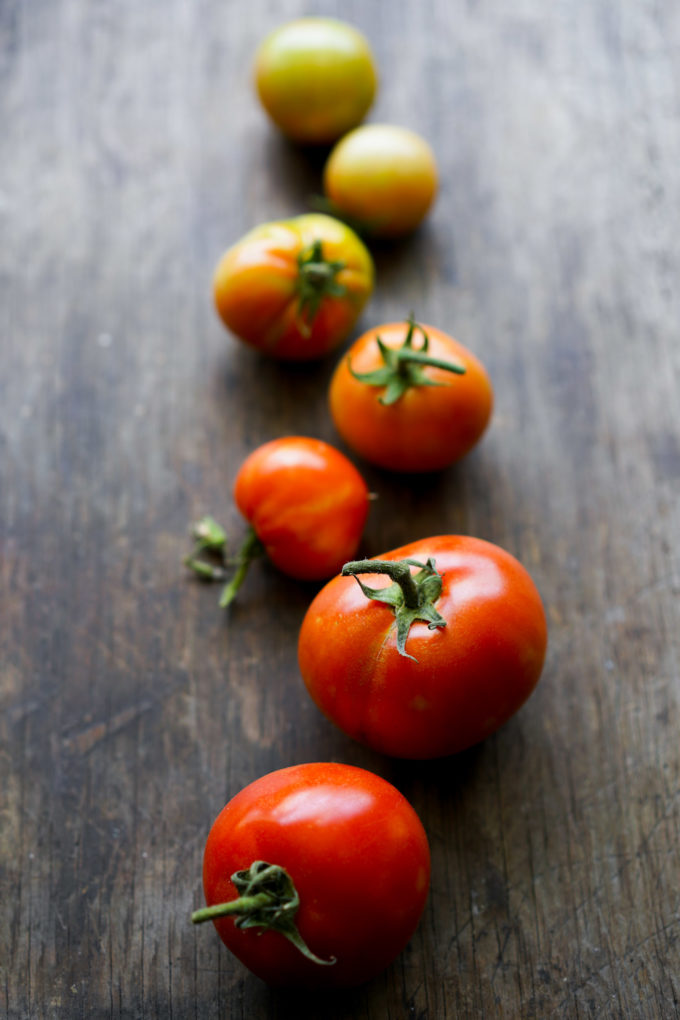
Harvesting: Tomato plants typically range from 50-120 days from seed to harvesting fruits depending on the variety you plant. When the tomatoes are red on the stem, it’s time to snip them off and eat them fresh! I like to keep mine at room temperature on the counter before eating them.
You also have the option of clipping them off the vine when they have only begun to turn orange and have them ripen on the counter, but I’ve found that the tomatoes have more flavor if they stay on the vine until fully ripened.