There are two types of ways to start seeds: indoors or outdoors (aka direct sowing). Depending on where you live and where you want to grow, you could start seeds with both methods. For those in colder climates, you may want to start seeds indoors to get a head start on the growing season if it’s still too cold to direct sow seeds outside in the early Spring.
In some locations like zone 10 where the climate is milder, you can choose to direct sow seeds outside since it will be warmer earlier. However, to get an extra harvest out of an already long season, you can also choose to start indoor seeds in the late winter.
When you start seeds indoors, you need to mimic the perfect environment for seeds to germinate (warm and full of light). Once they’ve grown into adequate-sized seedlings, you can repot or fully transplant them outside after hardening.

Which seeds are good for starting indoors?
Seeds that do well with starting indoors are tomatoes, peppers, bok choy, and herbs like basil. These types of seeds aren’t root vegetables that don’t like their roots disturbed (like carrots or potatoes).
You want to make sure to start these seeds at an appropriate time in your growing season based on the harvest period of each vegetable and the last frost date in your region. You don’t want to plant too early and run out of room in your home! I like to use websites like the Old Farmer’s Almanac to figure out the appropriate time to plant seeds.
While there are a good number of vegetables you can start indoors, It’s important to note that not all plants do well with transplanting. For example, seeds that you want to direct sow outside are carrots, potatoes, or onions because you don’t want to damage their root development since they are underground plants.
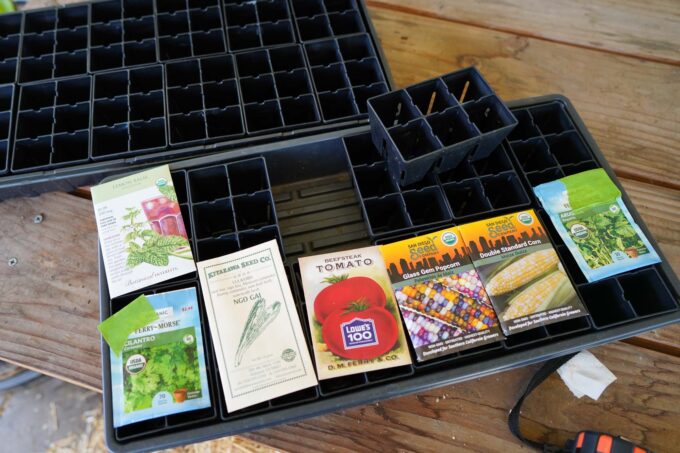
When buying seeds, it’s good to buy from a local seed company that produces the seeds in your region because you know these seeds work well in your area. Make sure to look at the company website to see where they grow their seeds to confirm. I like buying seeds from San Diego Seed Company and Kitazawa Seed Company. When you purchase seeds, it should have a packing date and expiration date, make sure to check these dates to know if your seeds are still viable.
Equipment & the setup
Now that you’ve got your seeds, you need to have a make-shift set-up. I like to reuse the items I already have at home to save money when I can, like using an old Ikea bookshelf. Here are other items you need:
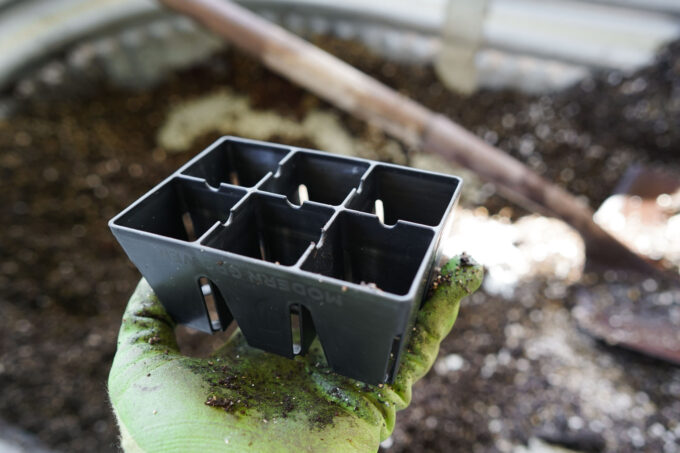
- Seedling cells: Cells are the containers you plant all the seeds in with your soil. I like using reusable seedling trays like Modern Grower’s Epic Gardening’s 6-cell trays because they’re durable and I can reuse them in the future. I also reuse trays I bought from garden stores that are plastic. You can also buy seedling cells at your local hydroponic store for more affordable prices. I would not recommend compostable peat moss trays because I found they dried out quickly and didn’t compost fast enough after transplanting–this caused some root bounding issues with my plants.
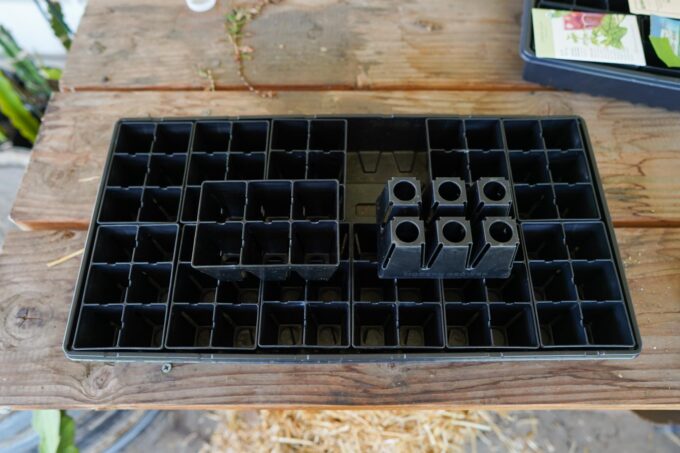
- Trays: Seedling trays are what you place your cells in and help store them in one container. The tray catches any water that may spill over and also gives you the option to water your seedlings from the bottom of the containers which helps prevent overwatering. You can buy these trays at any garden center or hydroponic store, but you can also use large Tupperware pieces you already have at home, too.
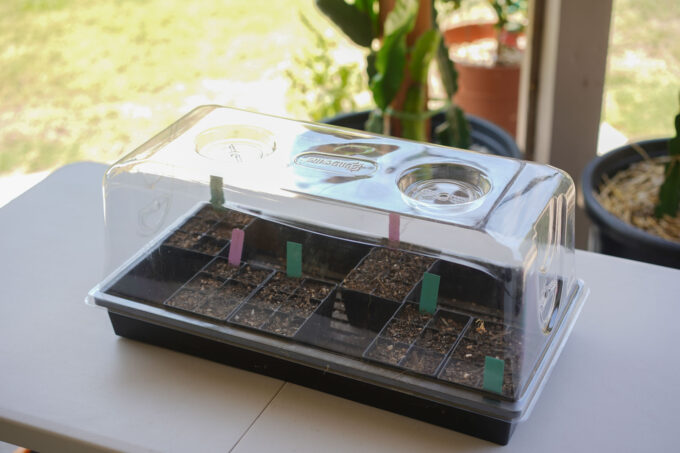
- Domes/lids: Domes and lids help keep the humidity and heat levels in your trays at an appropriate level. Seeds prefer warm and moist climates, so this helps during germination. Once your seedlings pop up from the soil, you want to open the dome vents or keep the lid off to prevent the leaves from growing mold. There are many cell, tray, and dome sets you can buy at garden stores like Lowe’s–this makes it easier!
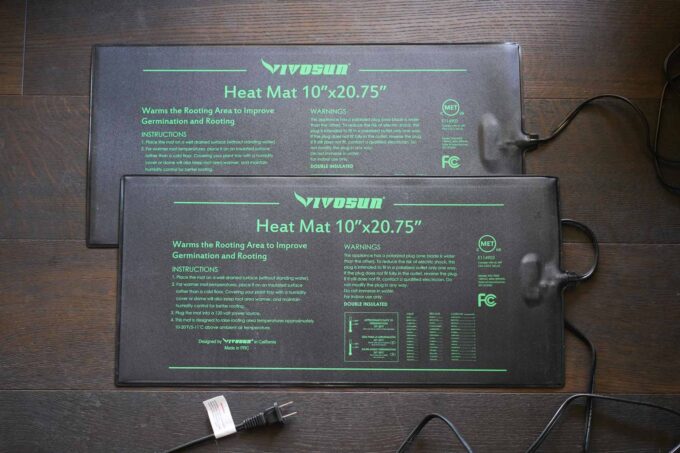
- Heating mats: Heating mats are super helpful for germination because they create a nice warm and moist environment for the seeds to sprout. My heating mats are from Vivosun and will only warm up the trays 10℉ above the current room temperature–meaning they won’t fry my seeds. If you have a heating pad at home you can use this too, just make sure it has an automatic shut-off switch.

- Light source (sunlight or grow lights): Seedlings (and most plants) need lots of light to grow and this situation is no different. Many people use the sunlight from a window, buy grow lights, or buy shop lights to help give their seedlings a light source. Seedlings typically need around 16-20 hours of light a day, so having an extra light other than the sun is helpful. You want to pick lights that are LEDs, have full-spectrum (or broad spectrum) lighting, and have at least 2,000-3,000 lumens per square feet of seedlings. I currently use a shop light with 3700 watts and 4000K lumens–it may not be exactly to spec, but it’s worked fairly well for my seedlings.
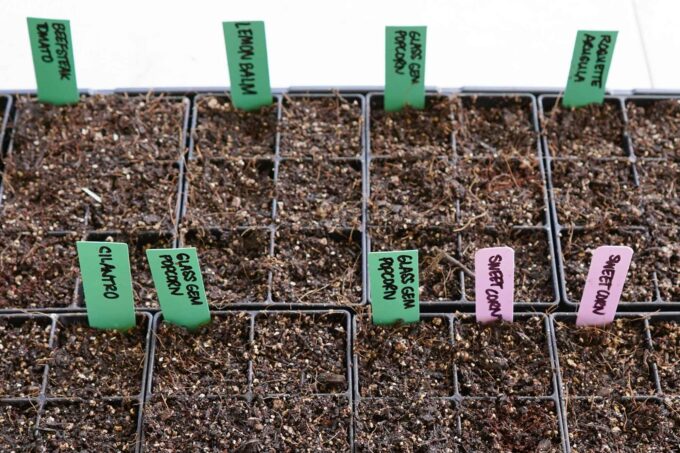
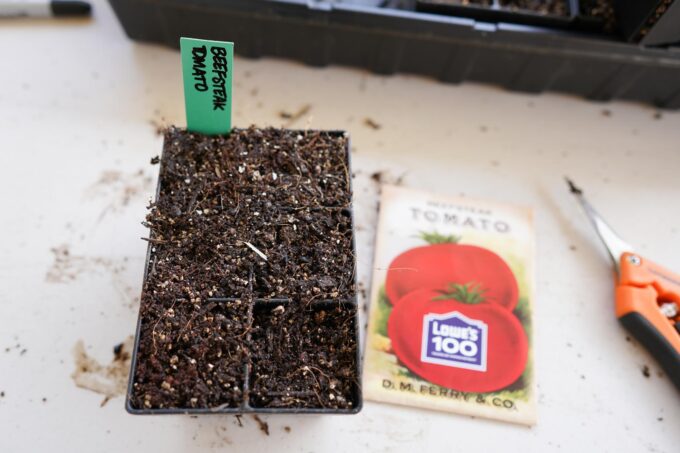
- Labels: Last but not least, labels! You want to make sure each set of cells is properly labeled so you don’t forget what’s what. It’s really easy to mix plants up if you have lots growing at once, especially if they’re the same type of plant of a different variety.
Type of soil to use
You can use premade, bagged potting soil at the store like Fox Farm Happy Frog or Dr. Earth Potting Soil, but I prefer making my own potting mix to create a loamy texture with my soil that is well-draining. To make my own potting mix with a combination of garden soil, compost, chicken or horse manure, coco coir, vermiculite, perlite, and worm castings.
Potting Soil
Ingredients
- 2 cubic ft coconut coir
- 1 cubic ft organic garden soil
- 1 cubic ft chicken manure
- 1 cubic ft vermiculite
- 1 cubic ft perlite
- 10 lb organic worm castings
- Espoma Gardentone fertilizer
Instructions
- If you purchased coconut coir brick, follow the instructions on the package and hydrate the coir before combining with other ingredients.
- In a large container or on a tarp on the ground, combine all the ingredients and mix thoroughly.
- Wet the potting soil until it’s hydrated and can clump in your hands and then use it in your container or garden.
How to plant tomatoes from seeds
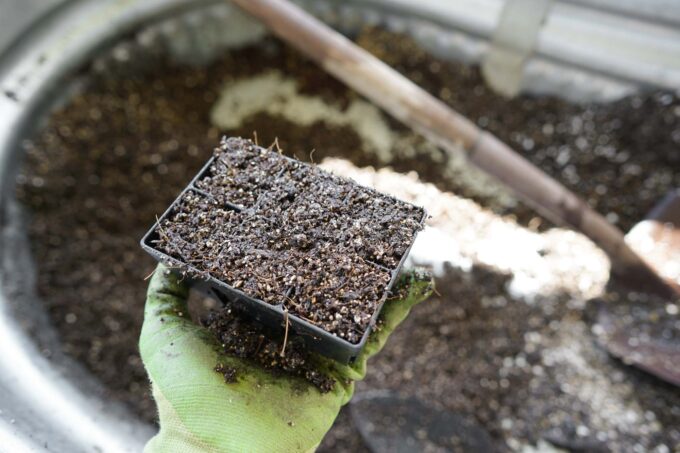
Before putting them in the trays, moisten your soil with some water so that you can slightly clump it together with your hand. Pre-moistening your soil prevents it from moving around too much when you water the tops after planting the seeds.
Add the soil into your cells and don’t compact it too much because you want room for your seeds to grow. When planting your seeds, refer to your seed packets to determine the seed depth. You don’t want to plant too deep because your seeds will have trouble coming to the top.
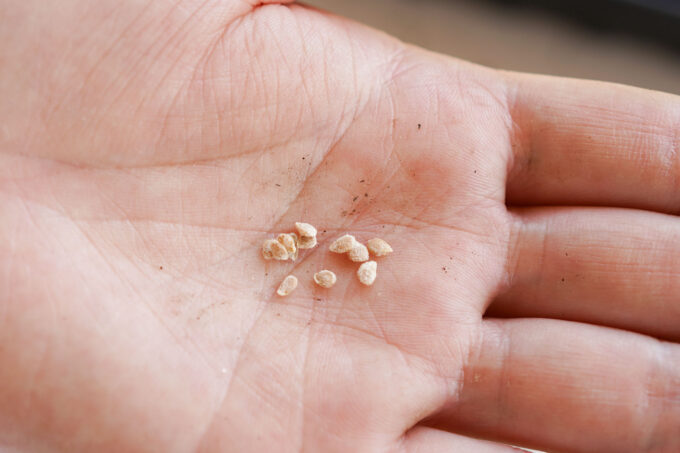
For instance, tomato seeds need to be planted at ¼ of an inch. You can plant around 2-3 seeds per hole unless the seed is a combination seed (which has more than one seed inside). Gently cover the hole with the soil and gently water the seeds after labeling them.
Place them on a heating mat and under a light source (if you’re using a grow light keep it about 4 inches away from the light to prevent scalding). You want to check on your seeds every day for any new developments. To specifically learn how to grow and care for tomatoes from seeds, read our detailed post here.
Germination
Once planted in the soil, seeds will begin to germinate. Germination means that the seeds begin to grow roots and shoot sprouts above the soil. The time it takes from planting the seeds to seeing the first shoots is the time frame for germination.
These first shoots are cotyledon leaves, which are leaves that are inside the seeds and provide photosynthesis as the plant grows its true leaves later on. True leaves grow from and above the cotyledon leaves are the actual leaves. They typically look differently than cotyledons.
| Name of plant | Days for germination |
| Tomato | 7-10 days |
| Cucumber | 7-14 days |
| Peppers | 7-21 days |
| Arugula | 5-8 days |
Watering
Make sure to check on your seedlings every day and touch the soil to see if it’s moist. If it’s dry and lighter in color, then sprinkle some water on the top. You can also have the option to bottom water from the tray and allow the seedlings to soak up as much water as they need–this prevents overwatering. I like to add about ¼ inch of water at the bottom and wait 10 minutes for it to soak, if it’s completely dry after 10 minutes then I give it another ¼ inch of water.
Thinning
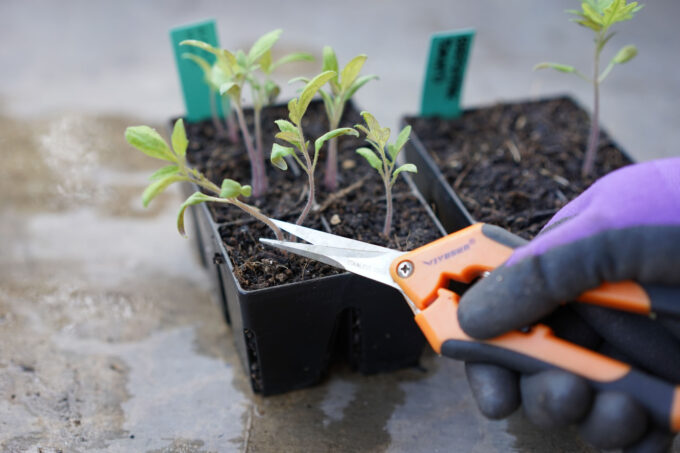
After you see a pair of true leaves grow above the cotyledons you can begin thinning your plants! Some people wait until there’s a handful of true leaves or judging by the height of the seedling.
This process is necessary to make sure all your plants grow big and strong. Since you planted about 2-3 seeds per cell or hole, there will be extra plants in each space. Pick the strongest seedling for every 3 inches of space or every single cell. The seedling shouldn’t be too tall or long where it bends over, but it should have a healthy set of true leaves.
You can choose to snip off the other seedlings or prick out the extra seedlings and replant them in new cells. I typically choose to snip them off because I don’t have too much room for too many plants.
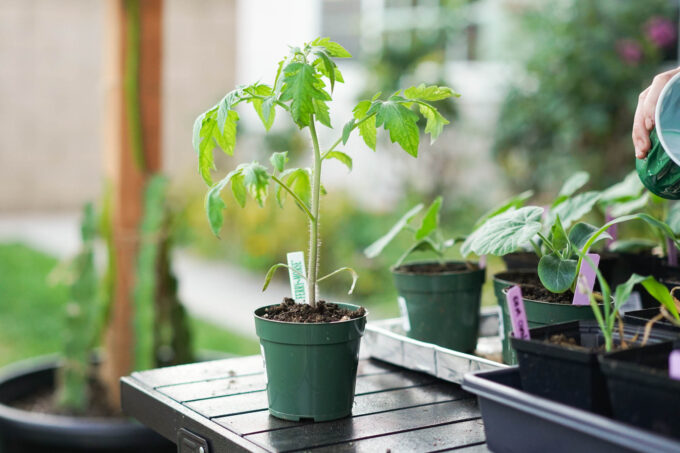
Repotting
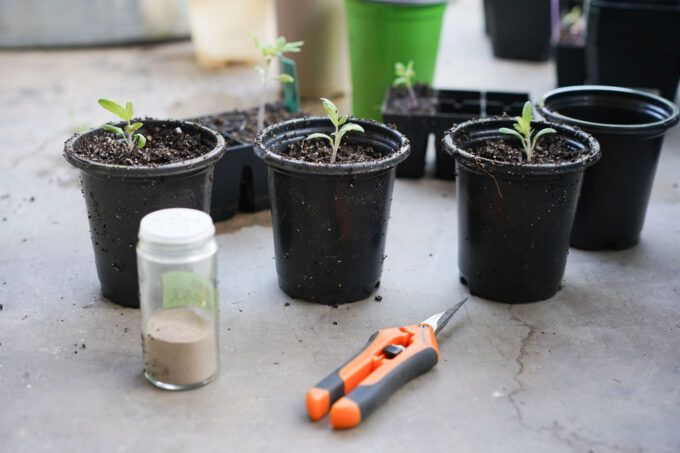
Sometimes indoor plants grow a little too big for their starter cells and need to be repotted before hardening and moving outside. I like to use 3-4 inch sized pots or containers to repot seedlings because this allows them to really develop their roots and become stronger plants.
To repot plants, add a handful of soil into the new pot and make a hole big enough to fit one plant. Sprinkle some mycorrhizae powder to make sure the roots grow strong and prevent root shock when repotting. Then plant the seedling and cover the sides with soil and gently press around so it stays intact. I water it carefully and watch it grow.
Hardening
After your frost date has safely passed, you can begin the process of hardening off the plants. Hardening plants means helping them acclimate to outside weather conditions. One way to help your plants adjust before hardening is to gently blow fans on the seedlings during the day. This helps promote healthy and strong stems and leaves.
Hardening usually takes about 1-2 weeks of transitioning depending on the plants and indoor/outdoor condition. I like to make sure the weather during this time is mild so the plants don’t get too much shock.
- 1st day: Move them under a shaded area for about 2-3 hours. Then you can move them indoors for the rest of the day.
- 2nd day: Repeat the same process from the previous day and include an additional 2-3 hours of direct sunlight. Then move them indoors for the rest of the day.
- 3-4th days: Repeat this process for another day and check the plants to see if they are adjusting. I like to lengthen the time they stay in the shade and the direct sun during these days if the plants look healthy (about another hour or two). If they look sun scorned (wilting too much, yellowing or edges are drying), I bring them back into the shade for longer periods.
- 5th day: Leave the plants outside all day in part shade/part sun and bring them inside at night.
- 6th day: Leave them outside overnight and check on them in the morning. Once they have survived an overnight stay and look healthy (no wilting or drying edges), I keep them outside.
I typically finish hardening plants within a week, but some people take up to two weeks depending on the plant and the regions they live in. Check on your plants throughout the week to make sure they’re thriving outside.
Transplanting
Once your seedlings are hardened and acclimated to the outdoors, you can remove them from their pots and see how their roots are developing. I like to keep them in these pots until I see a lot of roots throughout the bottom of the plant and soil. If you hardly see any roots, you can keep them in its 3-4 inch pot until they develop further.
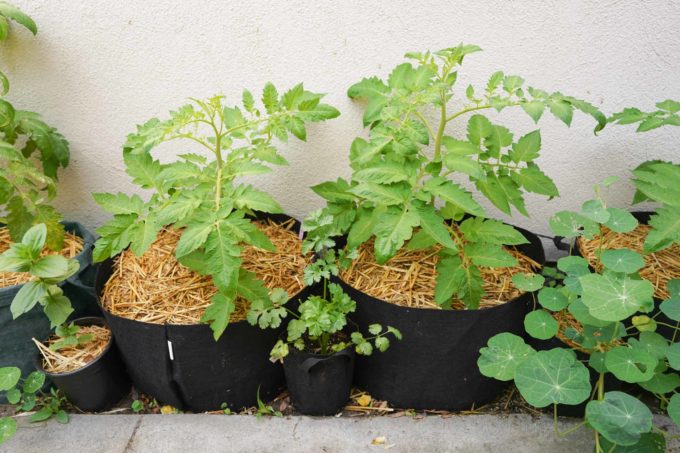
To transplant the seedlings into larger containers or grow bags, you can repeat the same process as repotting and mix in a little fertilizer (specific to the plant) with the soil. To dig a hole large enough, I like to use an empty pot of the same shape and size and press it down into the middle of the container–this will give you an exact shape hole you need to plant. Sprinkle some mycorrhizae powder in the hole and add your plant carefully.
If you’re using a large garden bed or planting in-ground prep your soil by adding amendments like compost and fertilizer. I still like to add the mycorrhizae powder in the plant hole to prevent any root shock. Once you plant your seedlings, water them thoroughly and add mulch on top. Mulch helps keep the soil moist, I like to use straw that I found at my local farm store.


