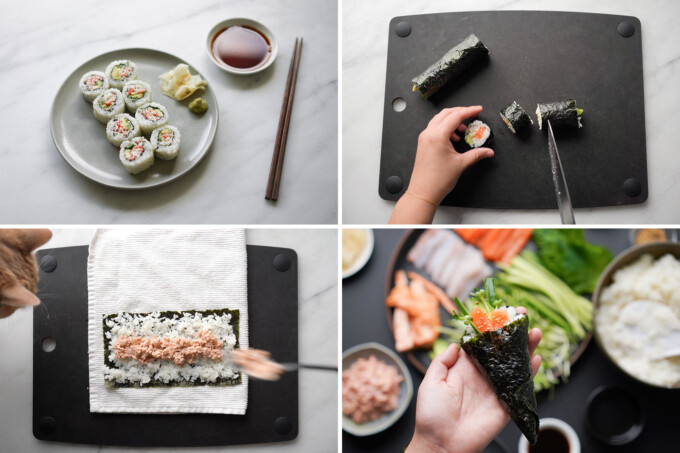
Have you ever wanted to host your own sushi party at home? Well, it’s easier than ever with my step-by-step guide on how to roll sushi. I’ll even give you some of my favorite tips and tricks to make sushi at home easily.
I’ll show you four ways, step by step, to roll sushi:
- maki sushi – traditional cut roll with rice inside
- uramaki – cut roll with rice on the outside
- how to roll sushi if you don‘t have a sushi mat
- rolling temaki handrolls
Tools you’ll need
You can easily wrap sushi rolls at home, but you need some tools to make the experience seamless. Here are my favorite things to use when making homemade sushi:
- Bamboo sushi rolling mat (or a hand towel)
- Plastic cling-wrap
- Bowl of warm water
- Sharp chef’s knife
- Cutting board
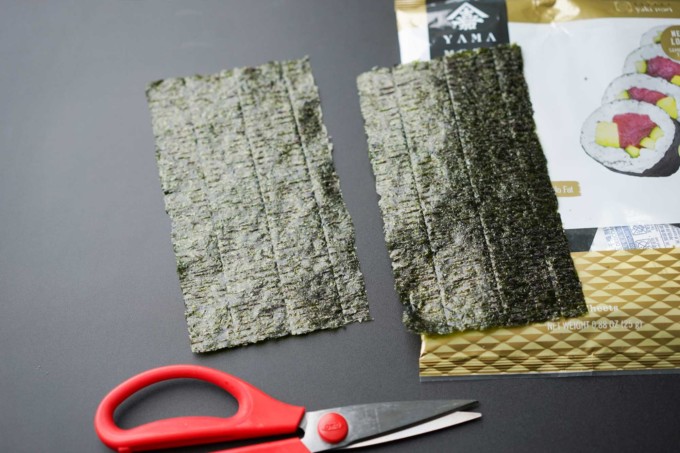
In addition to the tools, the ingredients you need to roll sushi at home are sushi rice, nori (roasted seaweed), and fillings (vegetables or fish). If you have the option, I recommend high-quality nori sheets because they’re more uniform and won’t tear while rolling. I prefer using Yamamoto Yama Gold roasted nori.
You can easily make sushi rice in a rice cooker at home, but make sure you are using short-grain sushi rice. This type of rice contains more starch and is stickier which helps keep the rolls together. Follow my simple sushi rice recipe here.
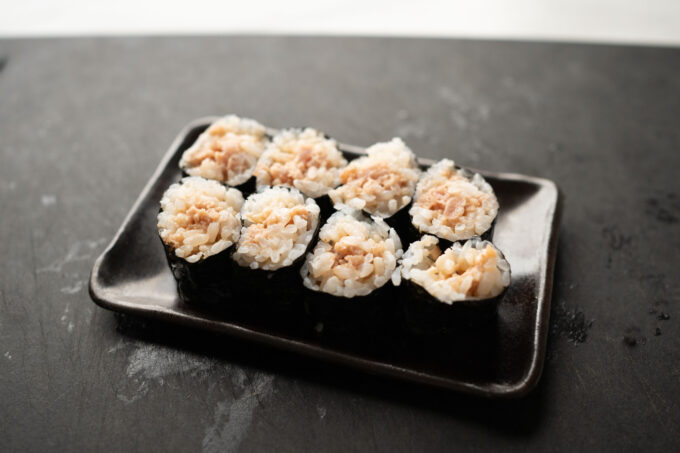
How to roll maki sushi with a sushi mat (step by step)
Use these instructions to make maki sushi, like spicy tuna rolls or any rolls wrapped with nori on the outside.
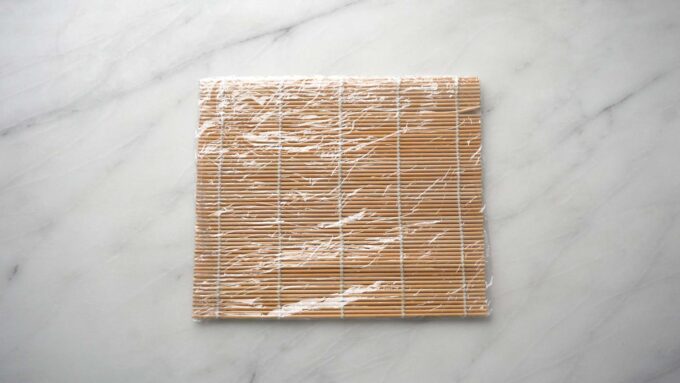
1. Cover your bamboo sushi mat with cling wrap and place it on the table with its bamboo rods running horizontally.
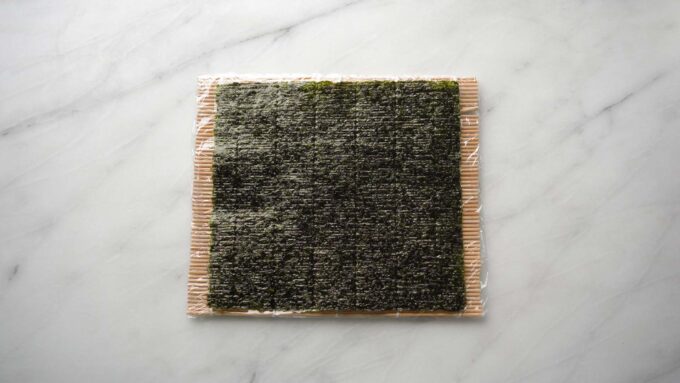
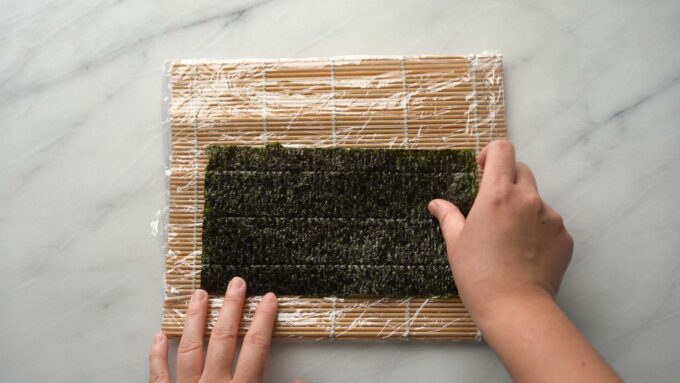
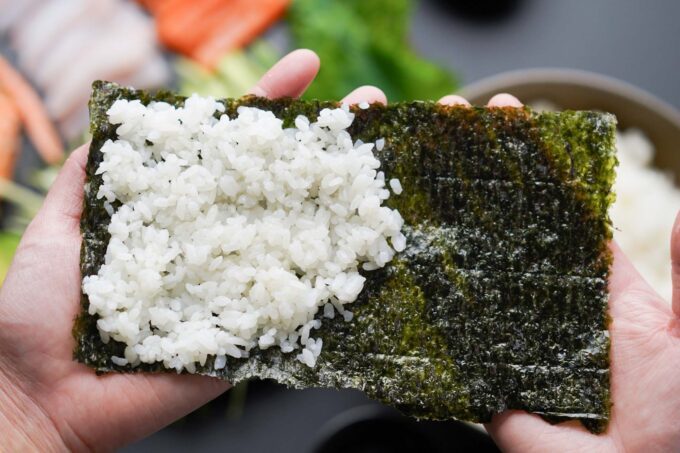
2. Place the nori on the mat with the shiny side facing down.
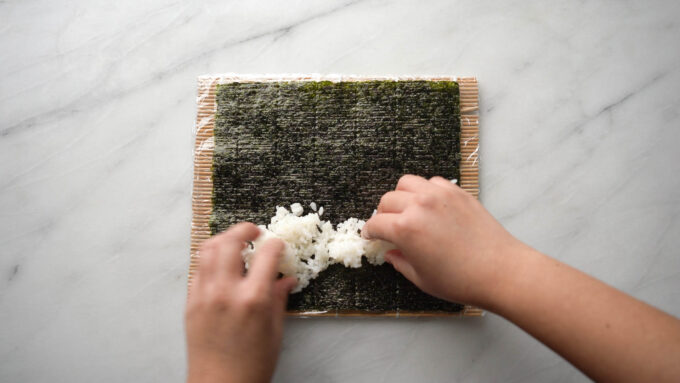
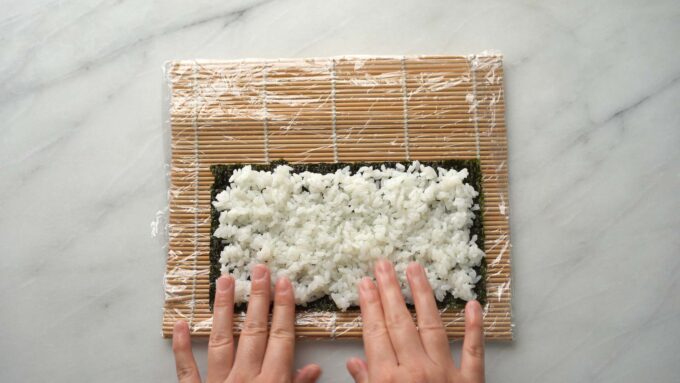
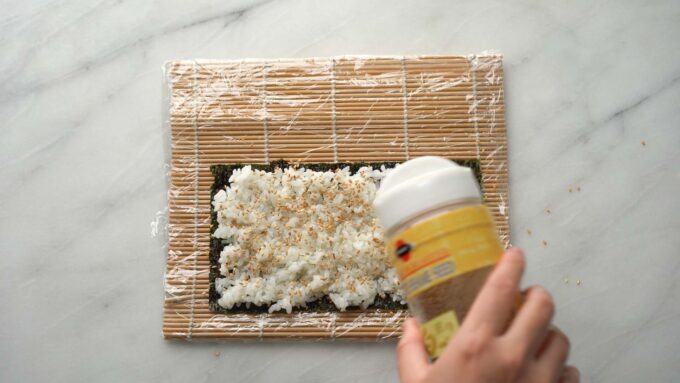
3. With clean hands, add ¼ cup of sushi rice to the nori sheet.
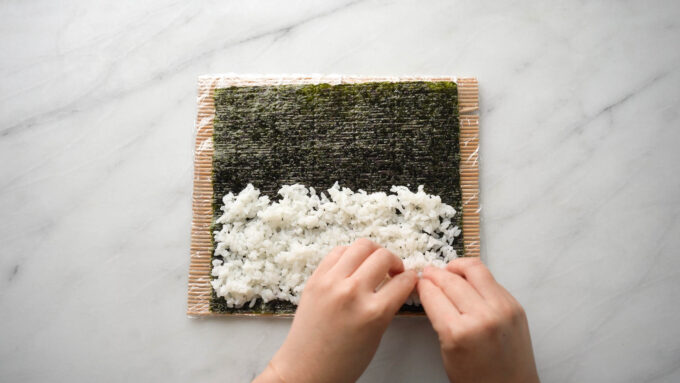
4. Starting from the bottom of the nori sheet, evenly spread the rice. Stop adding rice one inch from the top of the nori. Dip your hands in warm water to keep your hands from sticking.
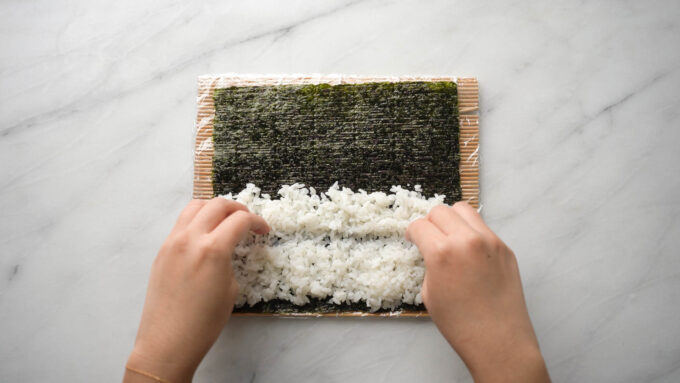
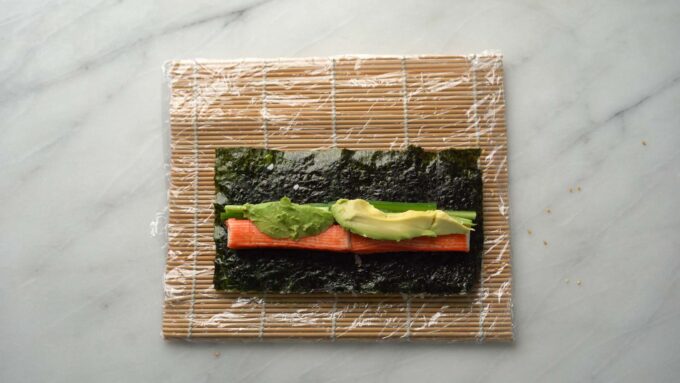
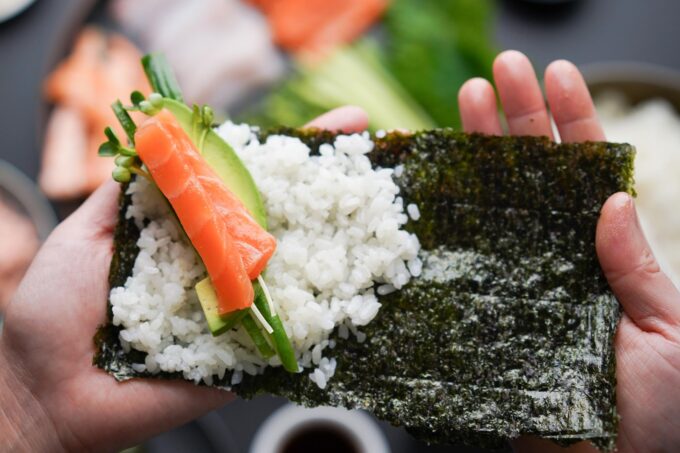
5. In the rice, make a shallow horizontal indent with your fingers two inches from the bottom.
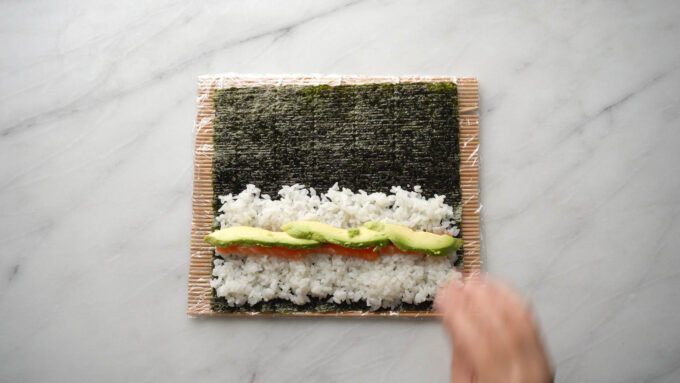
6. Add your fillings in a horizontal line. Try not to add too much filling, or it will be harder to roll.
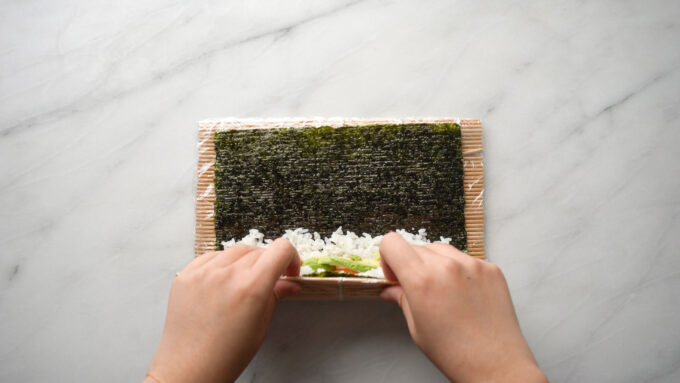
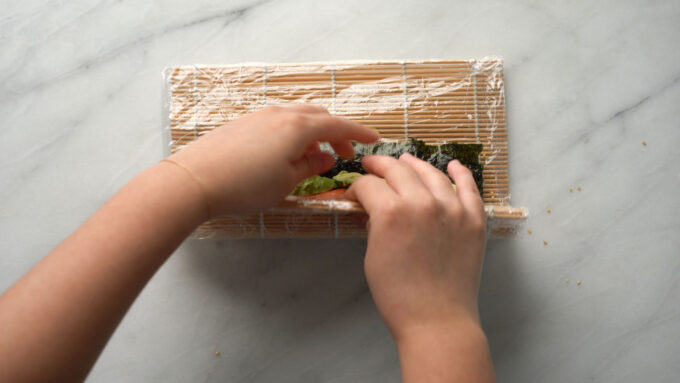
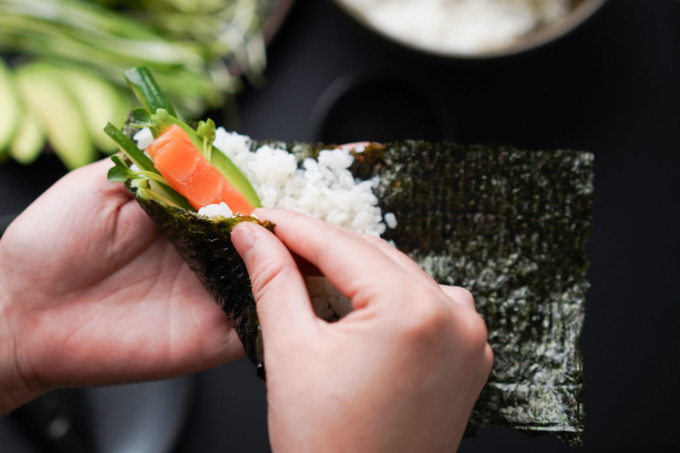
7. Lift the bottom edge of the sushi mat and nori. Then, carefully move the nori sheet over the filling.
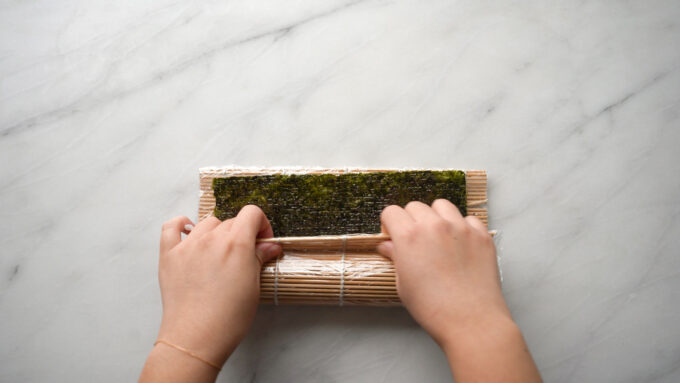
8. Once the nori is pulled up enough to cover all the filling, press the mat into form the log shape.
9. Continue to use the sushi mat as a guide and move in an upwards motion to roll the nori and fillings into a log. Be gentle, so you don’t tear the nori.
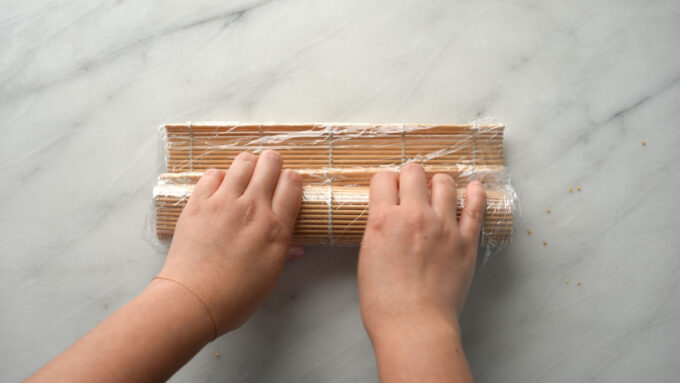
10. Pull the mat back, then rotate the roll so that it sits on its seam. Cover the roll with the rolling mat press to seal, firming up the log shape without pressing the ingredients out.
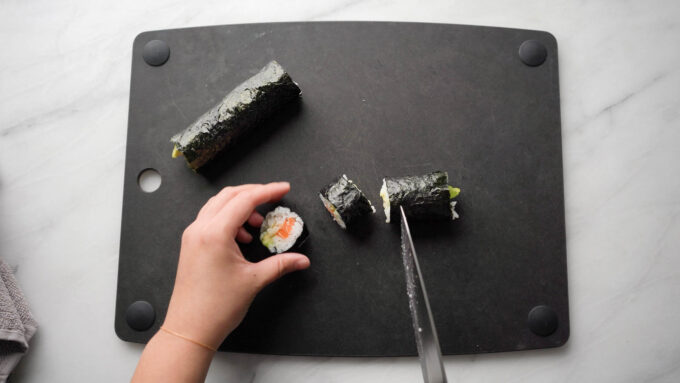
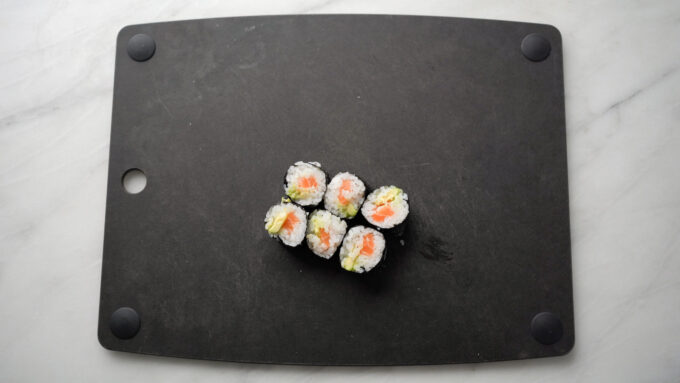
11. Using a sharp knife, cut the roll into six to eight pieces in one clean motion per cut. Try not to saw back and forth into the roll, or it will tear. Wipe down the knife in between slices to prevent tearing the nori.
How to roll sushi with rice on the outside a.k.a. uramaki (step by step)
Uramaki is a sushi roll with rice on the outside of the nori, like California rolls. It may be a little tricky wrapping and cutting this type of roll, so here is the best way to make it at home.
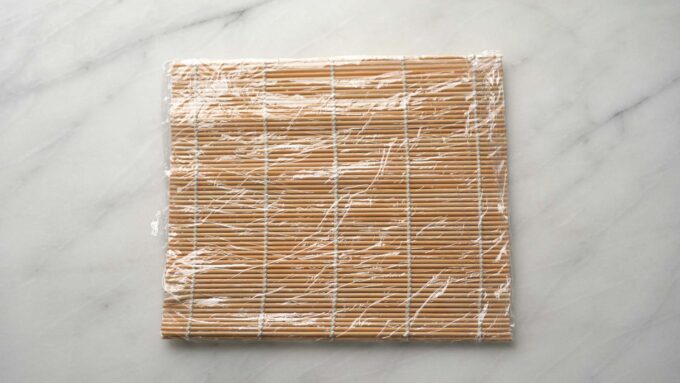
1. Wrap your sushi mat in cling wrap to keep it clean.
2. Place the nori before you, so the shorter sheet length is closest to you. Then, cut the nori in half by folding the bottom of the sheet upwards. Place this half sheet on your rolling mat.
3. Measure ¼ cup sushi rice. Then, using clean hands, evenly spread the rice throughout the nori sheet.
4. You can add any toppings like sesame seeds over the rice at this point. Keep a warm bowl of water next to you to clean your hands. Turn the nori and rice sheet over so the rice faces down.
5. Add the fillings in a horizontal line. Keep at least one inch on the top and bottom of the nori, so you have enough room to wrap.
6. Lift the bottom of the nori sheet using the sushi mat and cover the filling. Place one hand on the top of the sushi mat to hold it steady. With the other hand, hold the sushi mat and roll simultaneously, adding pressure by pulling it towards you. This will help tighten the roll.
7. Continue to wrap the roll in an upwards motion.
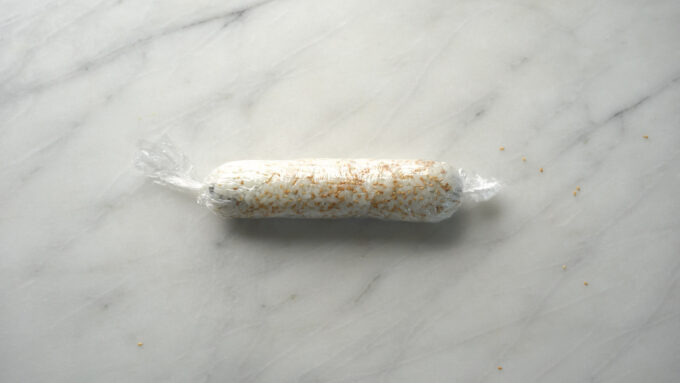
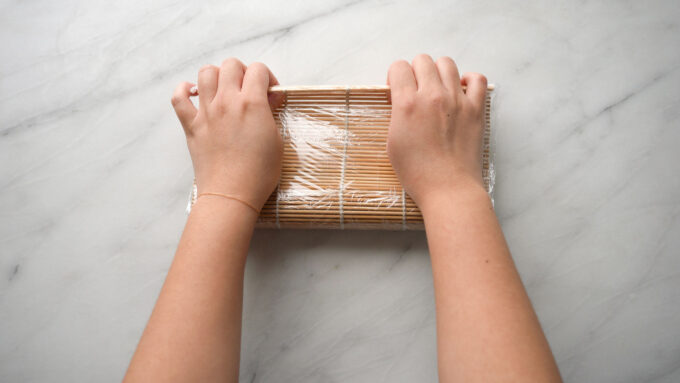
8. Take a sheet of cling wrap and cover the roll. Use both index fingers and thumbs to pinch the sides of the cling wrap while also rolling your sushi forward. This should look like a candy wrapper

9. Use a sharp knife to cut each slice in one stroke. Clean the blade in between each slice. Remove the cling wrap and serve.
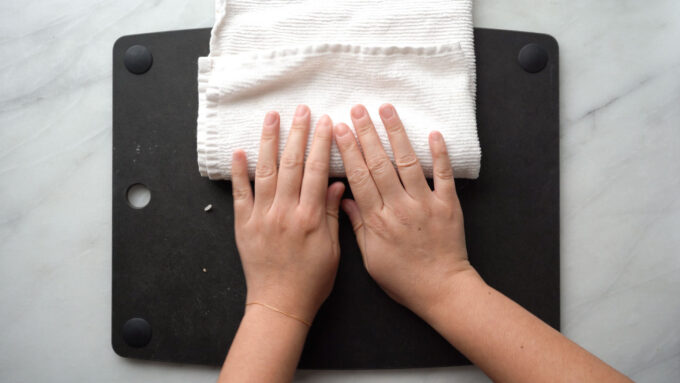
How to roll sushi without a mat (step by step)
If you don’t have a sushi mat, you can use a hand towel or Ziploc bag to roll your sushi. It’s a similar technique to using a regular sushi mat, and we also recommend wrapping your hand towel in cling wrap to prevent the ingredients from sticking too.

1. Place your hand towel wrapped in cling wrap (or Ziploc bag) on the table.
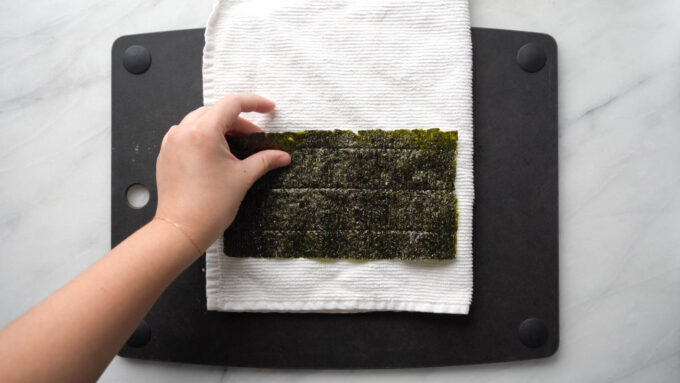
2. Place the nori, shiny side down.
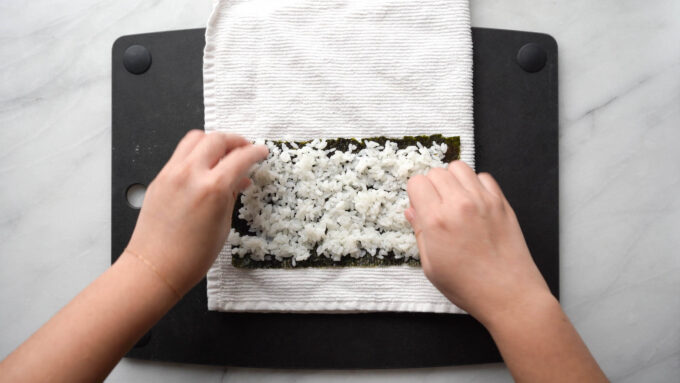
3. Using clean hands, spread ¼ cup of sushi rice throughout the nori, leaving one inch of space at the top of the sheet.
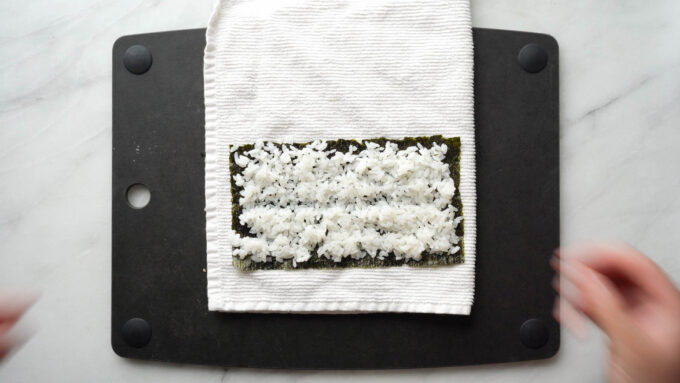
4. Make a shallow indent along the center horizontally. Use a bowl of warm water to wash your hands if they get too sticky to move the rice.
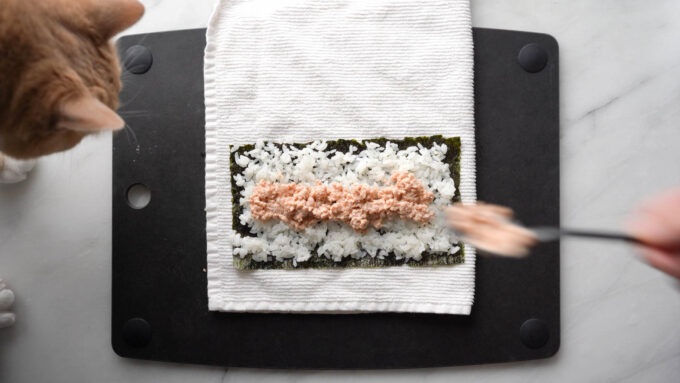
5. Add fillings in the indent.
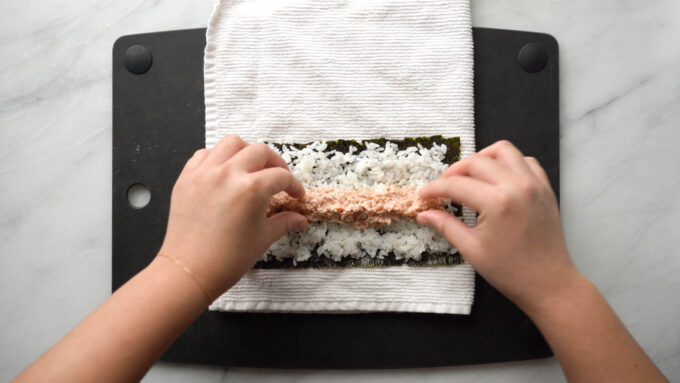
6. If needed, reshape the filling so its uniform in a line to make the rolling go smoothly.
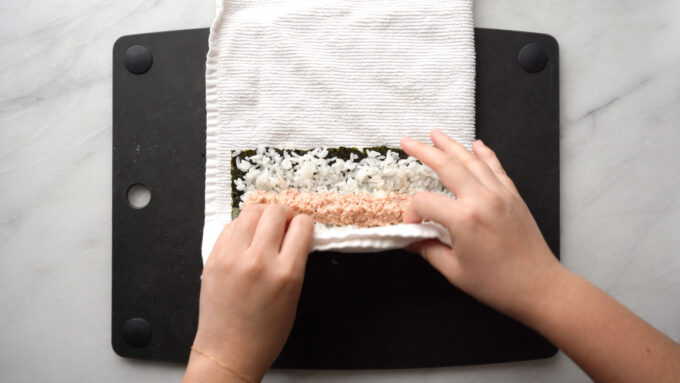
7. Using the towel, lift the bottom of the nori and cover the fillings.
8. Continue to move the towel upwards until the portion you started with at the bottom makes contact with the rice. Press down to seal the roll to create a tight and uniform sushi roll.
9. Continue rolling all the way up.
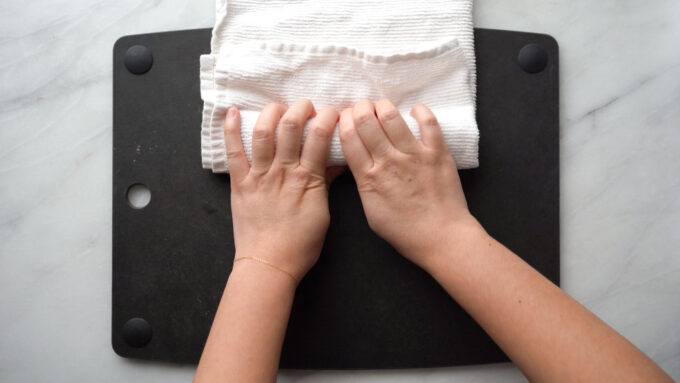
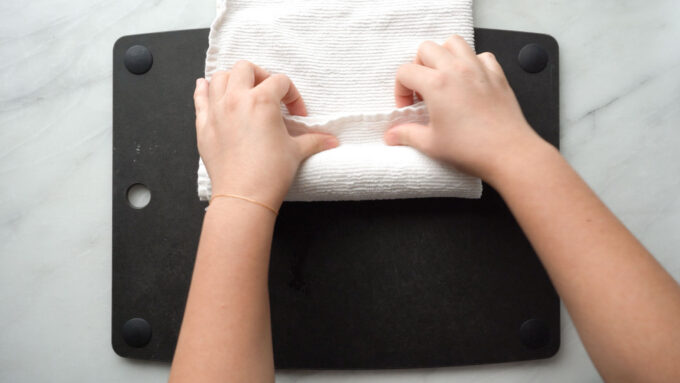
10. Rotate the roll about a quarter turn, and gently re-press the roll to firm up the log shape.
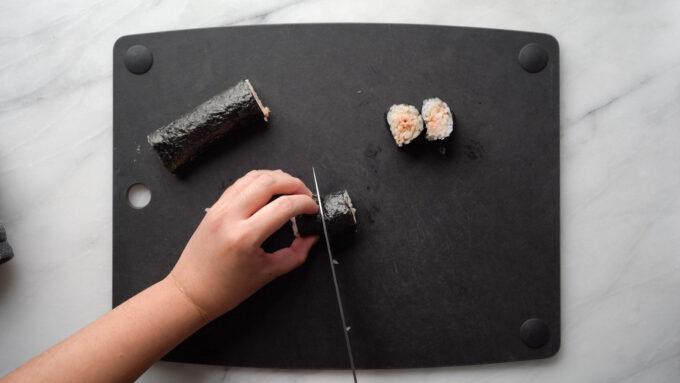
11. Cut the roll in half, then half again, then half again to cut equal length cut rolls into 8 pieces. Clean the blade in between each cut to prevent mangling your sushi roll.
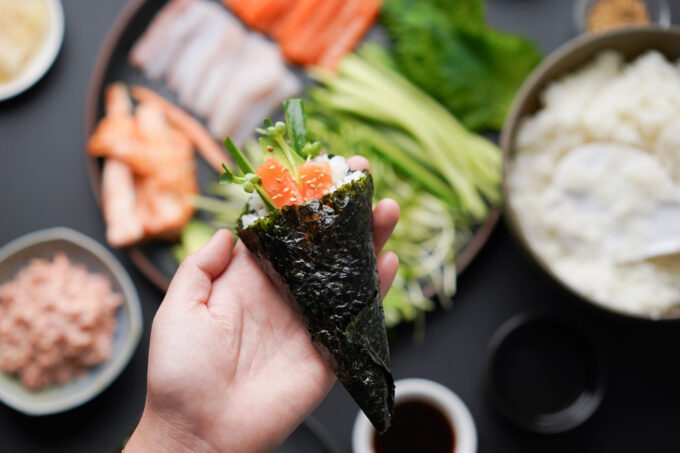
How to roll temaki hand rolls (step by step)
Temaki are hand rolls that aren’t cut and are quite possibly the easiest way to roll sushi for beginners. Here’s my guide to making temaki:
1. Cut the nori sheet in half in the middle of the (ever so slightly) shorter side.
2. Add about two to three tablespoons of rice to the sheet.
3. Add any vegetables and position them diagonally from the bottom center corner to the top left corner. Add fish on top of the vegetables.
4. Begin folding the temaki by lifting the bottom left corner of the nori and covering the fillings. Continue to roll the nori until it’s shaped like a cone.
Tips
- Pick quality ingredients, like nori and short-grain white rice
- If you don’t have a bamboo mat, use a clean, lint-free towel with cling wrap OR a Ziploc bag
- Use clean and damp fingers to spread the rice evenly, and if your hands get sticky, dunk them into a bowl of warm water.
- Make a shallow indent horizontally along the center of the rice to place your fillings. This will keep your fillings intact while rolling.
- Cut your fillings very thinly and use less filling than you want to add. It’s so easy to overdo the fillings, and rolling the sushi will be more difficult.
- Use a sharp knife and only cut one way, no sawing. Clean the knife in between each slice.
- For uramaki, wrap it in cling wrap after rolling to tighten the shape and make it easier to slice. This helps make the cuts cleaner and keeps the rice in shape.