I love to grill and wanted to share with you the best way to light a charcoal grill. For many, many years prior to this I’d just spray a ton of lighter fluid on the coals and try to light it. It wouldn’t stay lit for more than a few seconds, and even if you managed to not spray any outside of the BBQ, the fumes still reeked of it.
My favorite new way to light a charcoal grill does not require lighter fluid. There’s a few rules we stick with too. Here’s everything you’ll need to easily light a charcoal grill:
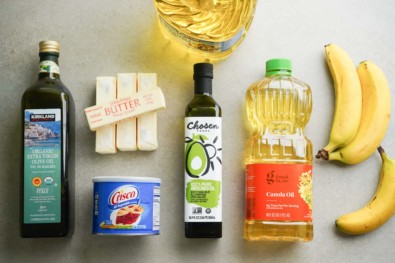
- chimney starter
- Fire starter material: old newspapers, cardboard or fire starter blocks
- 1 tsp cooking oil
- bbq lighter
- Manual or battery operated fan
- long stainless steel tipped BBQ tongs (optional)
Why shouldn’t you use lighter fluid?
The best way to cook using coals, in my opinion, is to avoid lighter fluid. Lighter fluid is great if you’re trying to create a roaring fire that lasts only a few seconds, but the main reason I avoid it is because it affects the flavor of the food.
Then there’s the noxious smell. When I smell BBQs going on in the neighborhood it’s always immediately apparent if the person is burning fluid.
And finally lighter fluid is just another thing you have to keep buying, that you don’t need to achieve perfectly lit coals.
Why you should use a chimney starter to light charcoal
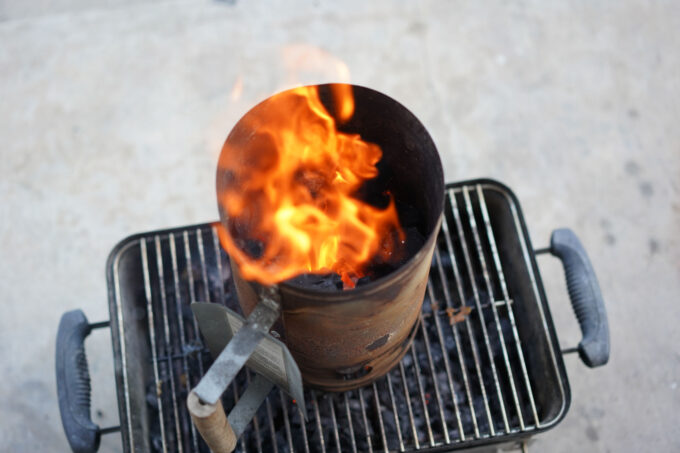
Chimney starters, or charcoal chimneys are a great tool to help you easily light charcoal. They look like large steel mugs with a huge handle. There’s an open grate on the bottom, a fully open top, and strategically placed holes throughout to encourage airflow in the proper direction.
Heat from coals rise upward, and this contraption helps to concentrate all that heat in the metal cylinder which helps heat coals inside the chamber, instead of just escaping into the air.
You can score a chimney starter for around $15-25 dollars but they are durable and reusable.
Choosing the right type of charcoal
Since we’re going out of our way to avoid lighter fluid already, I also purposely avoid buying any briquettes that have lighter fluid in them. These are typically marked with something like “easy light.”
And I also like to avoid any charcoal briquettes to ensure there are no fillers in the coal. To form briquettes, fillers and binders are used to make these shapes, and I don’t want any of that burning near me, or seeping into the food I eat. They have the benefit of uniformity which helps all of them heat evenly at the same time, but it’s not worth the tradeoff to me.
I like to use natural lump charcoal. Lately I’ve been using Kamado Joe coals since they stock it at my home store. Natural lump charcoal tends to create less ash than briquettes. Less expensive ones like the ones at your local megamart can often be a mix of various wood species, and vary greatly with large and small chunks. If you go this route, you may need a small hatchet to break the larger pieces down both so it fits in the chimney starter and so all the coals can heat more evenly. But it’s worth it.
- Clean out your grill
Pour out any old charcoal from your previous grilling session, and all the charcoal dust down there. This stuff can kick up during cooking and stick to your food. You don’t need to clean the grill grate yet.
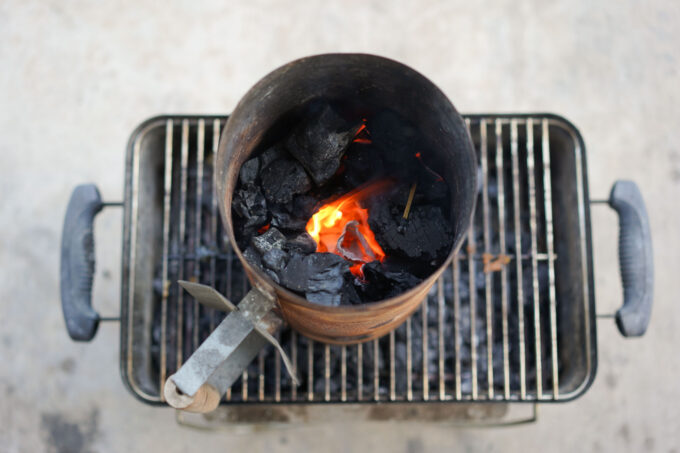
- Setup the grill and chimney starter

Place the grate back on the grill and place the chimney starter on top. Place an empty roll of toilet paper or paper towel in the center, then add charcoal to the chimney. For a typical grilling session I like to fill the chimney about 80% of the way. Having a little bit of extra room helps with rearranging the coals later.
- Place starters under the chimney
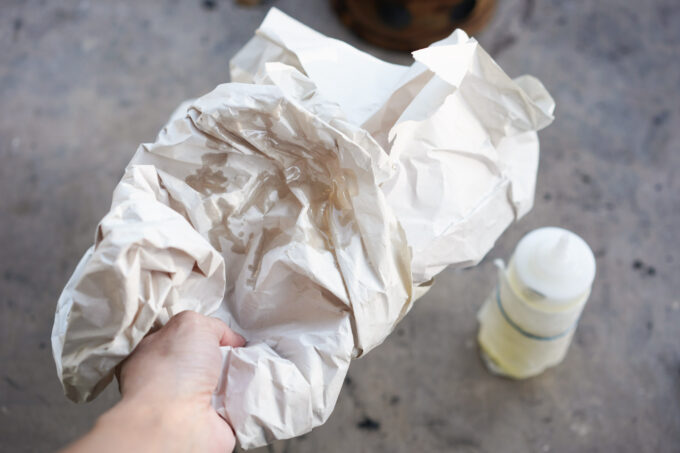
Dryer lint is a popular tool, but this is good only to help with the initial lighting–the burn time is extremely short. I like to use 1-2 sheets of balled up newspaper with about 1 tsp of cooking oil in it. The paper lights easily, and the oil helps it burn a little longer. You can also buy those little compressed fire starter blocks sold at BBQ or camping stores–the ones from Weber look like wax ice cubes, and there are other ones that look like compressed wood chips. These can be a great way to easily light your coals.

- Light the chimney starter
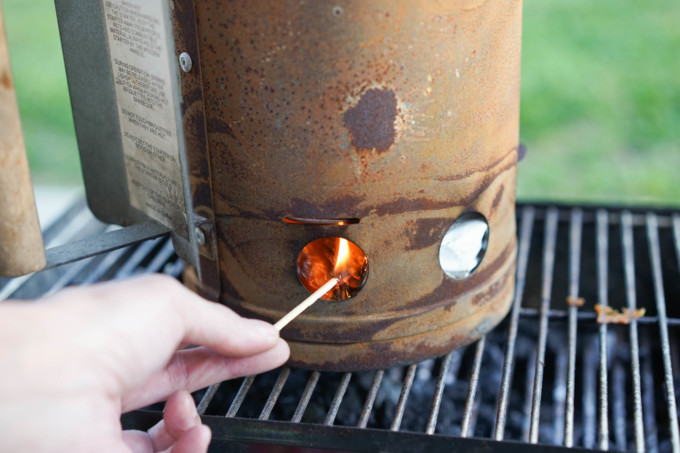
A BBQ lighter helps with the reach, and helps you relight later if needed, without getting your hand too close to the heat source. You can also use matches with tongs for extra reach.
- Fan the flames and make sure the coals get hot enough
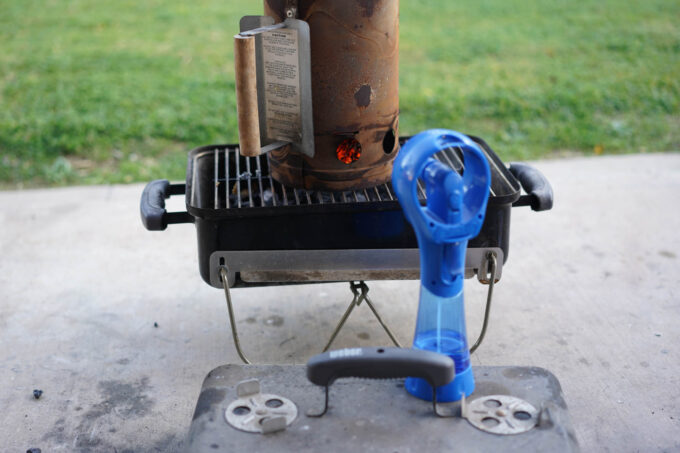
The coals need to burn hot enough and long enough so that they stay lit. You can increase the burn and fire size by fanning the underside of the chimney starter. I like to do this with my handy dandy electric fan, but a decent manual fan works wonders too.
- Add more starter and relight if necessary
If the starters you used burn out in under a few minutes and your coals are not staying lit, you need to keep feeding more material under the chimney starter. I like feeding in leftover / recycled paper, tp or paper towel rolls, paper bags or cardboard as a last resort.
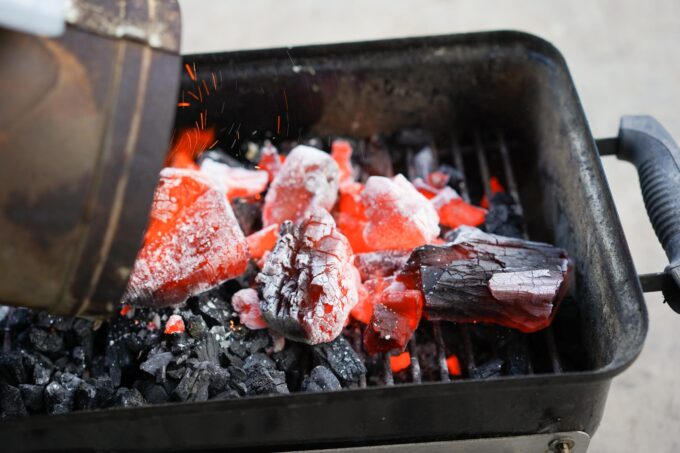
- Pour out the coals when they’re hot enough
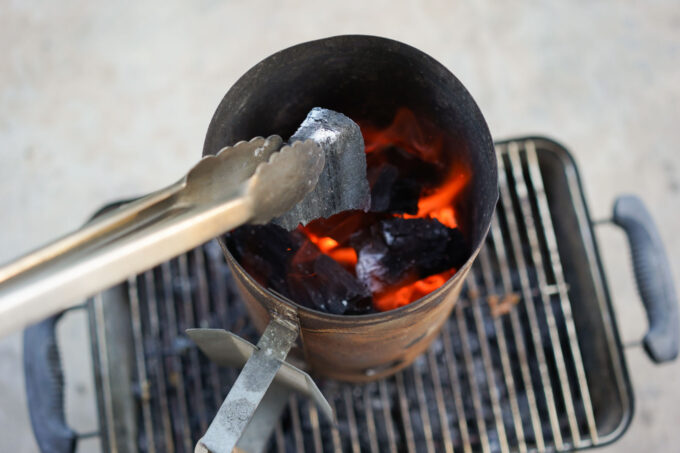
Sometimes there are blazing flames, but it may not mean the coals are ready. It’s a good sign that the coals caught fire and will maintain the flame. But the coals are ready when there’s at least a little bit of white on most of your coals. Sometimes the top ones lag behind on getting lit and I like to use a pair of long stainless steel BBQ tongs to rearrange the coals in there so the blacker coals are moved down a bit, or in hotter spots.
Now pour out your coals into the bottom of your BBQ. Your coals will continue to burn a little, and once they’ve all turned white you can spread them out over your grill and start cooking.
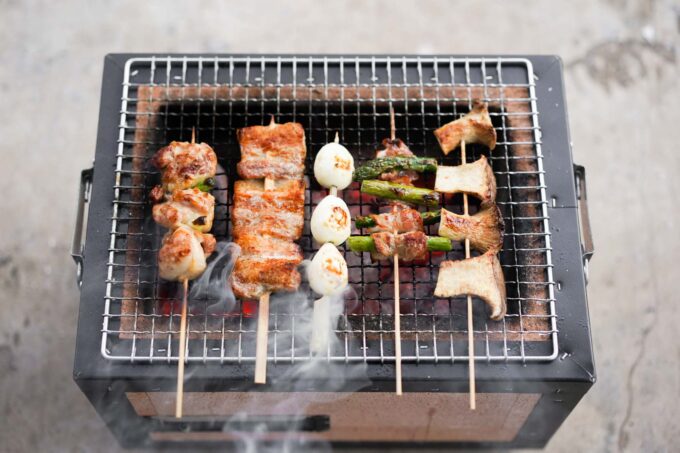
- Clean the grates and cook!

I like to put the cooking grate on now so it starts to heat up for a few minutes. Once it heats up, it makes it easier to scrape down to clean the grates with a grill cleaning tool. I typically find I have to do a final pass with a wet or oiled paper towel to pick up the rest of the bits on the grates.
Some of my favorite recipes to do on a charcoal grill
How do you light charcoal and keep it burning?
A common issue with lighting charcoal is that the fire goes out too soon. There are a few things you can do to help alleviate this. First is to keep the coals closer together so more of the heat transfers to other coals instead of escaping into the air. Using a chimney starter like in our method above also achieves this.
Second, you need to keep feeding the fire. If the paper or oil you use in step 3 above isn’t enough, keep feeding the fire with more starter material.
Third, to make the fire grow larger and hotter, you can fan the fire as its burning. A hotter fire can help coals reach the point where they stay lit.