Learn how to quickly and easily wrap or roll spring rolls with tips from my mom who has decades of experience wrapping these!
Whether you call it wrapping, or rolling, there are sooo many ways to roll a successful spring roll. The goal is always a uniform looking roll with uniform density or tightness of ingredients all the way through, without any tearing of the wrapper or rice paper.
If you want to learn a little background you can read about spring rolls vs egg rolls, or even learn how to make your own homemade spring roll wrappers you can, otherwise read on to learn how to wrap!
Different ways to wrap spring rolls
Rolling technique can vary a bit depending on factors like:
- the size of the wrapper or rice paper
- the desired amount of filling in the wrapper
- if you prefer open or closed ends on the wrapper
- if the wrapper will be fried, or cooked, or just eaten fresh
Here are examples of my recipes that call for wrapping some type of rolls:
- Vietnamese / Chinese Egg Rolls (Chả Giò)
- Vietnamese Fresh Spring Rolls (Gỏi Cuốn)
- Vietnamese Bò Bía
- Lumpiang Shanghai
- Filipino Turon
- California Rolls
- Spicy Tuna Rolls
How to wrap Vietnamese spring rolls (gỏi cuốn)

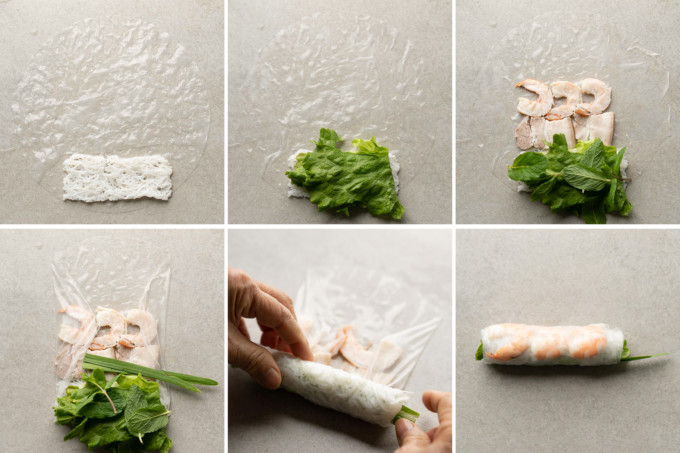
1. Cut reinforcements for the wrapper: take a sheet of rice paper and cut it into four even pieces (notice the 2nd layer of rice paper on the left photo. Doubling up rice paper where the meat goes will help prevent tearing at these bumpier spots on the roll.
2. Quickly dip one sheet of rice paper in lukewarm water, add a dipped piece of rice paper reinforcement, then add cooked rice noodles to the bottom of the wrapper. The width of the noodles will dictate the length of your roll. Notice the 1.5-2″ space left available on the left and right of the noodles.

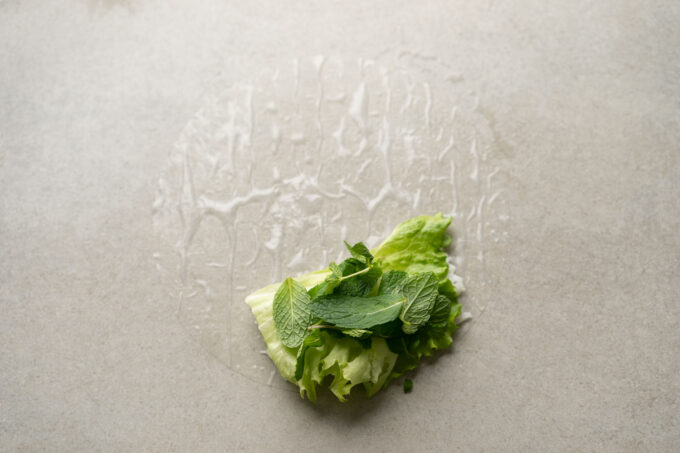
3. Add lettuce on top of the roll, cutting or breaking off parts as necessary so it matches or is shorter than the noodle width. After eating a few rolls you’ll learn a ratio of veggies to noodles that you like, you can always adjust later.
4. Add any herbs you like, again keeping it narrower than the lettuce or noodle width.

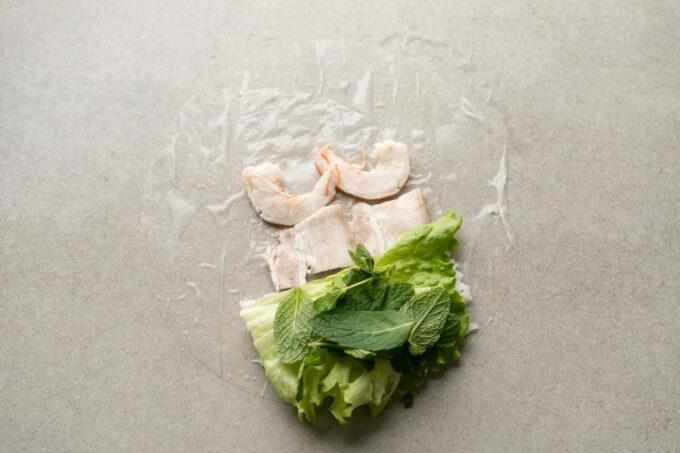
5. Add one row of pork right up against where the noodles end, keeping roughly the same width or narrower than the noodles. Add shrimp in the same way, touching, and the same width as the rest of the ingredients.
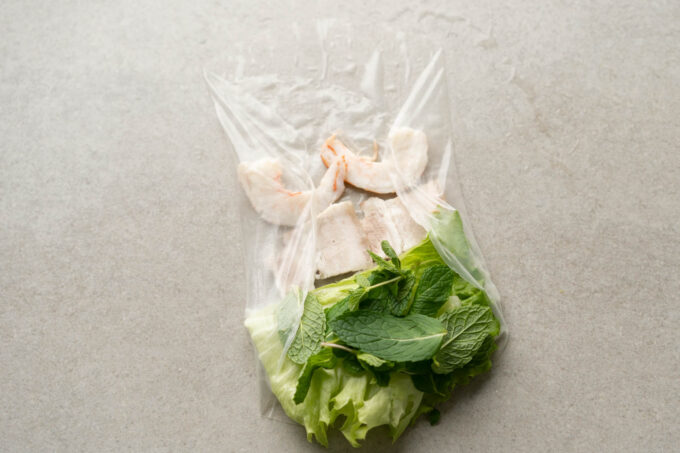
6. Fold the sides of the rice paper along the entire height of the wrapper. Add a few sprigs of chives too for flavor and decoration, making sure it sticks out a bit.
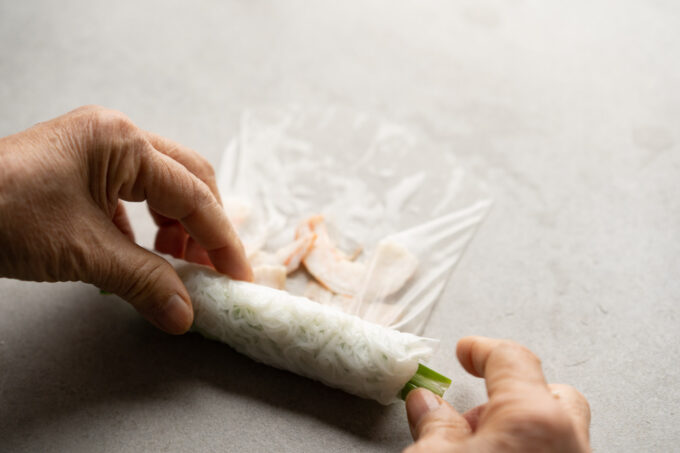
7. Begin to wrap. Make this part relatively tight, so the roll is tight all the way through. This is the most difficult part as you will have to continually push in veggies across the entire roll to maintain an even tightness throughout the roll. Trust me, it’s worth it!

8. Once you reach the part where the meat starts being rolled up, loosen the pressure a bit since the meat is more rigid. We have a reinforcement layer of rice paper, but if it’s too tight here the spring roll can break.
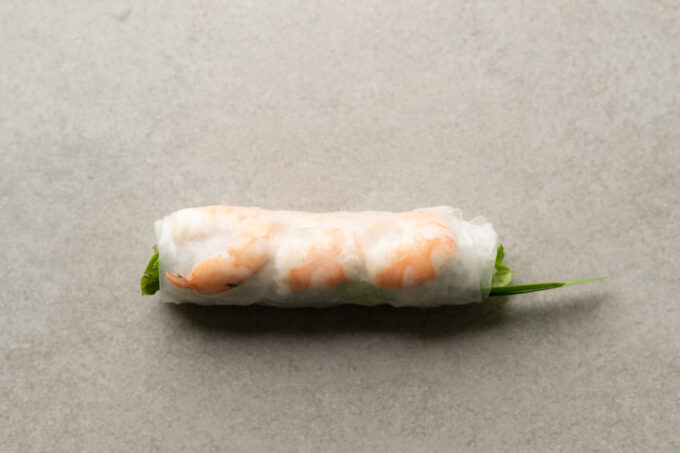
9. Continue rolling all the way up until you run out of wrapper, then you’re done!
Bonus tip #1: use a vertical water bowl to dip wrappers
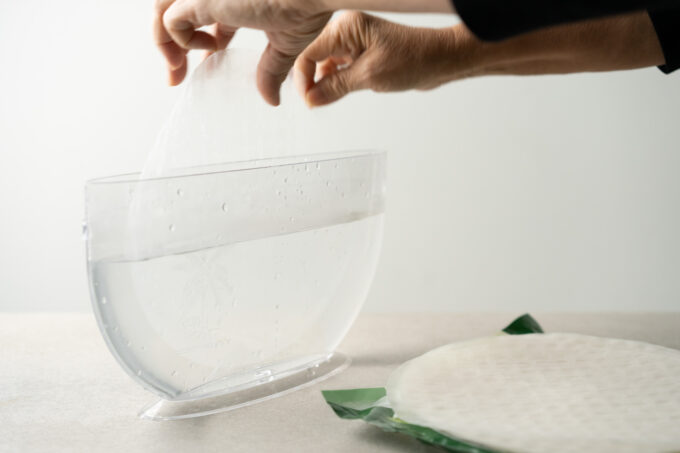
Prior to using a vertical rice paper water bowl, I would just use a pan or a plate with tall sides to dip the rice paper/ wrappers in. Don’t get me wrong using a simple plate is effective and easy too.
But when you have a table full of people wrapping their own rolls, with a ton of ingredient plates on the table too, space runs out quickly and this bowl is a HUGE space saver.
Many designs are available and they all pretty much do the same thing.
Bonus tip #2: wrap spring rolls faster with noodle sheets (bánh hỏi)
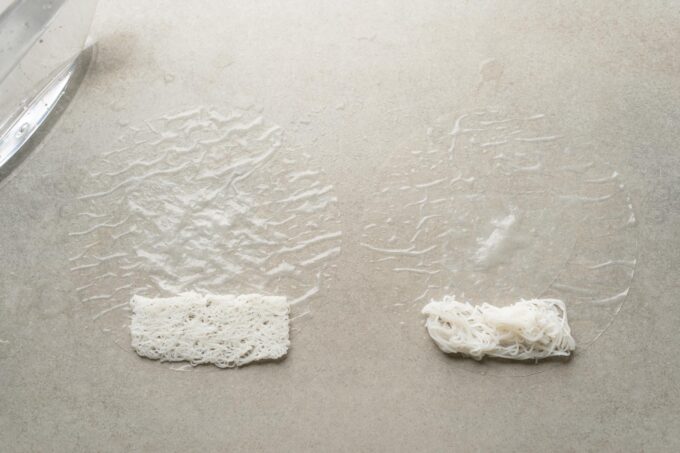
Pictured on the left is bánh hỏi, and I LOVE using these for Vietnamese spring rolls. They cook a lot faster, and they’re way easier to manage, cut, and arrange on your spring roll wrapper. They’ll make your rolls more uniform too!
Regular rice noodles work just fine but bánh hỏi will speed up your process a lot if you’re able to buy it. Learn more about these noodles on my recipe for Vietnamese spring rolls (Gỏi Cuốn).
Bonus tip #3: pre-assemble your veggies, herbs and noodles

Like working an assembly line, it can speed a bunch of stuff up if you prepare items in bulk, in stages rather than one at a time.
It works with spring rolls because instead of putting back scraps for veggies, noodles, or herbs you simply place it on the next stack ready to be rolled up. There’s less time picking up and putting down ingredients.
If you have another person to help with rolling, you can each stay more focused on your task.
How to Wrap Fresh Spring Rolls
Equipment Used
Instructions
- Cut reinforcements: cut a few sheets of rice paper into four equal wedges, enough for the number of rolls you want to wrap.
- Dip one sheet of rice paper in lukewarm water, dip the reinforcement and place where the meat will go.
- Then add your cooked rice noodles towards the bottom of the wrapper.
- Add lettuce and herbs on top of the rice noodles.
- Add meat right up against the rice noodles, up to two rows of meat such as pork, and shrimp if you'd like. Keep in mind the part facing down will be showing outside after you roll.
- Fold the left and right edges inward right up to where the ingredients end. This should match the final length of the roll we're wrapping.
- Begin to roll upwards, as you continually gather and compress the ingredients. You want the roll to be tight around the start with noodles and veggies, then as you reach the meat portion that is more rigid, don't compress or tighten the roll as much so it doesn't break.
- After the meat is rolled up, continue rolling all the way up until the rest of your wrapper is stuck to the roll. Done!



Love the shortcut tip using bánh hỏi!