I was very surprised to find out how easy it was to make homemade pasta dough, and also shocked about how fresh it tasted. There’s still times when you want the hardier, al dente texture of the boxed pastas. Fresh pasta isn’t objectively better than boxed, but it is amazing and a must try if you haven’t already.
My girlfriend and I learned how to make this at a pasta class from a local store. We’re no pros and it was still pretty easy on the first go! We’ve since made many batches of this pasta, tweaked recipes, and experimented with colored pastas, spinach pasta, extruded pastas, and even drying pasta.
You could easily use fettuccine from this for a garlic noodles recipe. Using the fresh spaghetti-like taglioni in my uni pasta takes it to another level too!
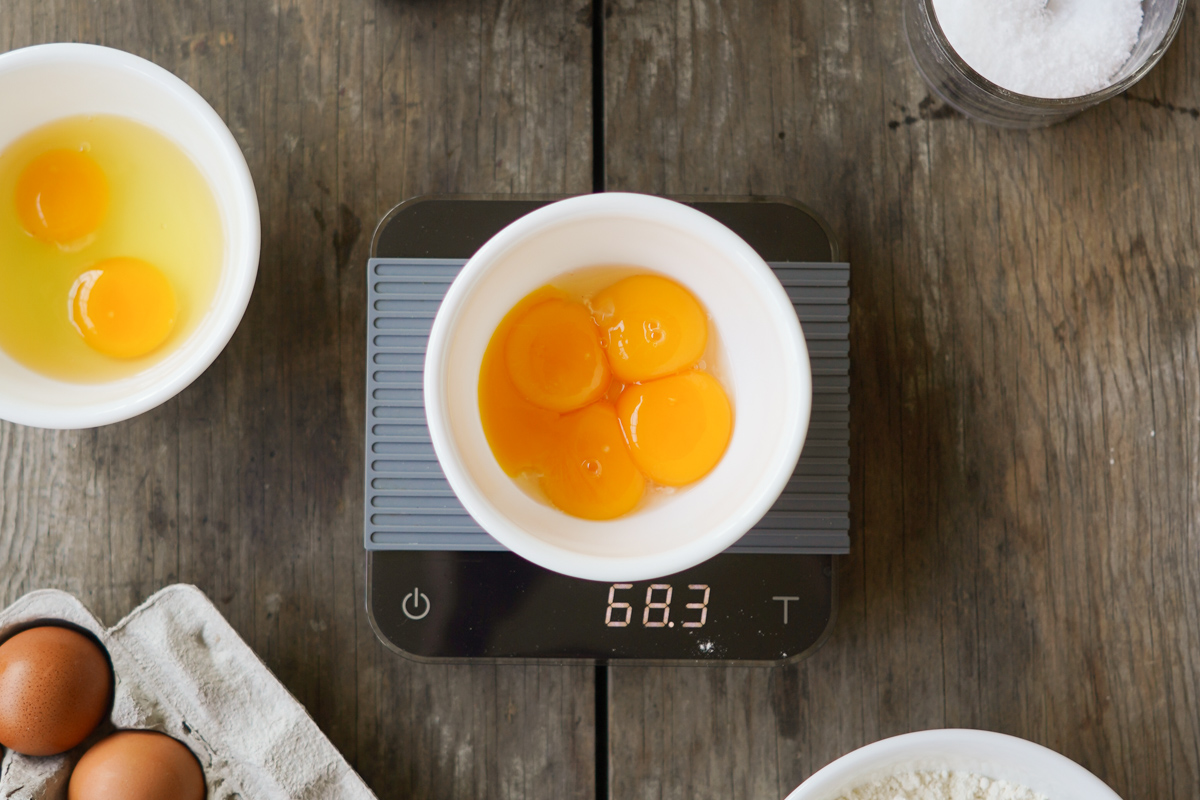
Weigh out ingredients
If you want consistency in your pasta the only way to achieve that is to use a scale to measure your ingredients. If using volumetric scoops for flour, it compacts, eggs vary in size, and you can’t accurately measure out egg whites vs egg yolks.
If you don’t use a scale, I’m sure you can get within ballpark and your homemade pasta dough will be fine, but if you want to tweak recipes or troubleshoot any issues with the pasta, it will be much more difficult. Just get a cheap scale. I use a precision Acaia – Pearl scale meant for coffee making like shown on my pour over coffee, espresso and Aeropress coffee posts.
This one is accurate to 0.1 grams but you absoultely can get by for normal cooking recipes with something accurate to 1 or 2 grams. This kitchen scale by Ozeri goes to 1 gram accuracy and would work well for this and its only around $11.
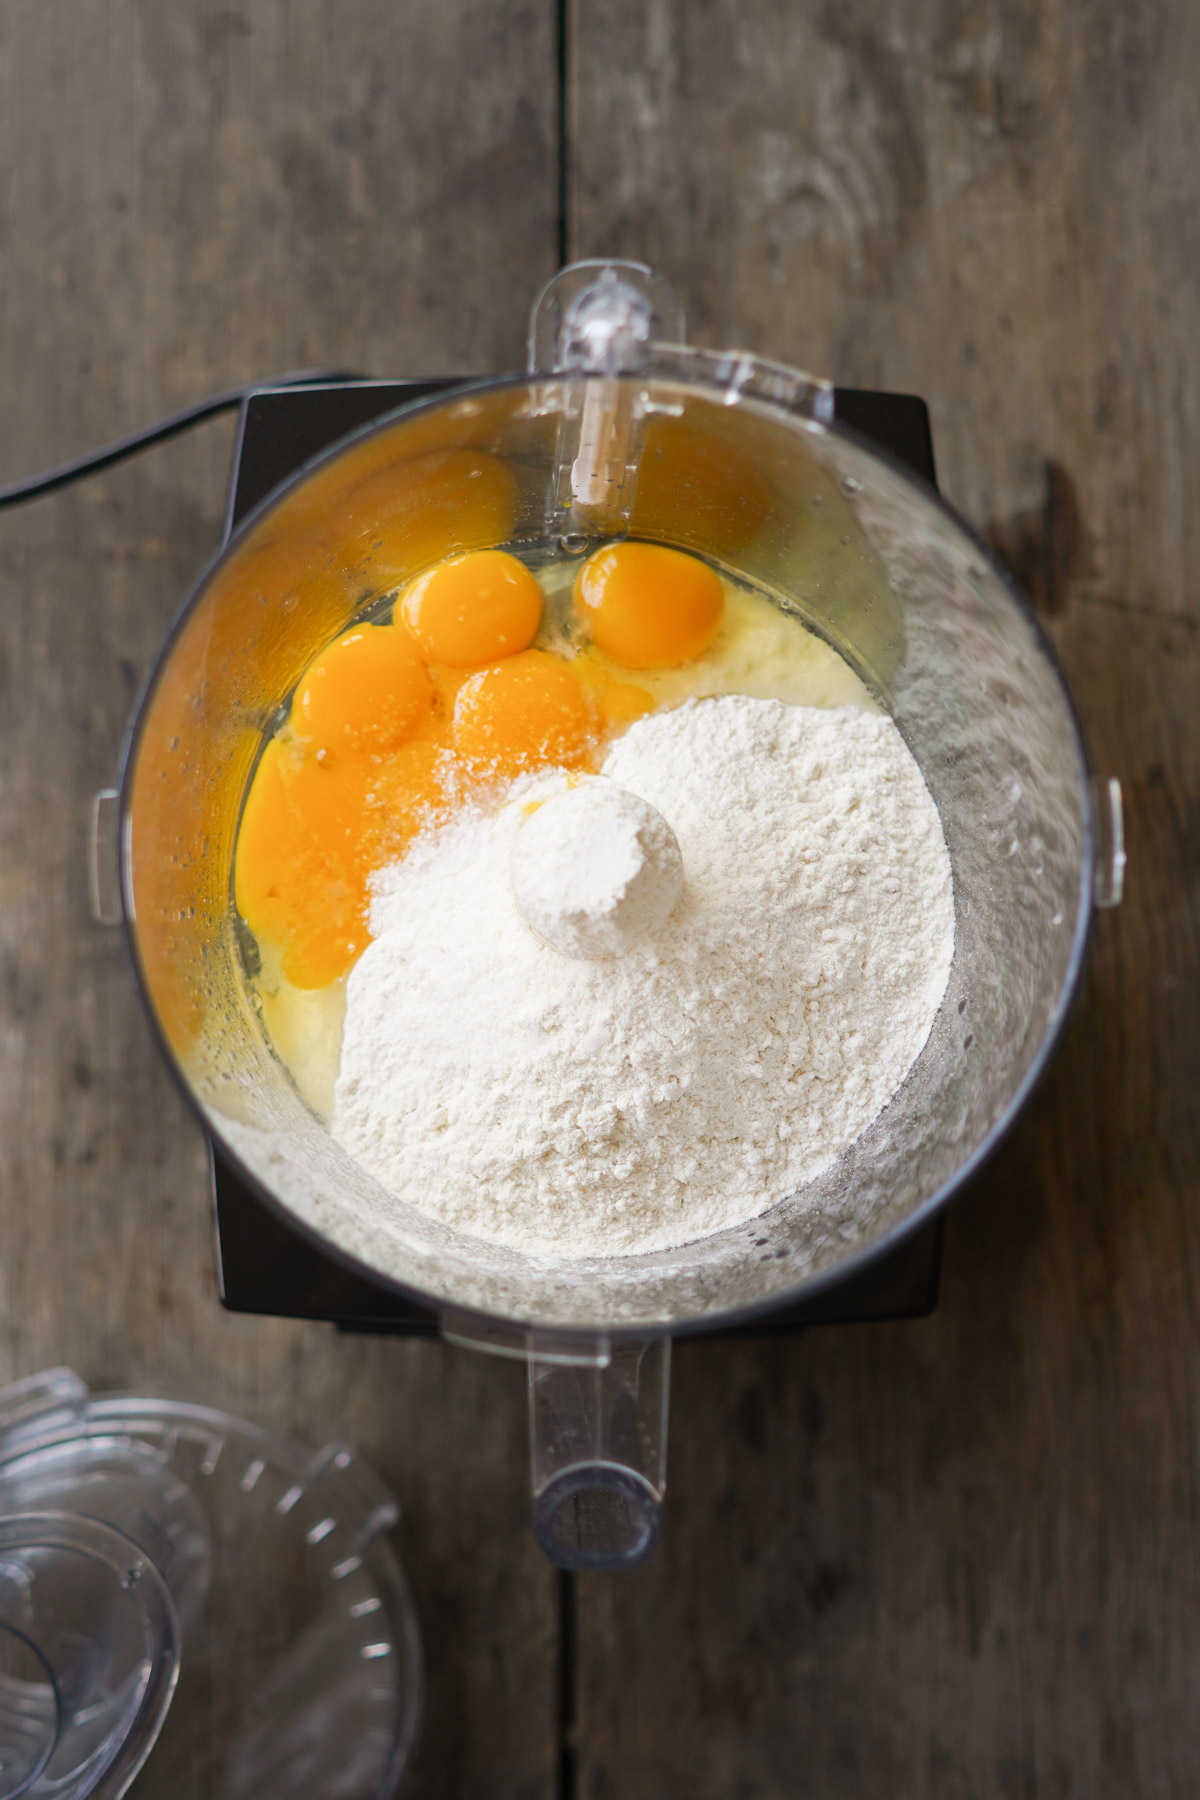
Combine ingredients
I like doing this in a food processor because it’s a lot faster, even if you have to wash an extra thing. If you don’t have or dont want to use a food processor, simply make a mountain on a cutting board with your flour and make a well inside. Pour the eggs and salt inside, then slowly work flour into the egg to keep the egg from spilling out until all the flour is incorporated.
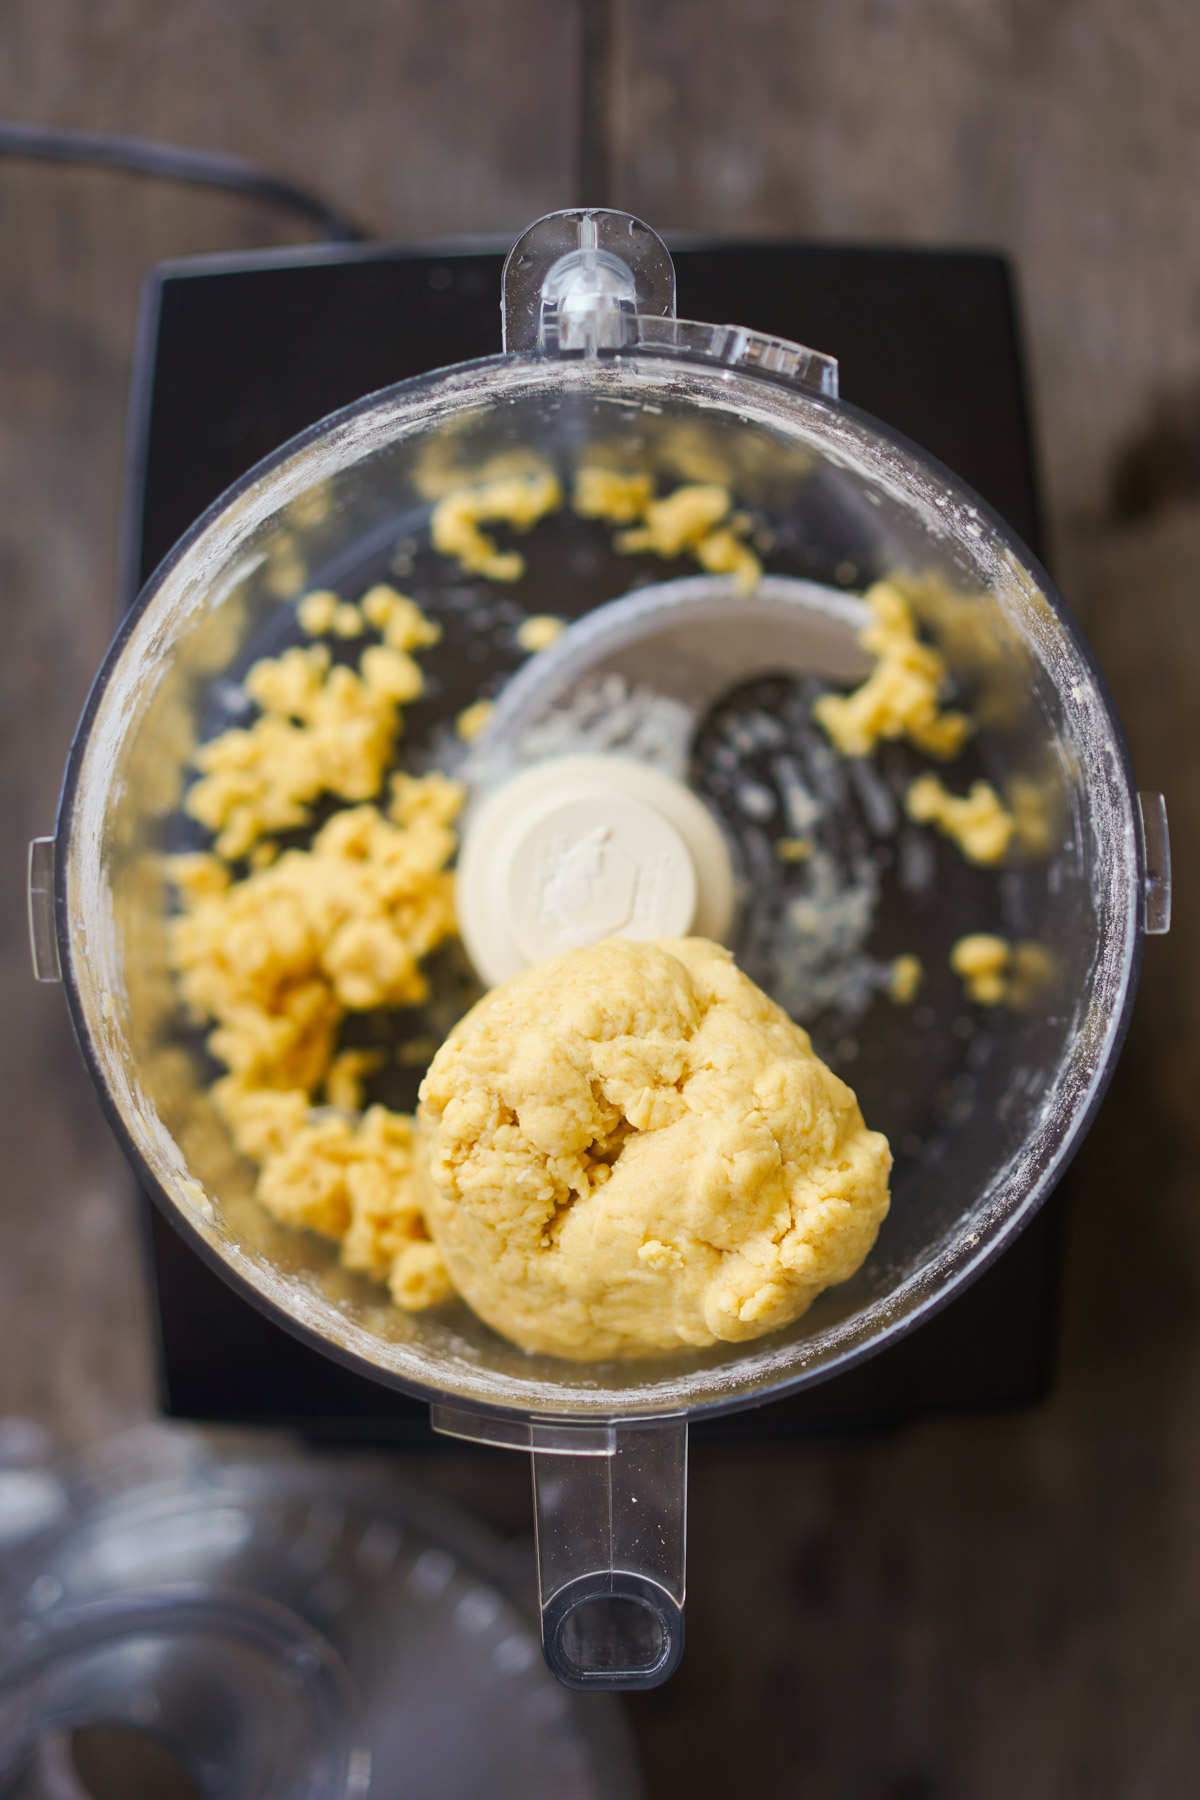
If using a processor, it will only take about 15-20 seconds to reach a stage like this ball shown below. It’s still a bit moist/tacky which is fine. Remove the blade, and pick up the rest of the dough with the big ball you have now.
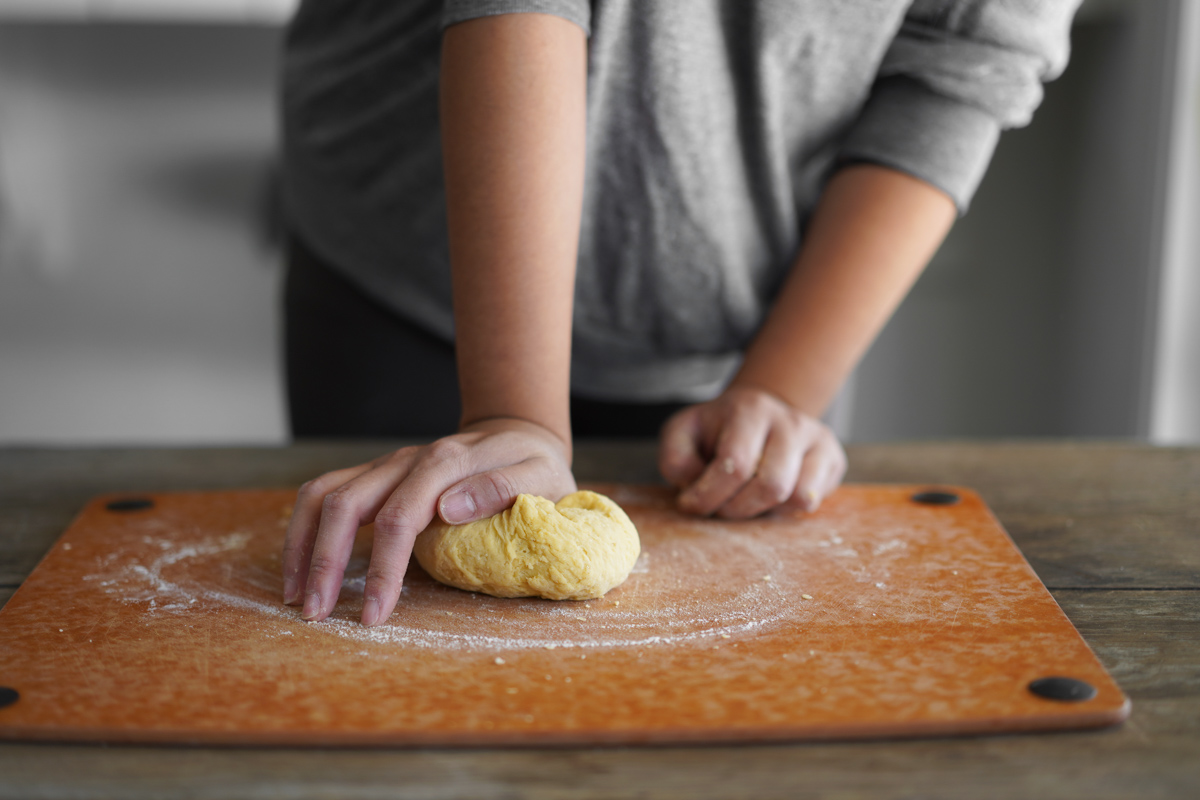
Kneading
Whether you use a processor or incorporated ingredients by hand, we need to knead for about the same amount of time. It doesn’t take more than about five minutes to develop gluten and strength here. You may need to regulate the moisture level by adding more flour or spritzing or adding drops of water.
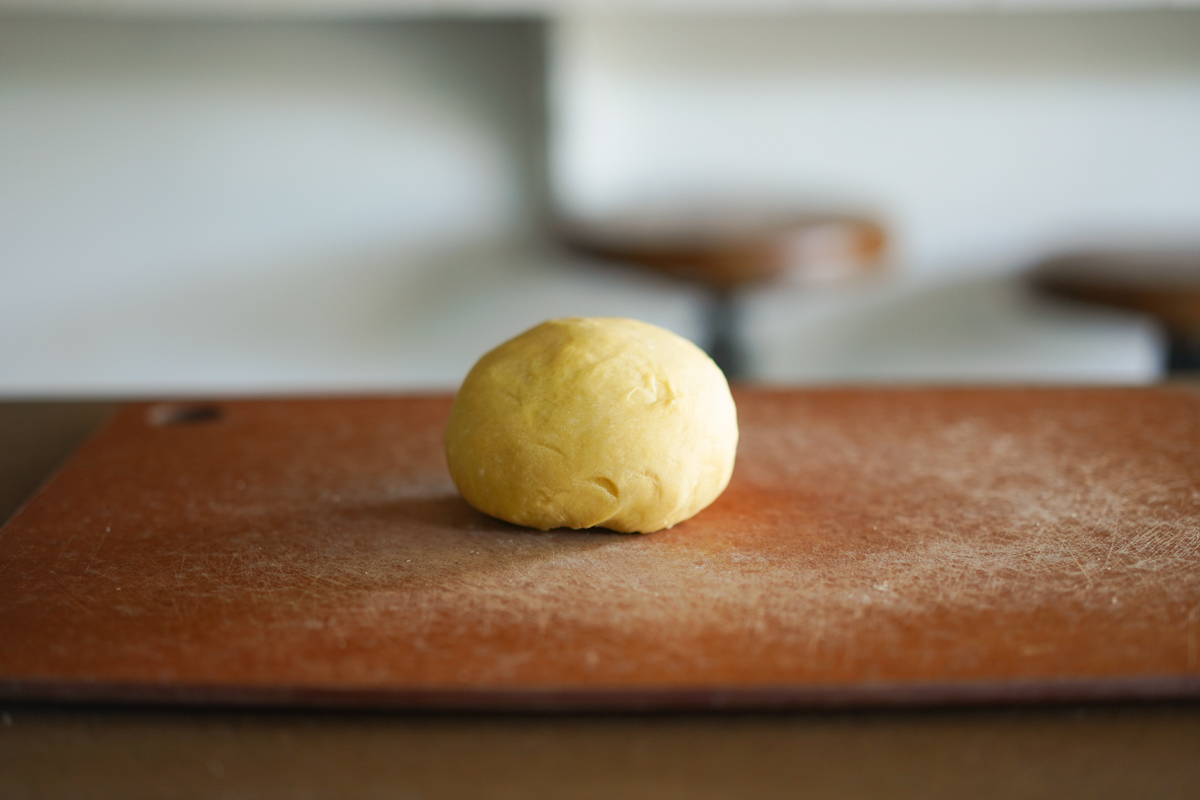
Resting the dough
The final consistency we want is something still slightly moist. It should be tacky but not sticky. The ball of dough should be slightly firm and hold its shape when you leave it alone, as shown below. Once you reach this stage, wrap it in cling wrap so it doesn’t dry out, and either rest it at room temperature for about 30 minutes, or you can put it in the fridge for at least 30-60 minutes.
Laminating the dough
After the dough has sufficiently rested, unwrap it and knead it a bit more. Use a bench scraper to split the dough ball into roughly thirds so its manageable in the pasta machine. We’re using a Marcato – 8320 pasta machine here to laminate and cut the dough.
We want to knead and roll out the dough get the dough with a rolling pin into a somewhat rectangular shape about 1/4″ thick, so when we can start running it through our pasta machine on its widest setting. On this machine, it’s 0.
Roll it out thin enough so you can do a a tri-fold. Fold as if it’s a letter being inserted into an envelope. Then run it through the machine with the seams on the side as shown below, so air can escape as you crank the machine (aka laminate the dough). If at any time the dough feels too sticky/tacky, sprinkle a little flour on it before folding, so you can run it through the machine without it getting stuck.
We’ll typically have to repeat this process, cranking it through the 0 setting about 6-8 times: kneading, rolling, and laminating again until the texture of the dough has smoothed out and isn’t super rippley any longer.
Once you’ve achieved a smooth dough, you change the knob on the machine from 0 to 1 and repeat the kneading, rolling, and laminating, and flouring as needed. At this point you only need to run it through each stage once to hit your final tagrget. For taglioni we leave it at a 5 thickness, and fettuccine you can go thinner around 6 or 7.
I’m known to cheat, going from 0 to 2, then, 4 then 5. Or if the goal is 7 I may be from 0 to 2, 4, 6, then 7. You’ll have much fewer issues if you just go up one at a time, but once you get the hang of how the dough feels you can kinda judge if skipping thicknesses will cause you any issues.

Cutting the pasta
Once you’ve laminated to the thickness you want, you’ll have a pretty long sheet of pasta. You should cut this into thirds or fourths, depending on how long you want each strand of pasta.
Remove the crank handle on this machine and flip it to the pasta cutting side. You may want to reflour the pasta sheet again before doing the cutting to make sure it doesn’t stick. The photos below are of fettuccine at a 6-7 thickness.
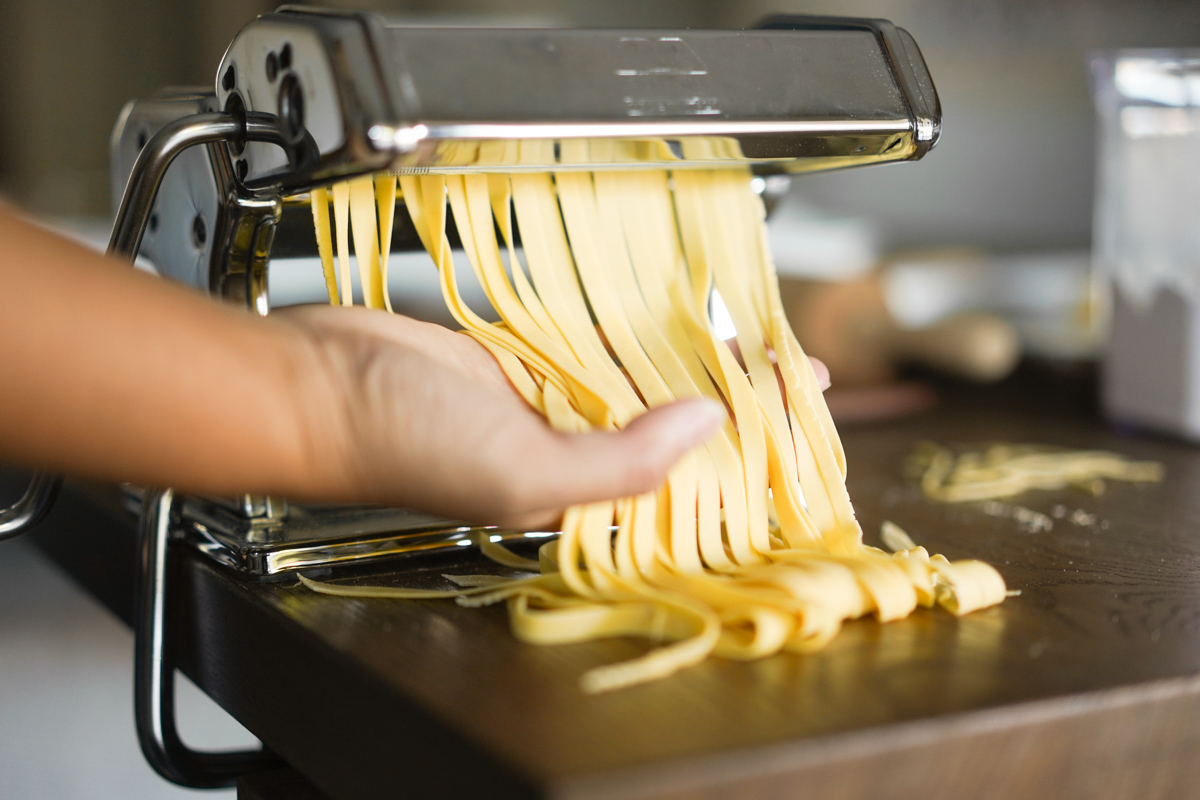
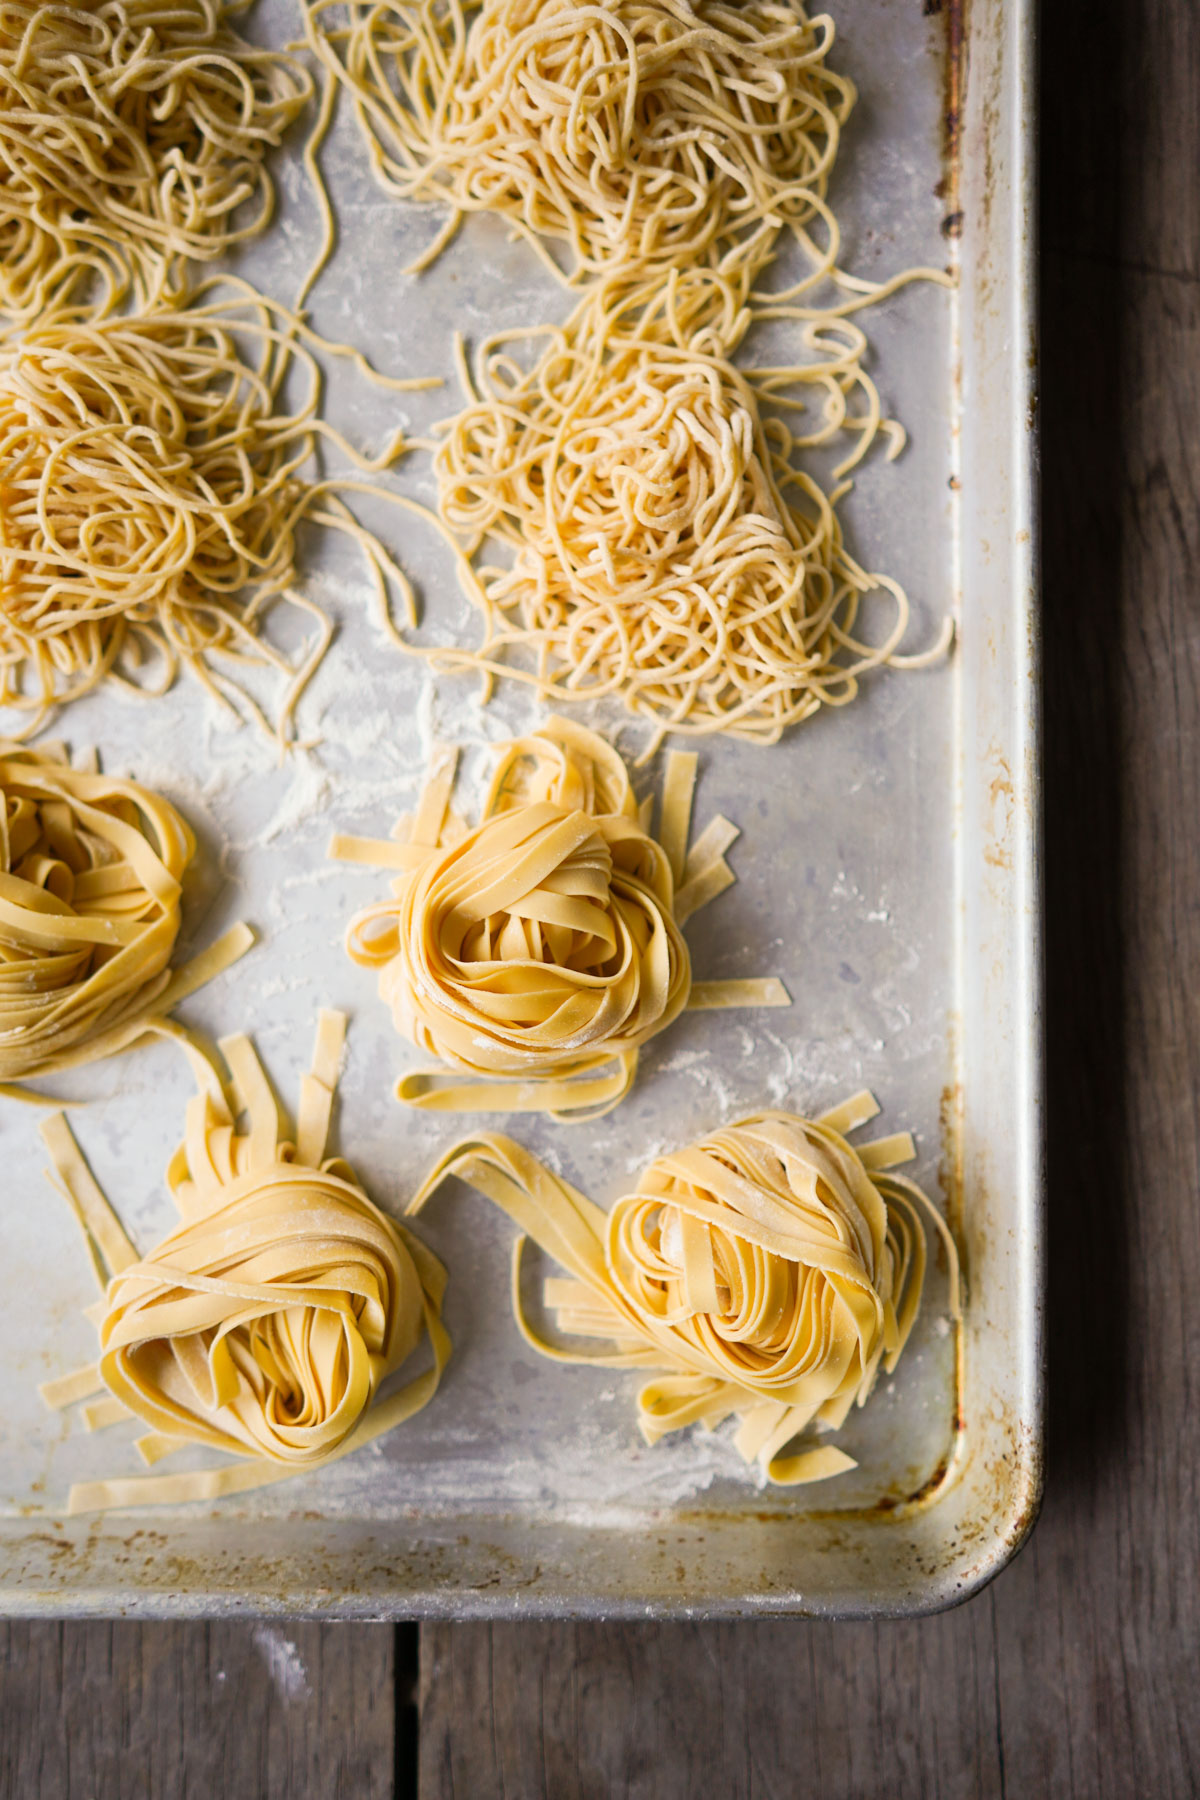
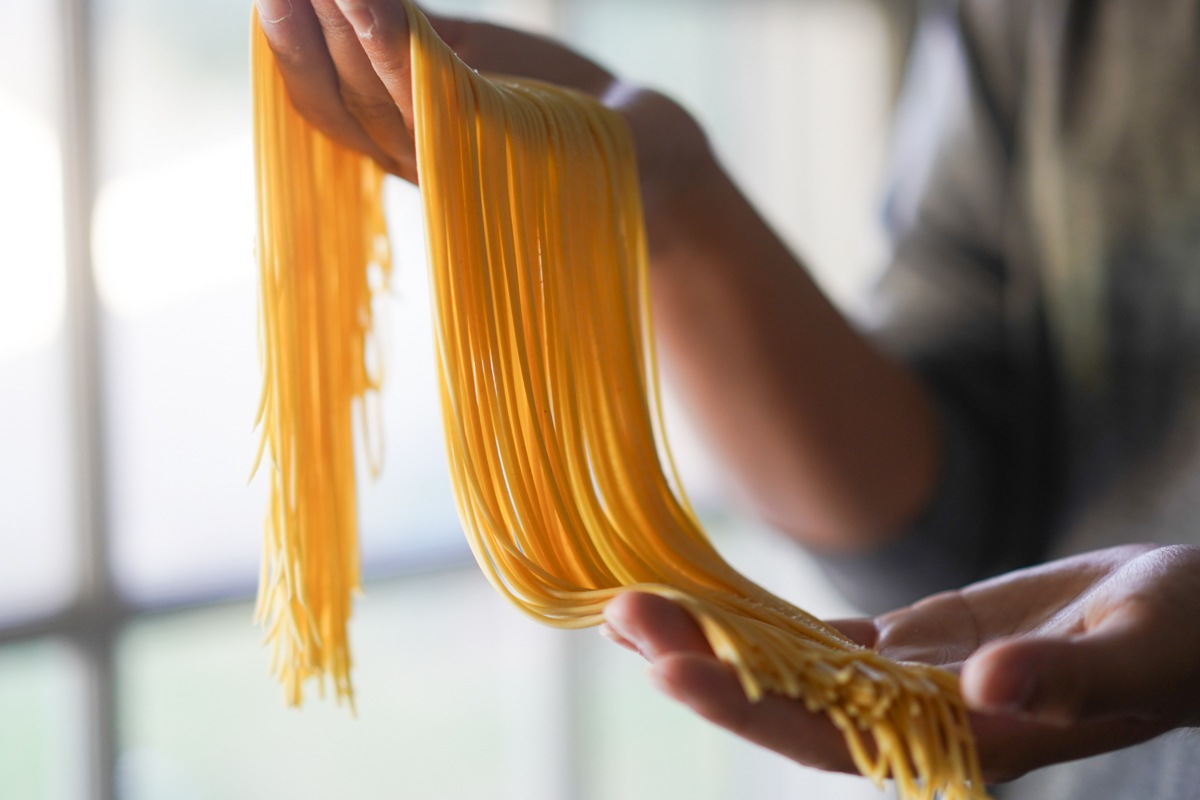
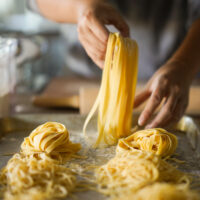
Aaaand this is taglioni at around a 5 thickness. Both are amazing, but the thinner one will cook faster.
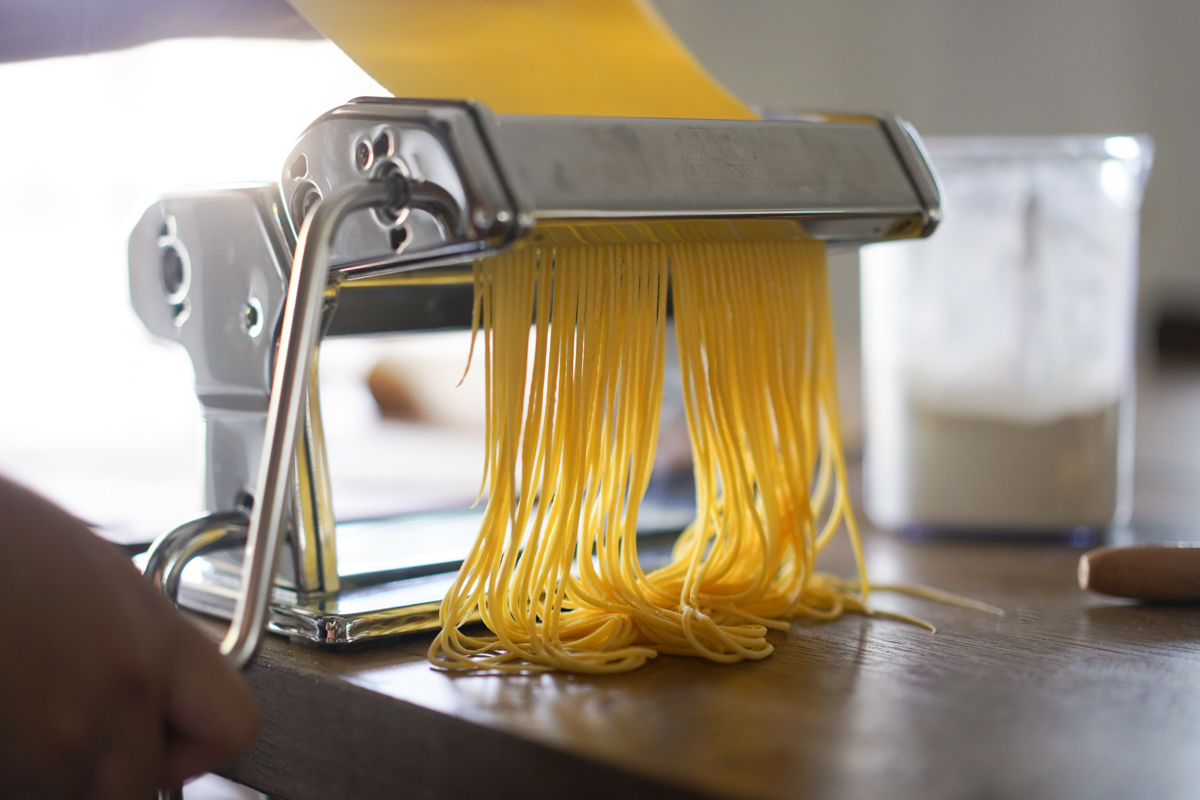
Closeup of that taglioni. Excellent size for my uni pasta recipe!
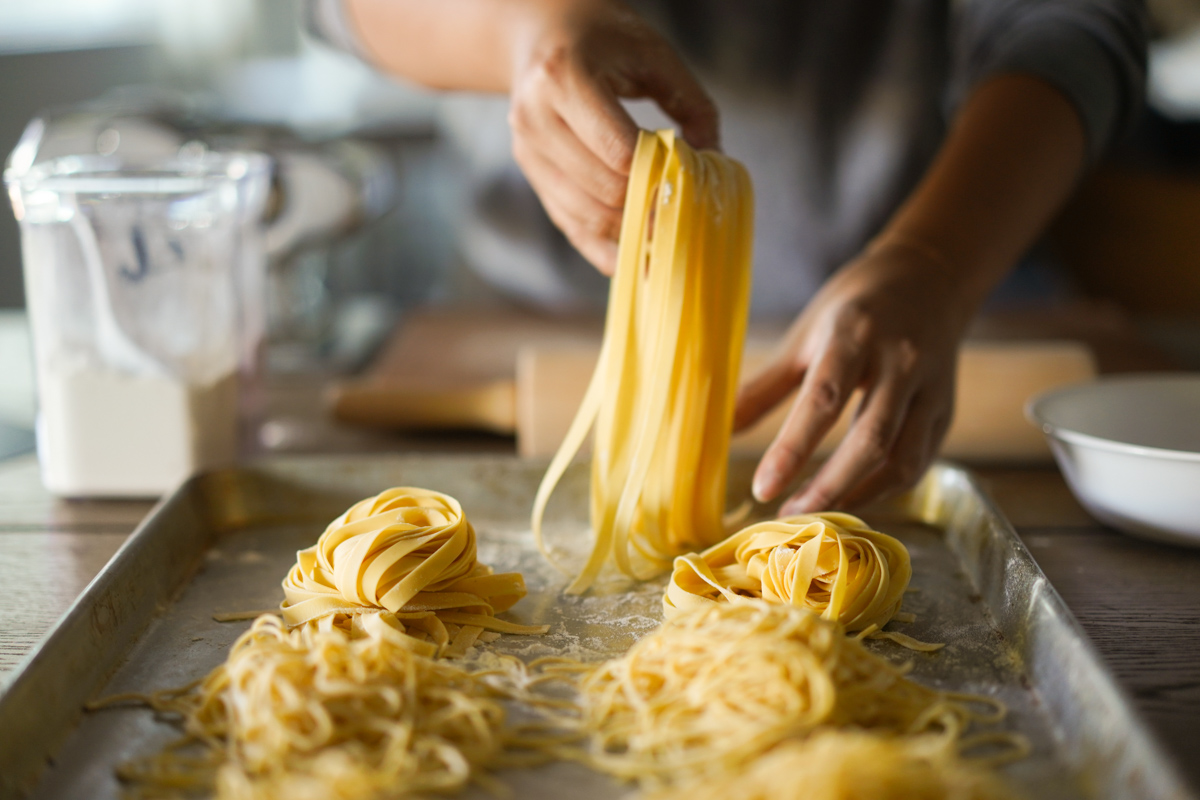
Prep a cutting board of half sheet pan so you can lay these out while you work. Even if you’re going to be cooking it right away for a meal, make sure the individual pasta strands don’t rest on each other because they will tend to stick making it impossible to separate before you cook and it will not cook evenly.
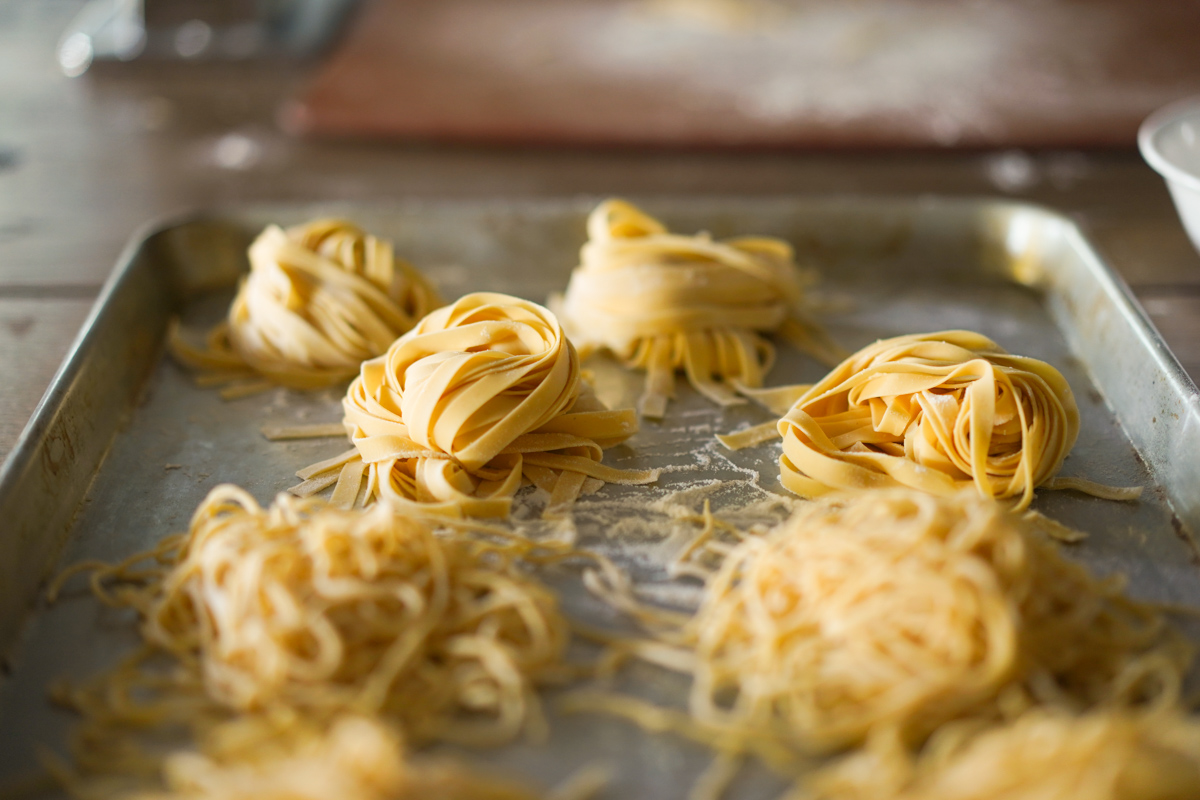
So immediately as the strands come out of the pasta machine, separate the strands, flour it lightly, then lay it down in nests or just spread out on a sheet.
Repeat for the remaining two sections of pasta we split off with the bench scraper earlier. This is definitely a labor of love, but well worth the final outcome. There are a lot of steps and it can sound intimidating just reading through, but the details are important to follow.
Once you run through the process on a few batches, it’s not really difficult and things just start to fly through.
This basic pasta recipe is easy to double or triple and freeze so you can make meals as needed. Once you’ve kneaded the dough and are ready to rest it, just form balls and wrap them up air tight to throw in the freezer. Just pull them out and fully defrost on the fridge before you’re ready to roll it out.
Once you get the hang of this, you can start experimenting with adding veggies like my spinach pasta, other flavors, new shapes for feta pasta, and even drying these out to gift!
Homemade Pasta Dough (Fresh Egg Pasta)
Ingredients
- 280 g "00" flour Caputo or Anna brands. All-purpose flour is ok if you must.
- 2 large eggs Whites & yolks
- 65 g egg yolks Reserve the whites for other recipes!
- 1 tsp salt And more salt for boiling pasta
Equipment Used
- pasta strainer
Instructions
- Weigh or measure all your ingredients.
- Combine ingredients. Add everything into a food processor and pulse for about 15-20 seconds until a ball starts to form and picks up all the dough. If doing this without a processor, pour flour onto a cutting board and make a well in the center, pour the eggs and salt in the center and slowly start to incorporate flour into the egg until you've gotten it all.
- Knead. Take the formed ball of dough and press the heel of your hand into it. Partially fold the dough back onto itself, rotate a bit, then repeat. This strengthens the dough and develops gluten. Do this for a few minutes until it gets firmer. You may need to regulate the moisture level by adding more flour or spritzing or adding drops of water. The target consistency is one that isn't gooey or stickey–we want it firm but still slightly tacky.
- Rest the dough. Form it into a ball, cover in plastic wrap and rest on the counter or fridge for 30-60 minutes.
- Laminate the dough. Unwrap plastic wrap and plit the dough into thirds and work with one at a time. Roll out the dough with a rolling pin until its a rectangle about 1/4" thick or slightly thinner, thin enough so you can fold as if it’s a letter being inserted into an envelope. Then run it through the machine on a 0 setting and crank (see photos in the post). Add flour as you need knead and roll out the dough so it doesn't stick to the machine.Repeat this entire process of rolling, folding, and cranking through the machine on a 0 setting about 6-8 times until the dough looks smooth and not rippley.Turn the knob on the machine to a 1 setting, and repeat the above, and continue until you reach the thinness you like. I like around 5 for the taglioni cut on this machine, and around a 7 for the fettuccine cut.
- Split the dough. At this point you'll have one long sheet of dough. Cut the sheet with a bench scraper to the lengh you'd like in your final pasta strands.
- Cut the pasta. Move the crank handle from the laminating side of the machine to the cutting side–either the taglioni or fettuccine. Sprinkle some flour on the sheet before cutting if needed to prevent the pasta from sticking to the machine.
- Catch the pasta as it comes out of the machine, and immediately separate the strands, dusting it lightly with flour before spreading or forming nests on a sheet pan or cutting board.
- Repeat. You have 2 more pasta balls to repeat the above steps with to finish out the dough!
- Cook. Get a medium sized pot filled with roughly 3-4 inches of water and get it to a boil on high heat. Add enough salt so it tastes like the sea–usually more salt than you'd think. Boil pasta in single bowl sized servings at a time so it doesn't crowd the pot and it lets the pasta cook more evenly. This pasta cooks much faster than typical dried boxed pasta, taking somewhere between 1 and 2 minutes. Test the pasta by taking bites every 20 seconds until it reaches desired doneness, remove with a strainer and repeat!