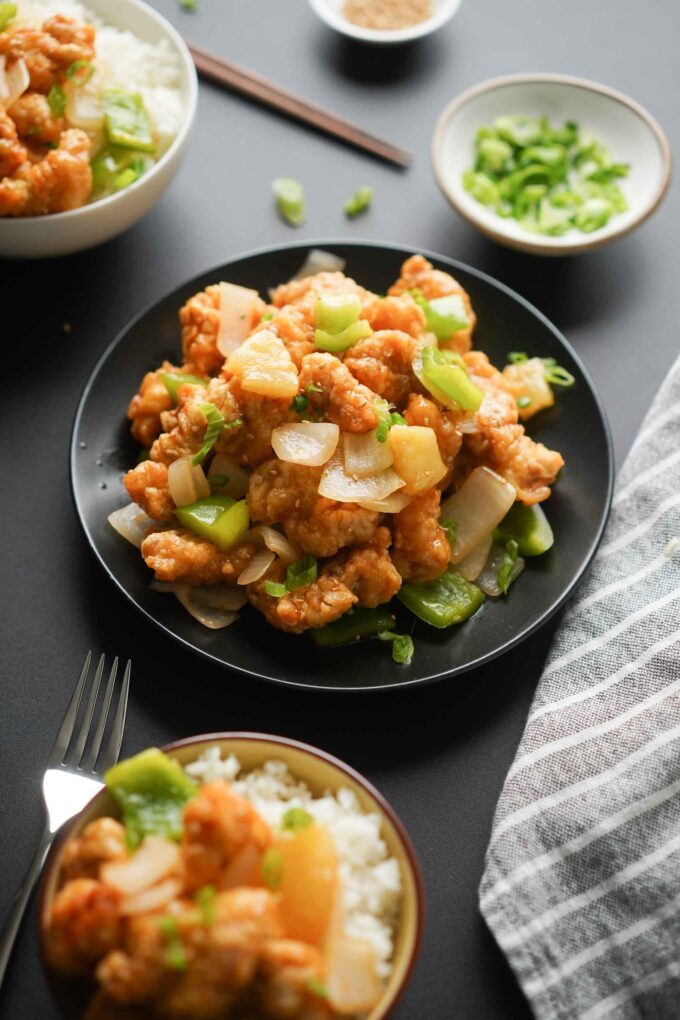
This homemade sweet and sour pork recipe yields crispy pieces of deep-fried pork, sautéed in a sweet and slightly tangy sauce.
After decades of eating (probably) hundreds of authentic, Chinese style sweet and sour dishes from various restaurants throughout the years, I’ve finally have the best homemade sweet and sour pork recipe that I can make anytime I have a craving.
What is sweet and sour pork?
Sweet and sour pork with pineapple is a very Americanized version of an authentic Cantonese dish called “gu lou yook.” It’s a very popular dish in American culture and these days you can find many variations of sweet and sour pork in different Chinese American restaurants.
It’s been said that the American version is much sweeter in comparison to traditional Chinese dishes of sweet and sour sauce.
If you want it the easy and simple way, you wouldn’t be looking at recipes–you can order this dish at Chinese restaurants for takeout. I like getting my fresh sweet and sour pork dish from my local restaurants, China Palace, and Green China near me in Southern California.
However, after being in a love affair with this dish for the past two decades, I’ve finally come up with my own homemade version. It has a little more ingredients than average, but the end result will totally be worth it.
Cuts of pork to use
My favorite cut of pork to use for sweet and sour pork is pork shoulder/butt because it’s got the perfect balance of fat and lean layers of meat. I don’t prefer using pork loin because it may be too meaty or tough, and pork belly is often too fatty per bite.
I found that traditional Chinese style sweet and sour pork dishes use pork butt. It’s also very affordable at the grocery store, so this is a win-win situation.
Sweet and sour pork batter

My favorite part about sweet and sour pork is actually the extra crispy batter—there’s just something about fried food that I can’t say no to. I knew that if I wanted to make sweet and sour pork at home, I needed to get an ultra-crispy outer layer to properly balance out the sauce.
I’ve noticed that there are two types of batters that many restaurants use for this dish. A wet batter that gives the pork pieces a more plump and puffier crust; and a dry coating made by dredging the meat in beaten egg and a dry flour mixture.
After trying both batters, I found that the wet batter ended up disintegrating faster in the sauce after stir-frying. I prefer the latter type of batter to get extra crispy and chunky pieces of meat.
Sweet and sour pork sauce
I’ve tasted so many different types of sweet and sour pork recipes at this point and I’ve noticed that each restaurant has its own type of sauce. Some are sweet and others you can smell the vinegar coming out of the kitchen.
For this sauce, I decided to balance out the sweet sugar with the tangy vinegar and acidic tomato sauce for a more well-rounded flavor. I want to be able to taste all three with each bite and not just feel like I’m eating sugar.

The cooking technique – double fry method

While I was testing this recipe, I found that deep frying and dredging with pork was a bit different from chicken. For one, the moistness of the pork would cause some of the crispy batter to detach from the meat.
To reduce the water in my meat after seasoning, I covered it in cornstarch and rested the meat for about 5 minutes to soak up that extra moisture and so that the egg and flours could stick to the meat better. After searching the internet, I also found that if you allowed your dredged, uncooked meat to rest before frying, it had a better chance at holding up in and out of the fryer.
The best way to make sure you get ultra-crispy pork pieces that hold up after stir frying in the sweet and sour sauce is to simply double fry, like my Korean fried chicken recipe. While this is an extra step, it ensures that you won’t end up with flat and softened pieces after sauteing for a minute. There’s nothing more satisfying than having crunchy pieces with each bite.
Cooking tips
- Preheat your neutral cooking oil to 375 °F and make sure to measure this heat throughout the cooking process so you don’t overcook your oil and mess up your pork. A few times, the temperature of my oil was too high and gave me undercooked meat and extra dark batter. It’s also important to use a small strainer to lift out extra pieces of fried bits so it doesn’t burn and stick to your pork pieces.
- Cover all your pieces of meat with cornstarch first and let it rest before dredging (dipping into the egg wash and cornstarch/flour mixture). I found that if I let the cornstarch covered pieces rest for 5 minutes to soak up the excess moisture before moving onto the egg wash, it helped the batter stick to the meat better.
- Let your dredged, uncooked pieces of meat rest on a cooling rack before frying. Like the previous tip, allowing the battered meat to rest gave me a crispier crust that stayed intact after frying and during the sauteing process.
- Double fry your meat! This will give you sweet and sour pork pieces that are ultra-crispy and hold up better while sauteing. The double frying process removes the excess moisture in the meat and the crust that is leftover after the first fry. To learn more about the science of double frying, read this NPR article.

How to serve & how to store

This sweet and tangy recipe goes great with plain white rice because it’s so rich in flavor. My favorite ways to cook white rice are in a rice cooker, instant pot, or even the microwave.
This dish is best served fresh from the pan since it includes an extra crispy outer layer and covered with a special sauce. If you end up with extra sweet and sour pork, you can store it in an airtight container in the fridge for up to 3-4 days. To reheat, I like to use the microwave for a quick meal.


Sweet and Sour Pork (w/ Pineapple, Onion, Bell Pepper)
Ingredients
Frying pork
- 1 lb pork butt cut into ½ inch cubes
- 2.4 g (¾ tsp) salt for seasoning
- 148 g (19 tbsp) cornstarch
- 45 g (6 tbsp) all-purpose flour
- 1.8 g (1.8 tsp) salt for dry batter
- 2 large eggs beaten
- neutral cooking oil vegetable oil preferred
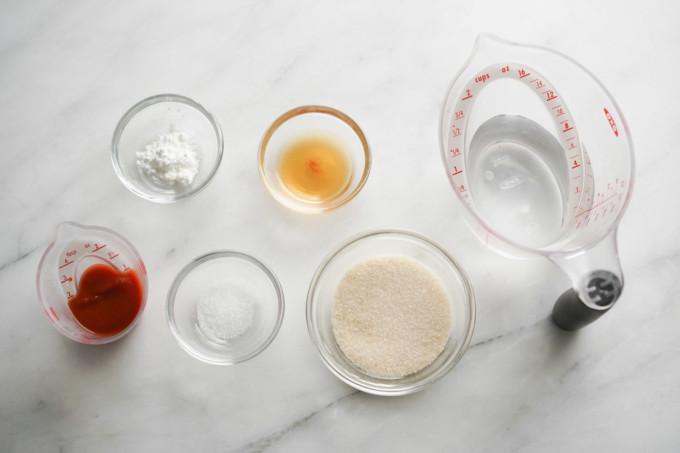
Sauce
- ½ fl oz (1 tbsp) garlic oil
- 2 fl oz (4 tbsp) tomato sauce
- 1 fl oz (2 tbsp) apple cider vinegar
- 100 g (½ c) granulated white sugar
- 2 g (½ tsp) MSG (monosodium glutamate)
- 5 g (2 tsp) cornstarch
- 12 fl oz (1½ c) filtered water
- ½ medium onion cut into ¾" pieces
- ½ medium bell pepper cut into ¾" pieces
- ¼ c pineapples cut into ¼ inch cubes
Equipment Used
- tongs and spatula or wooden spoon
- small strainer, optional
- pot for frying
- cooling rack and paper towels
- saucepan
- larger pan for stir-frying, optional if everything fits in the saucepan
Instructions
Frying pork
- Add the pork into a bowl and sprinkle the salt. Mix to make sure the salt is evenly spread throughout the salt. Leave the pork to marinate for at least 10 minutes on the counter.
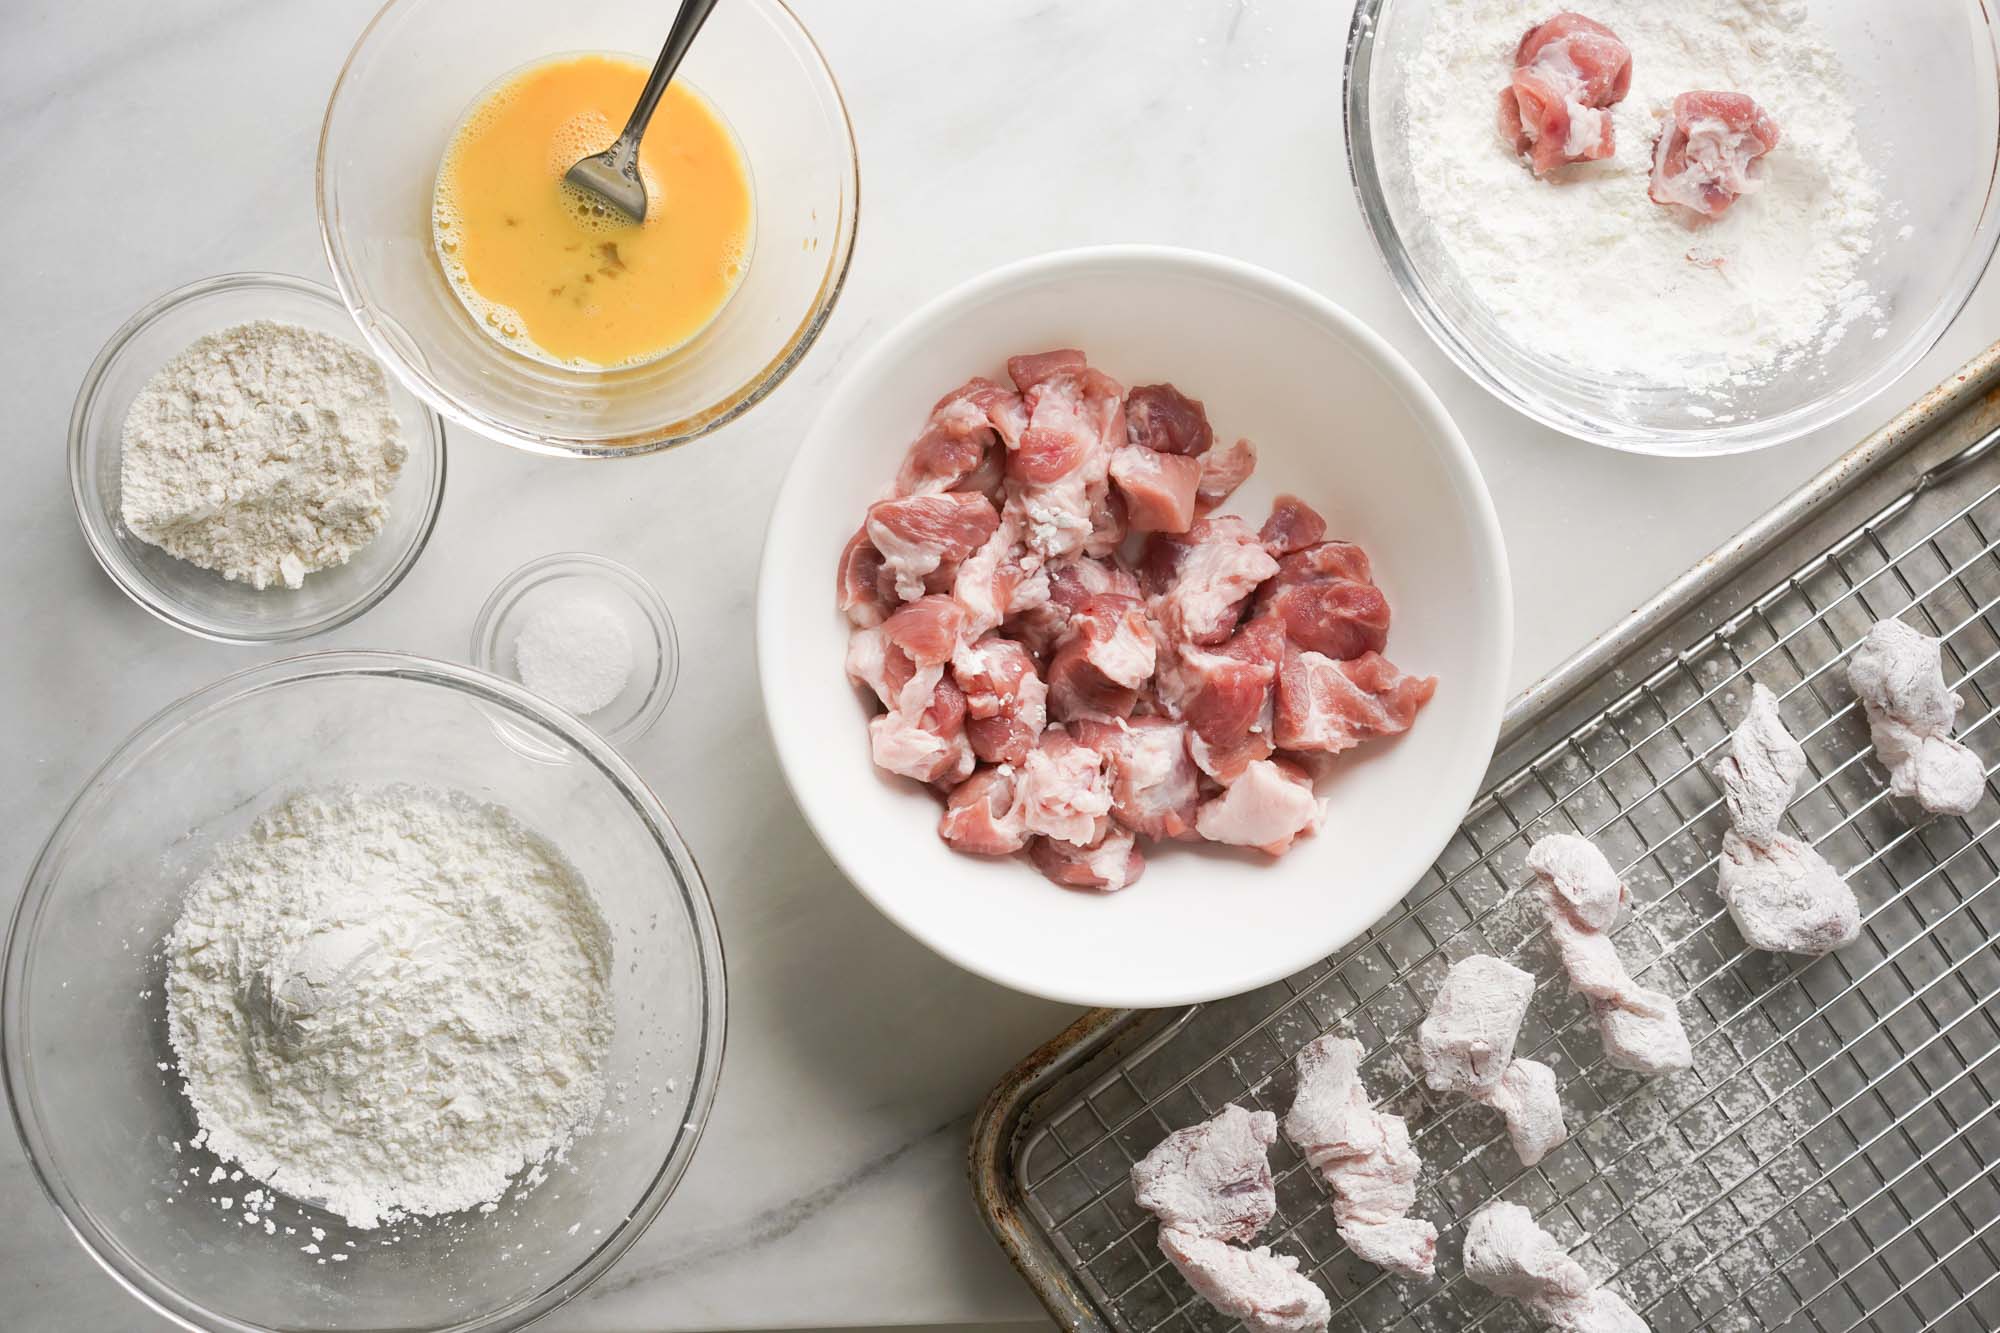
- While your meat is resting on the counter, prep your dredging station with three separate bowls. In the first bowl, add 1/2 c (or 62.5 grams) of the cornstarch.

- In the second bowl, add the egg and lightly beat with a whisk or fork.
- In the last bowl, combine the rest of the cornstarch, the all-purpose flour, and salt.
- First, dip the pork cubes into the first bowl of cornstarch and properly cover them completely in the starch until they are white. Place them on a cooling rack and repeat the process with the rest of the meat. Allow the cornstarch covered meat to rest on the cooling rack for about 5 minutes before moving on. This soaks up excess water in the meat and allows the batter to stick better to the meat.
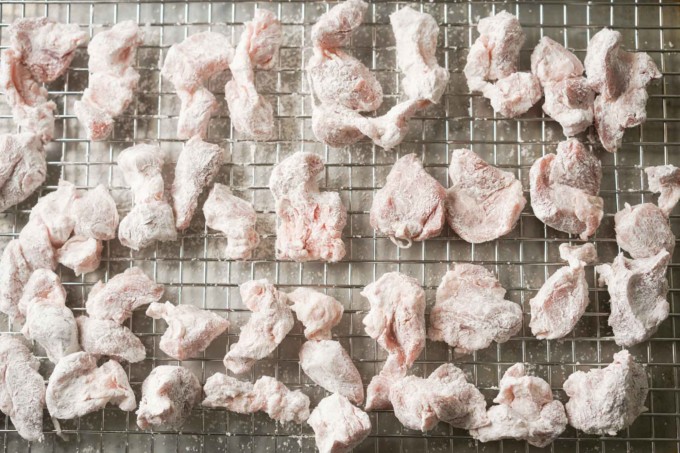
- Then take the pork cubes covered in cornstarch, dip them into the beaten egg, and immediately cover them with the cornstarch and all-purpose flour mix (the contents of the third bowl). Place it on the cooling rack and repeat with the rest of the pieces. Let all the meat rest coated in dredging for at least 10 minutes to allow the crust to stick to the meat.

- While you wait for your pork dredging to rest, preheat your frying oil. In a heavy-bottomed pot over medium-high heat, add enough vegetable oil to cover about 1 ½ to 2 inches above the bottom. Preheat the oil to 375°F.

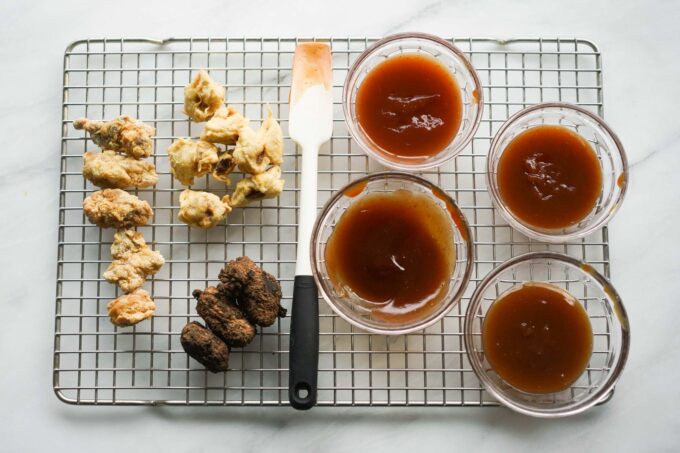
- First fry: After resting, carefully lower the pork pieces into the oil and fry for about 2 minutes per batch, occasionally turning them over to make sure both sides evenly fry. Try not to crowd the pork and pot by adding too many pieces. I add about 5 pieces at a time. Remove the pork when it’s pale in color and measures 145 °F in the center using the instant-read thermometer. The crust should be slightly crispy. Transfer to a paper towel-lined, clean cooling rack to remove excess oil. Repeat frying for the rest of the pork. In the photo– left: pork fried once, right: fried twice
- Second fry: Carefully lower the fried pieces of pork back into the oil and continue to fry for about 2 minutes or until they become light brown and measure about 200 °F. The color will get slightly darker after you remove them from the oil. Remove them from the oil and place them back onto the cooling rack. Continue to fry the rest of the meat a second time until complete.


Sauce
- In a saucepan over medium heat, add the garlic oil and sauté for about 30 seconds or until it’s nice and fragrant. Add the tomato sauce, apple cider vinegar, and sugar into the pan and stir until combined.
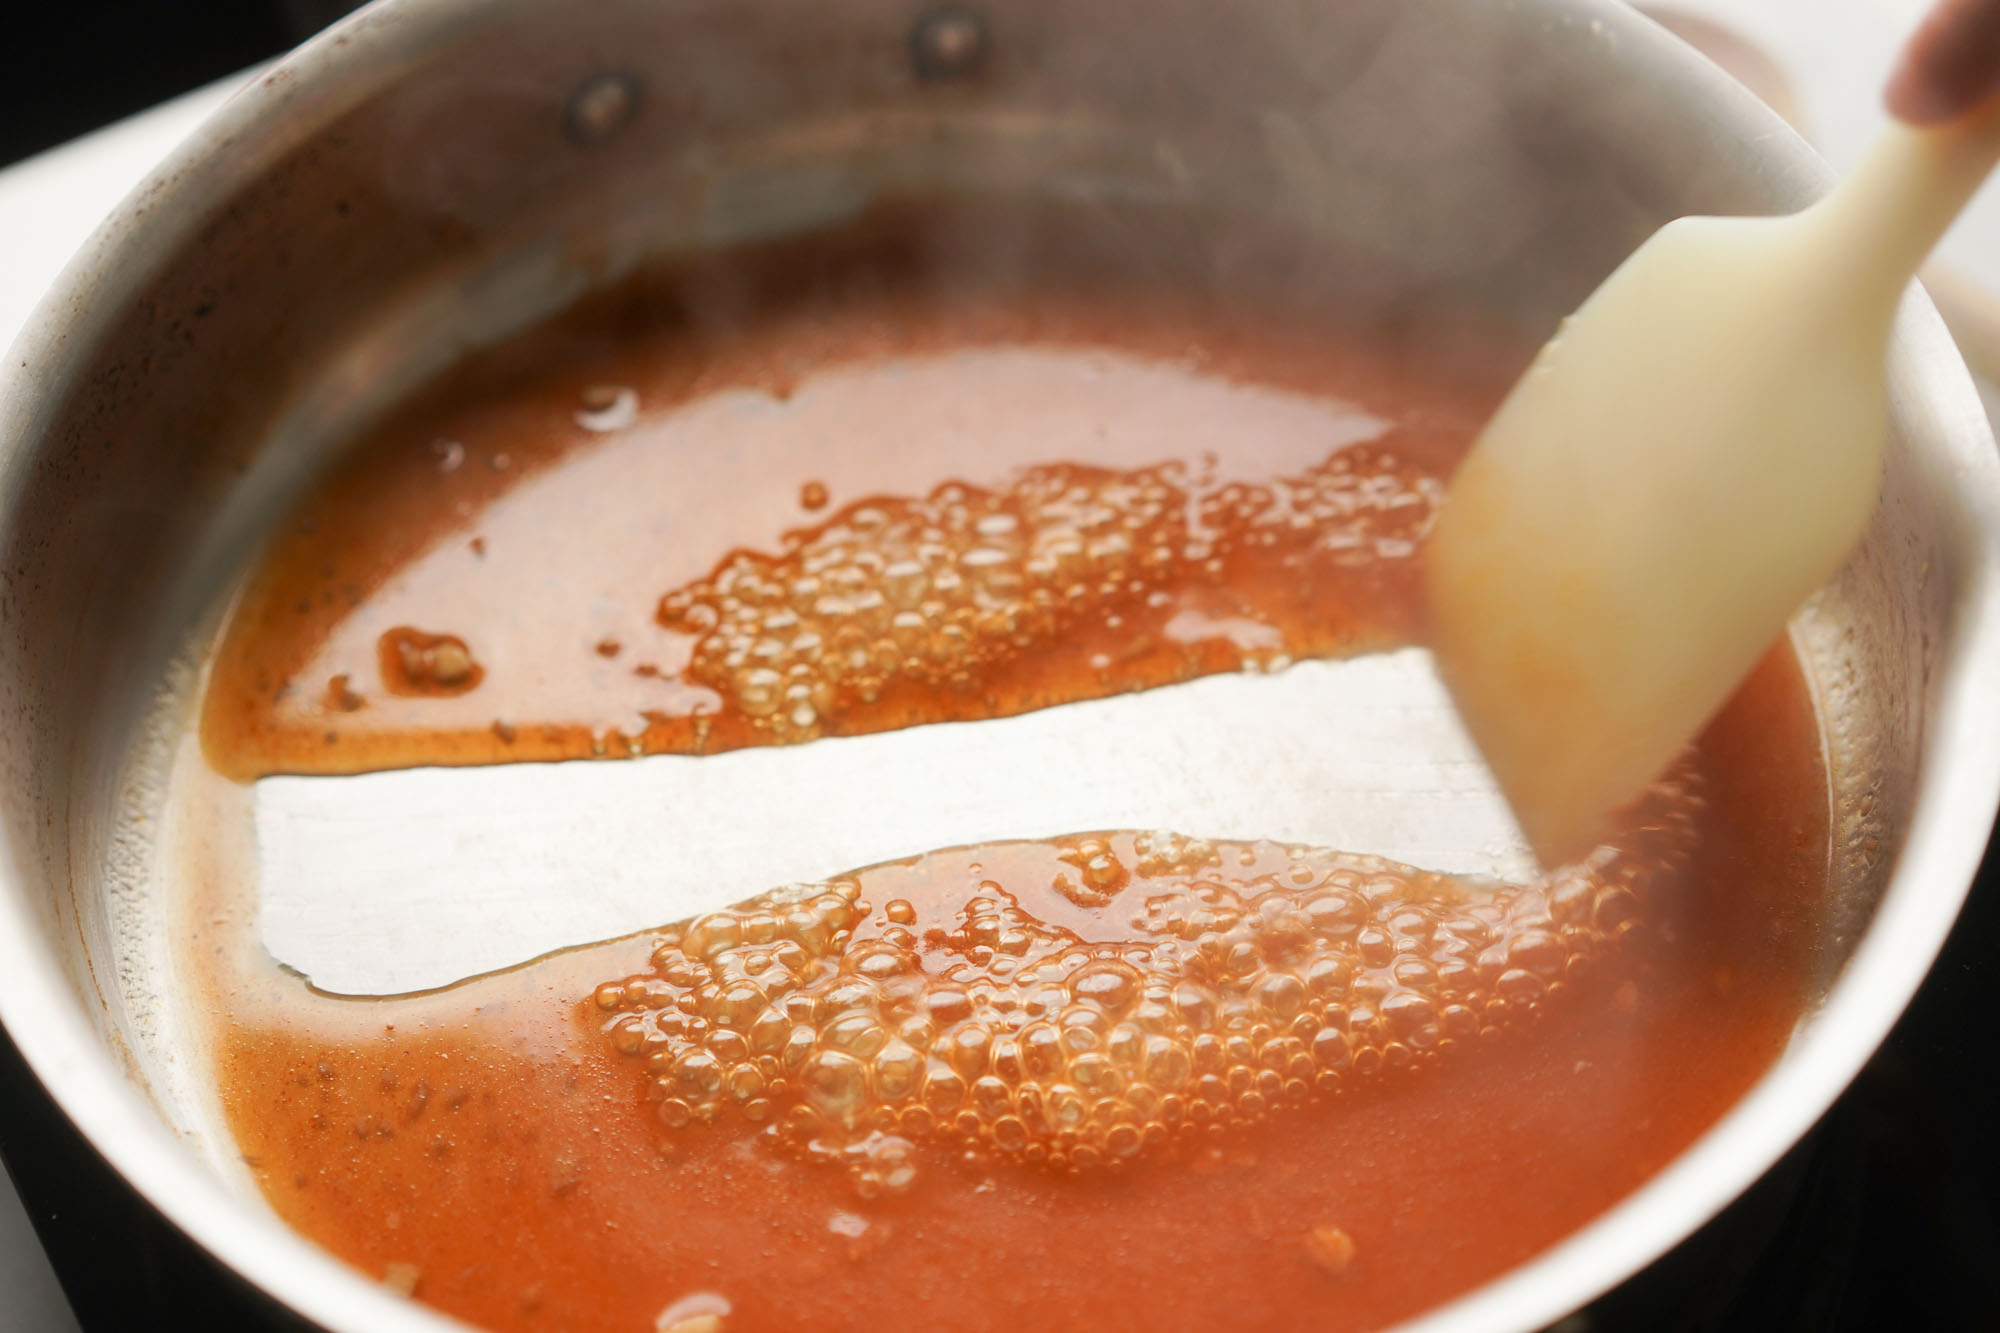
- In a separate bowl, combine the cornstarch and water until fully incorporated. Add this mixture to the saucepan and cook on medium-high until it hits a boil. Bring the heat to medium for a simmer and continue to stir until the consistency is similar to maple syrup which takes about 8 minutes. The sauce should be a darker orange-red at this point. See photo for how the final texture should look.
- Add the msg at this point and taste. Adjust any flavors however you prefer. If you want it sweeter, add sugar, or if you want it tangier add more vinegar.
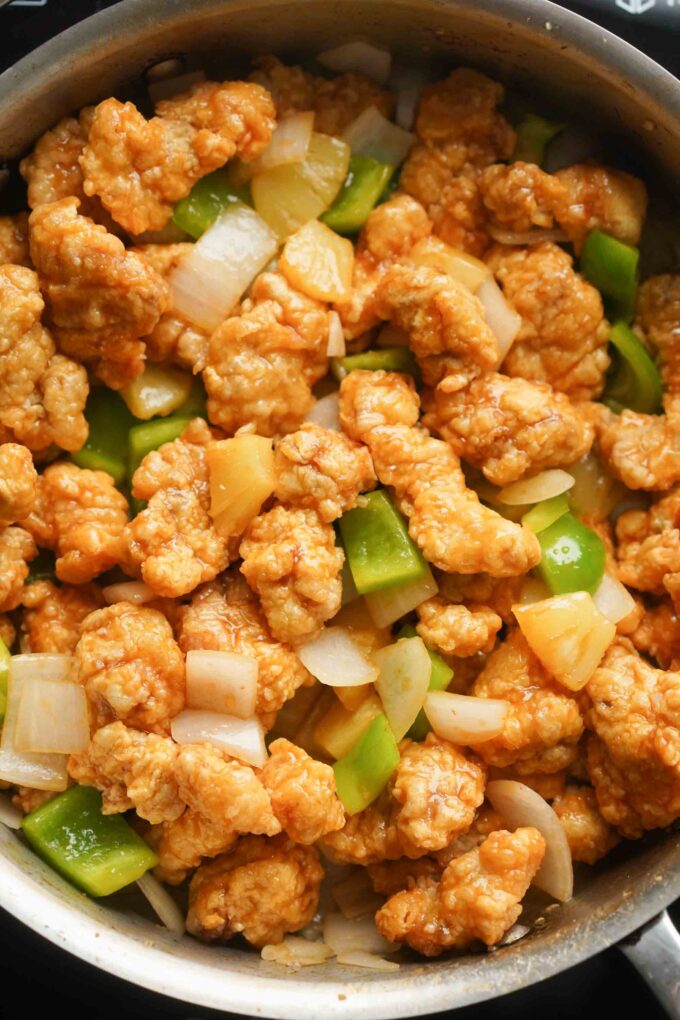
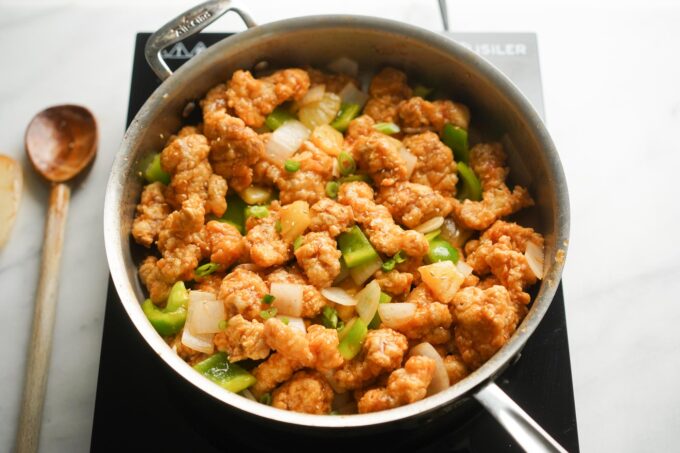
- Add the onion and cook for about 1 minute, then add the bell pepper, pineapples which don’t need cooking. Mix to coat in the sauce.
- Add the fried pork pieces and stir until you’ve covered the fried pork pieces. There should be just enough sauce to cover the fried pork, but not that it’s dripping with sauce. Serve immediately.