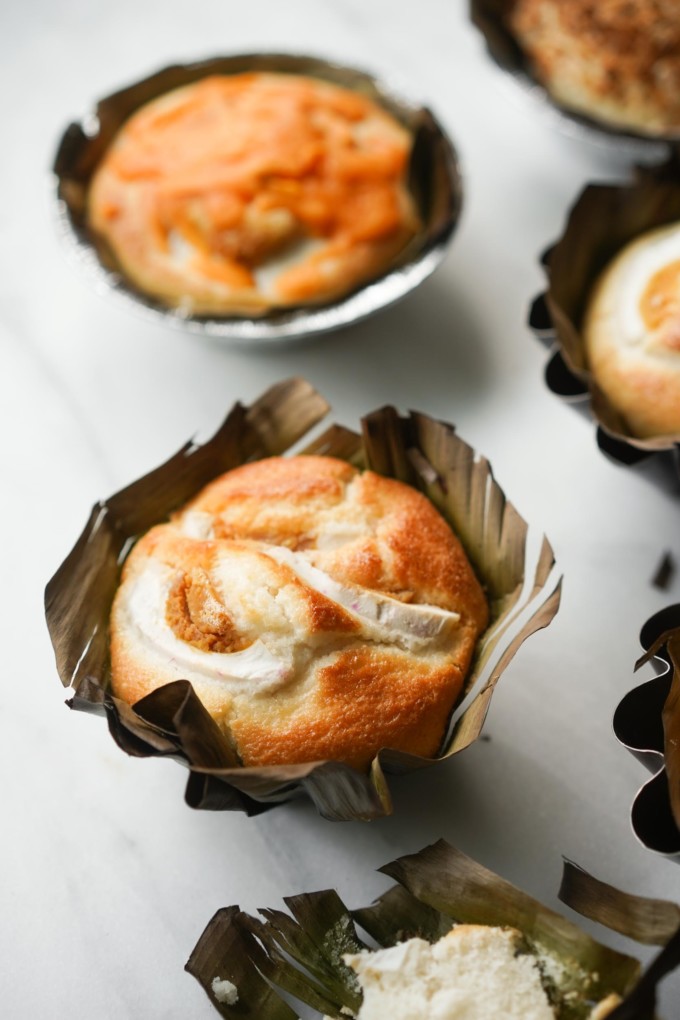
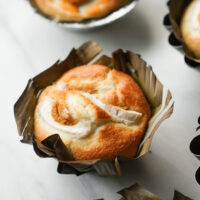
This soft and sweet rice cake is perfectly paired with a salty duck egg and cheese topping. Bibingka is a traditional Filipino dessert that is predominantly sold on the streets to celebrate the Christmas season, specifically after simbang gabi (or Christmas night mass).
With this Bibingka recipe, you won’t have to wait to visit the Philippines during the holiday season to enjoy easy, fresh baked bibingka at home.
Where did bibingka originate?
Like other rice cakes in Filipino culture, puto or biko, this kakanin (or cake) is one of the most popular desserts. Bibingka is traditionally made on the streets of the Philippines in terracotta pots lined with banana leaves and cooked over charcoal. While the origin of bibingka is not quite known, there are similarities between Indonesian and Filipino bibingka since they are both baked rice cakes.
Traditionally, bibingka (like puto) is made with a fermented glutinous rice mixture called galapong. This can give bibingka a slightly tangy flavor. In some regions like Cebu, bibingka is known for it’s tangy and yeasty flavor due to the traditionally added ingredient of tubâ (palm wine). This recipe gives a slightly modern flavor to the traditional bibingka. For the purpose of saving time without losing the delicious flavor, this recipe will use rice flour as a shortcut.
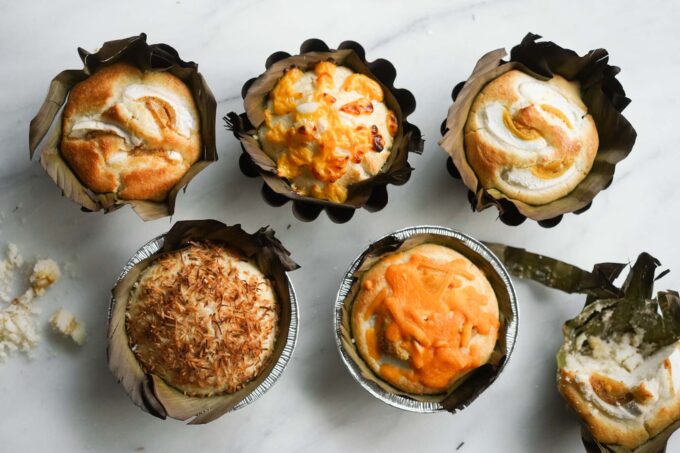
We also add plenty of sugar and melted butter to give a sweet and fattier flavor to the bibingka–this pairs really well with the added salty toppings like cheddar cheese or salted duck egg.
Oven baking vs. charcoal grill
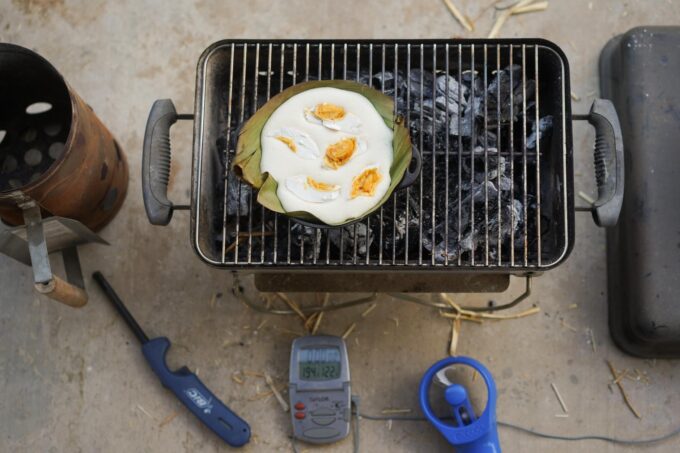
While I’ve tried baking the bibingka over charcoal to get that smoky flavor, I prefer baking the bibingka in the oven–you don’t have to preheat coals and you get an even temperature that cooks the rice cake more evenly.
Toppings
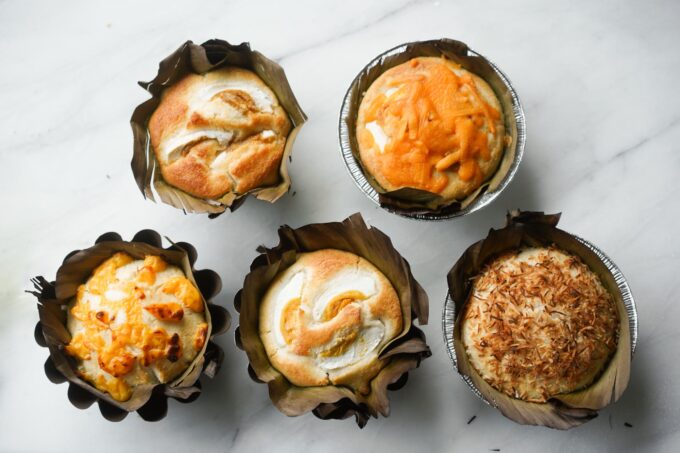
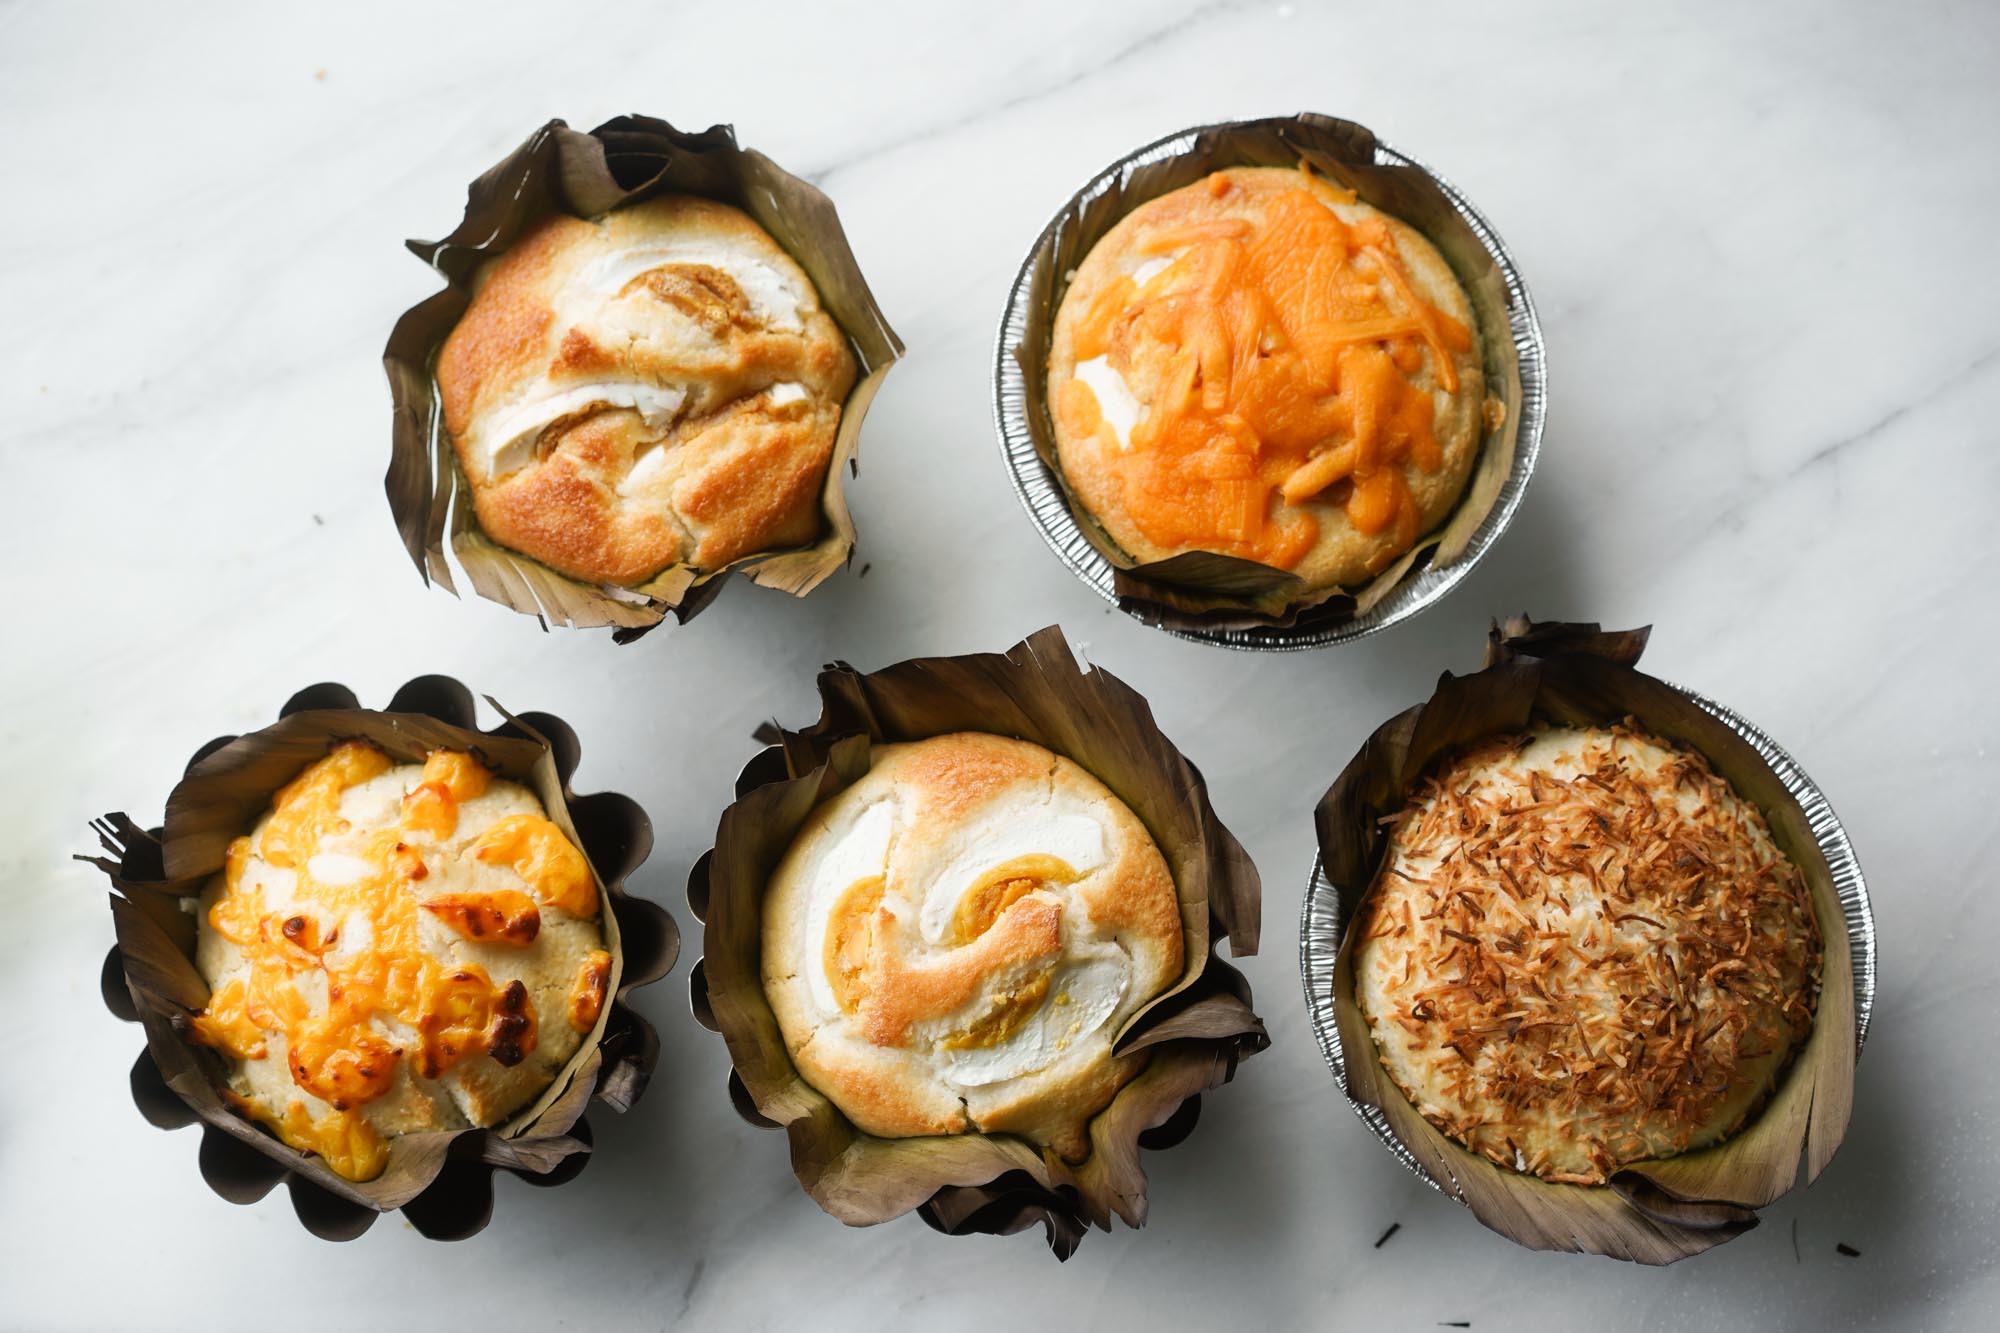
Different toppings need to be added at different times to prevent burning. For salted eggs slices, add them to the bibingka after 9 minutes of baking. For dried, unsweetened coconut shreds, add them on the bibingka after 11 minutes of baking. For cheddar cheese (or velveeta), add them onto the bibingka at 19 minutes of baking.
Note: timings are based on my standard, family sized electric oven, and it may vary from oven to oven. The goal is to add the toppings early enough while the batter is slightly wet and can adhere to them, but not so early they will bake too long and burn.
Cooking tips
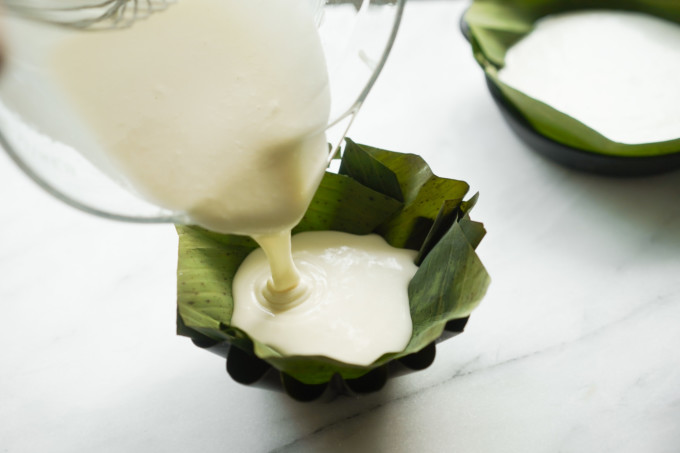
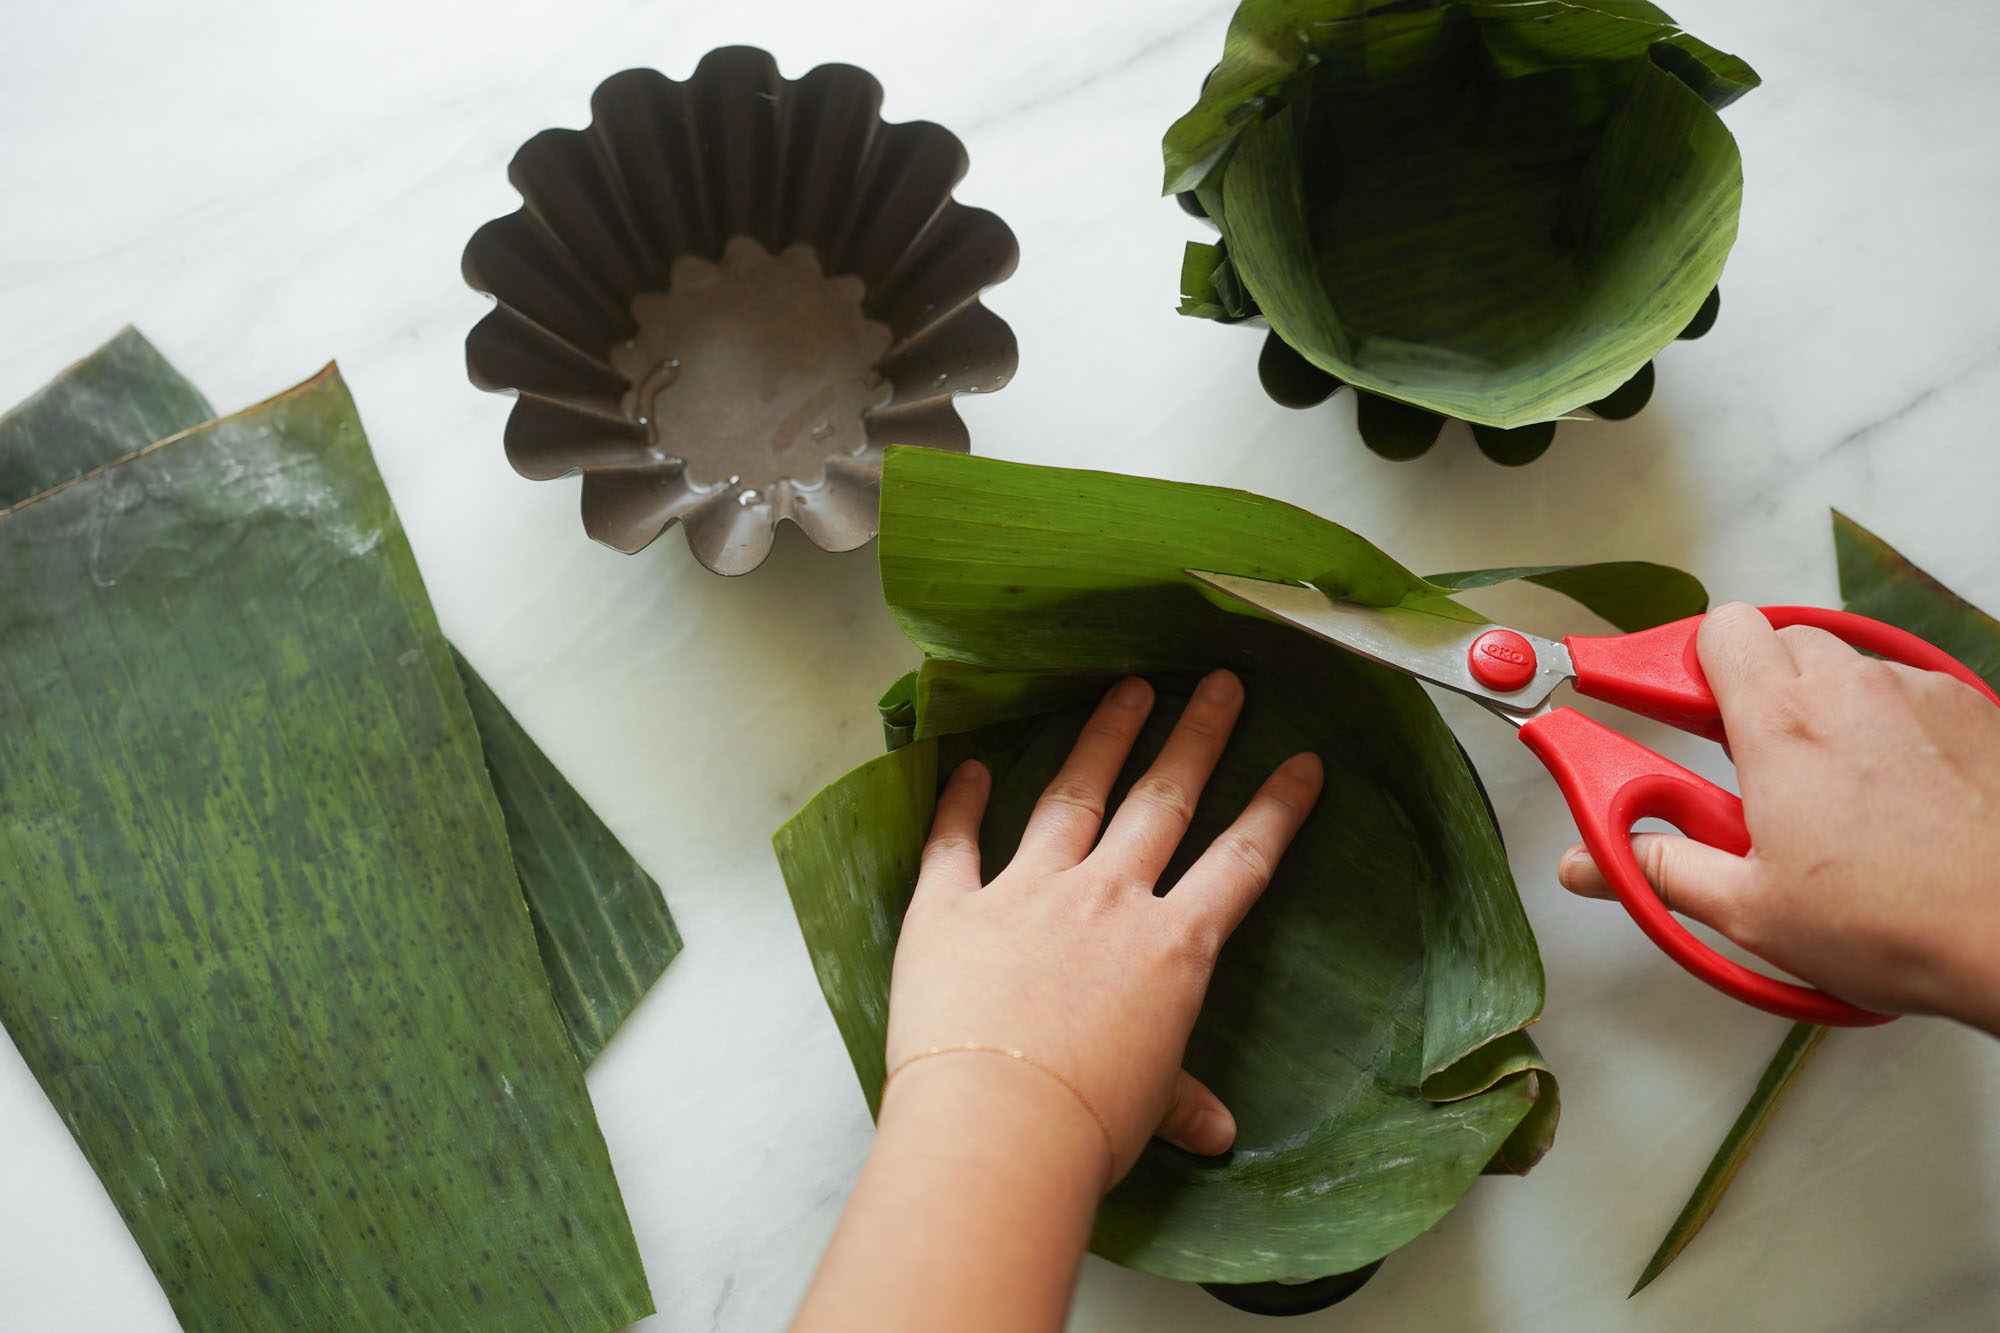
- Soften the banana leaves before lining them in the molds. Soften the banana leaves by moving it above a warm stove or electric burner. DO NOT put direct fire or heat onto the banana leaves or they will burn.
- Use rice flour, NOT glutinous rice flour. Rice flour will give you soft and moist bibingka, whereas glutinous rice flour will give you a completely different mochi-like texture (like ube crinkle cookies or sesame balls).
- Whisk the ingredients together until there are no lumps. The batter should have the consistency of a pancake batter.
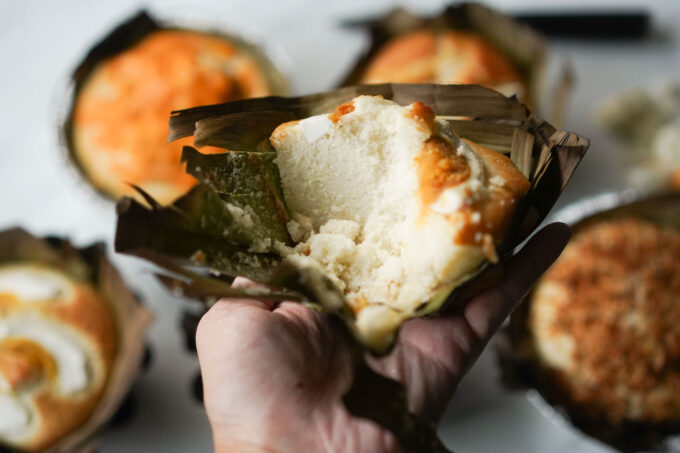
- Use toothpicks or a cake tester to make sure the bibingka is finished baking. Push the cake tester in the middle of the bibingka–it should come out clean. Finished bibingka should not jiggle when moved and is slightly golden on the top.
What does Bibingka taste like?
Bibingka tastes like sweet rice cakes that have a hint of coconut milk and pairs well with various toppings like salted egg. They’re known for their soft and slightly chewy texture.
Who invented Bibingka?
Bibingka comes from the Philippines and Indonesia. It’s a traditional baked rice cake that is often eaten during the Christmas season in the Philippines.
Bibingka (Filipino Baked Coconut Rice Cakes)
Ingredients
Bibingka
- banana leaves enough to line your molds
- 28.35 g (2 tbsp) unsalted butter melted
- 164 g (13 tbsp) white granulated sugar
- 184 g (6 fl oz) coconut milk
- 60 g (2 fl oz) whole milk
- 170 g (1 ½ c) rice flour
- 5 g (1 tsp) baking powder
- 1 g (¼ tsp) salt
Toppings (optional)
- 1 salted duck egg sliced into quarters
- unsweetened coconut shreds
- cheddar cheese or Velveeta shredded
Equipment Used
- flour sifter
Instructions
- Preheat the oven to 400 °F.
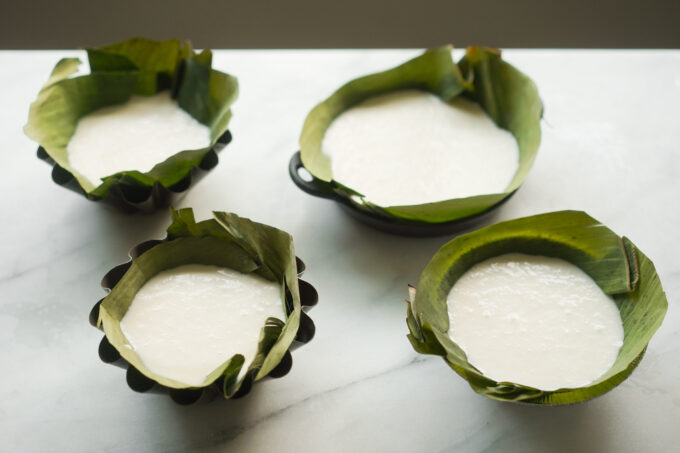
- Carefully clean the banana leaves under running water, making sure not to rip them. If your banana leaves are tough, carefully warm them over a warm stove making sure not to have the fire or electric burners touch the banana leaves (or they will burn). Once the leaves are soft and moldable, line the molds with banana leaves. You can use scissors to cut off the excess banana leaves around the edge.


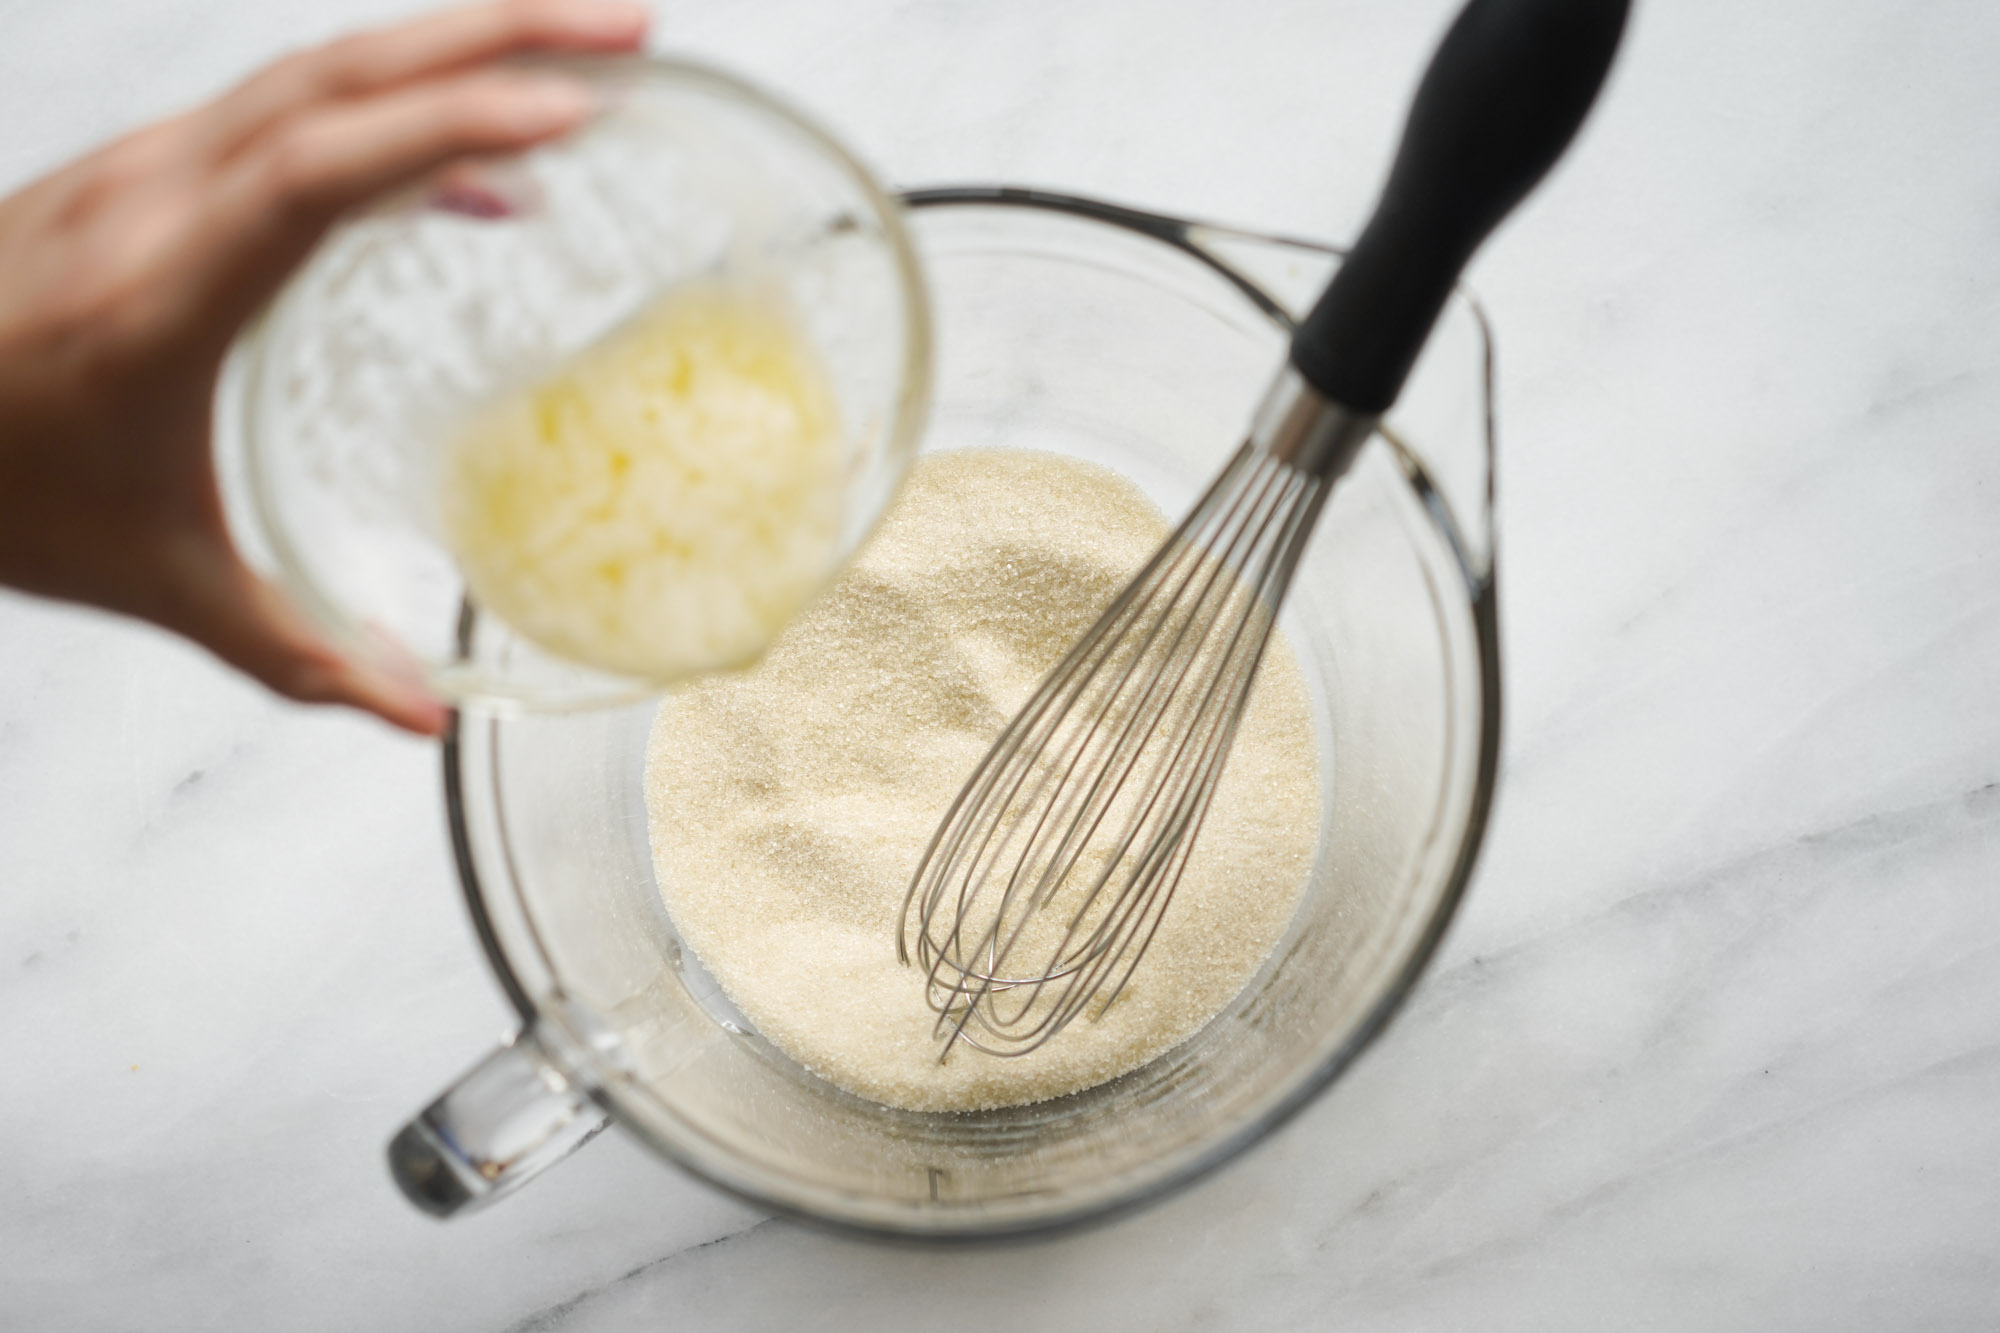
- In a large mixing bowl, cream together the melted butter and sugar until combined.

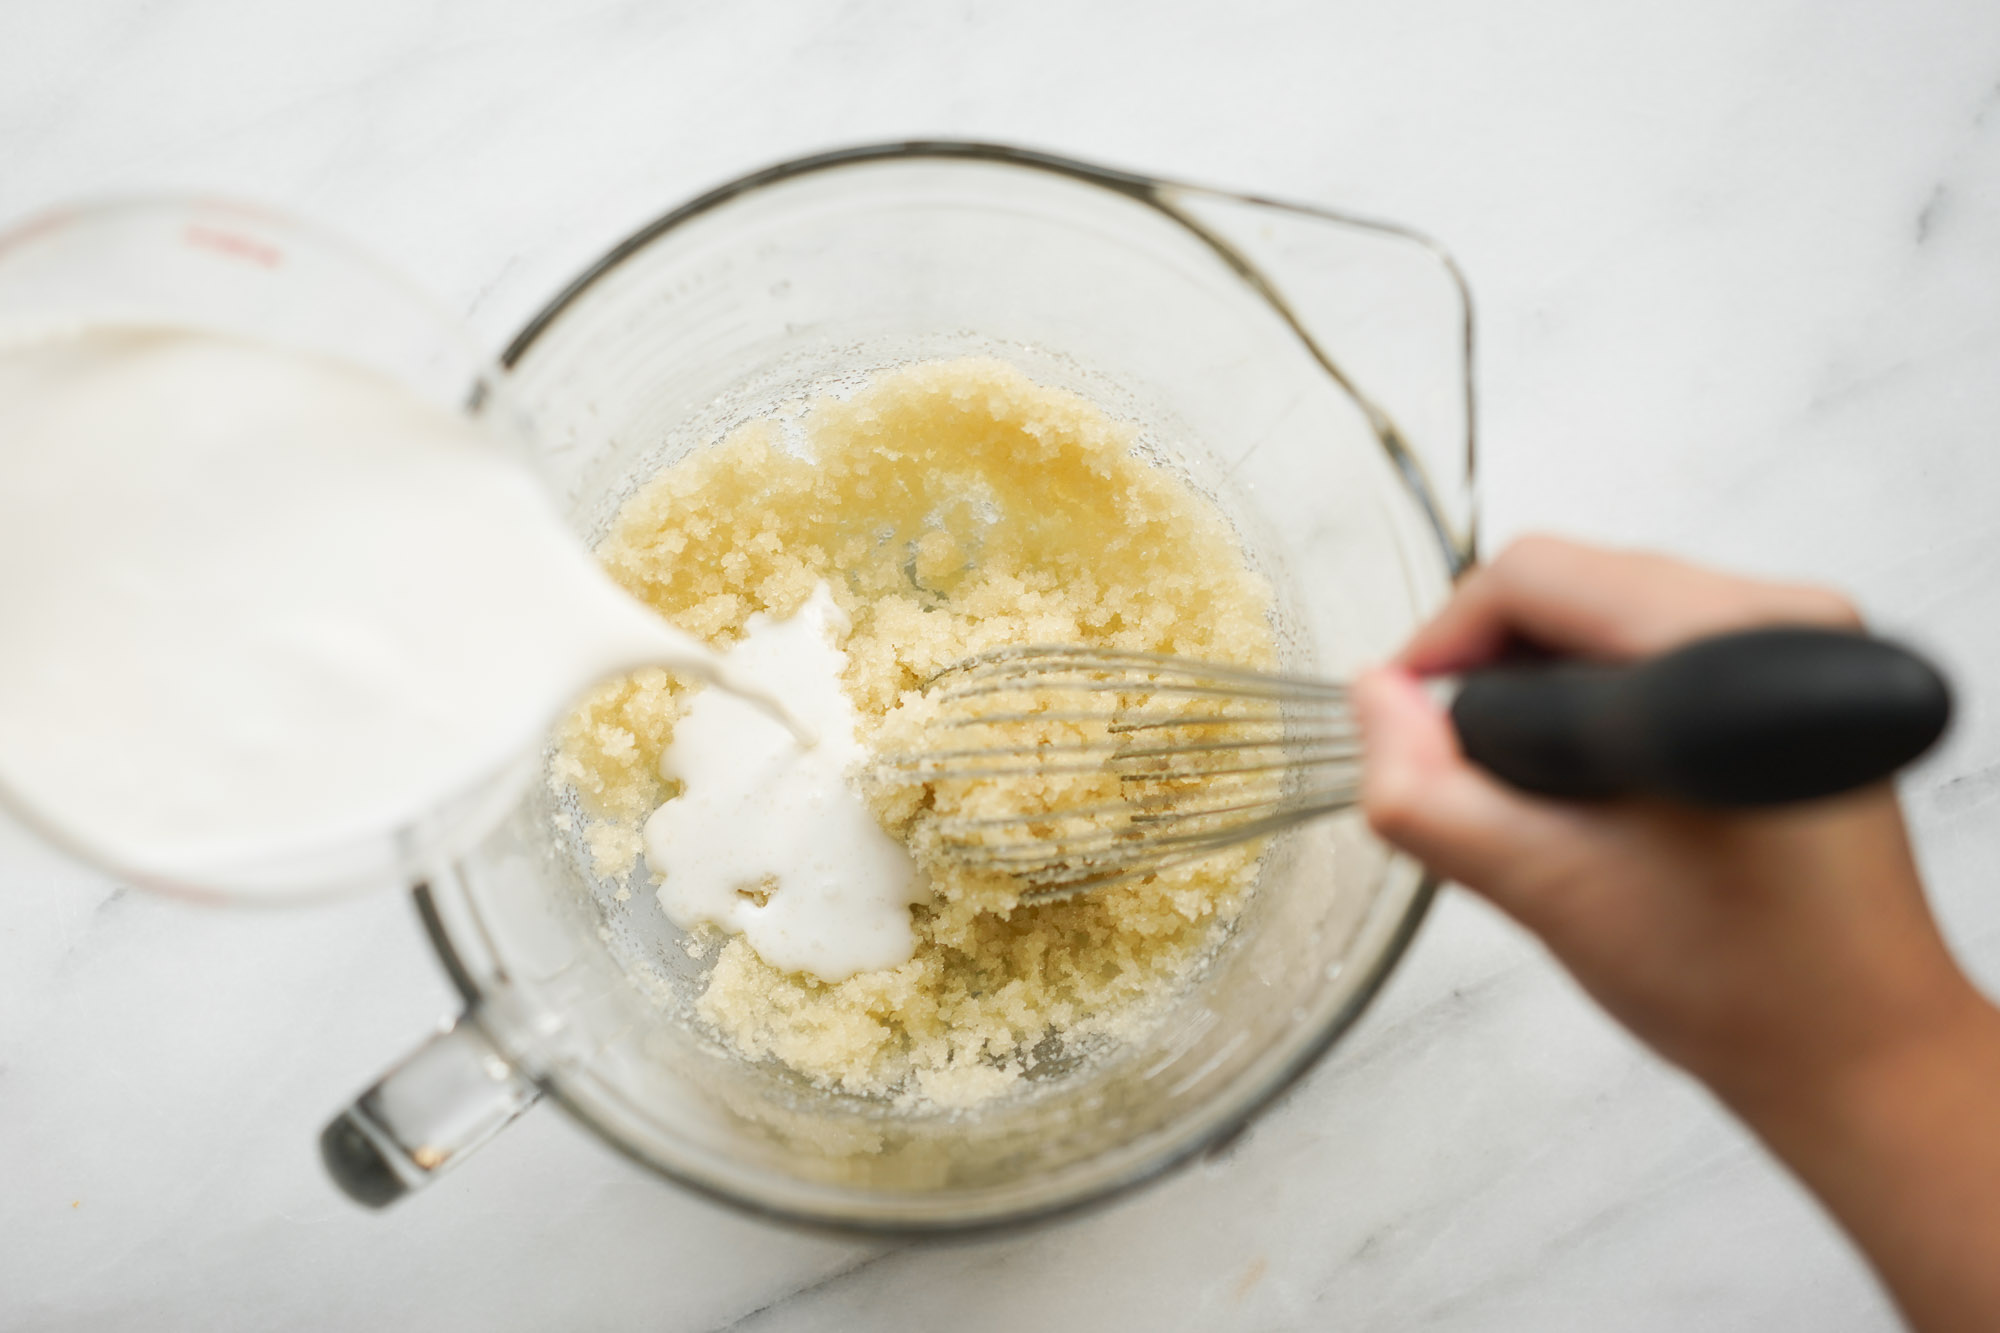
- Pour the coconut milk and whole milk and whisk until combined.

- Sift the rice flour, baking powder, and salt into the wet ingredients. Whisk together the ingredients until there are no more lumps. Pour the batter into the molds about 80% of the way up.
- Put the molds on a sheet pan to help stabilize the bibingka. Put the molds and sheet pan into the oven.
- After 9 minutes, add the salted egg topping to the bibingka and continue to bake for another 10 minutes. **NOTE: for coconut shreds, wait until 11 minutes to prevent burning the coconut. For cheese topping, wait until 19 minutes before adding to prevent burning the cheese.
- After 19 total minutes bake time, rotate the bibingka molds 180° to promote even baking since the back of the oven is usually hotter. Cook for an additional 5 minutes.
- Test the bibingka by pushing a cake tester or toothpicks into the middle of the bibingka. If it comes out clean, the bibingka should be done. If it’s wet, continue to cook for an additional 2 minutes and then check again. The bibingka should be firm in the middle and slightly golden on the top, but not burned.


Hello! Excited to try your recipe, but don’t have banana leaves. Could I just place the batter directly into a greased mold? Thanks in advance!
I haven’t tested this but I believe it should work. I would check the oven sooner and more frequently since it may bake faster though.