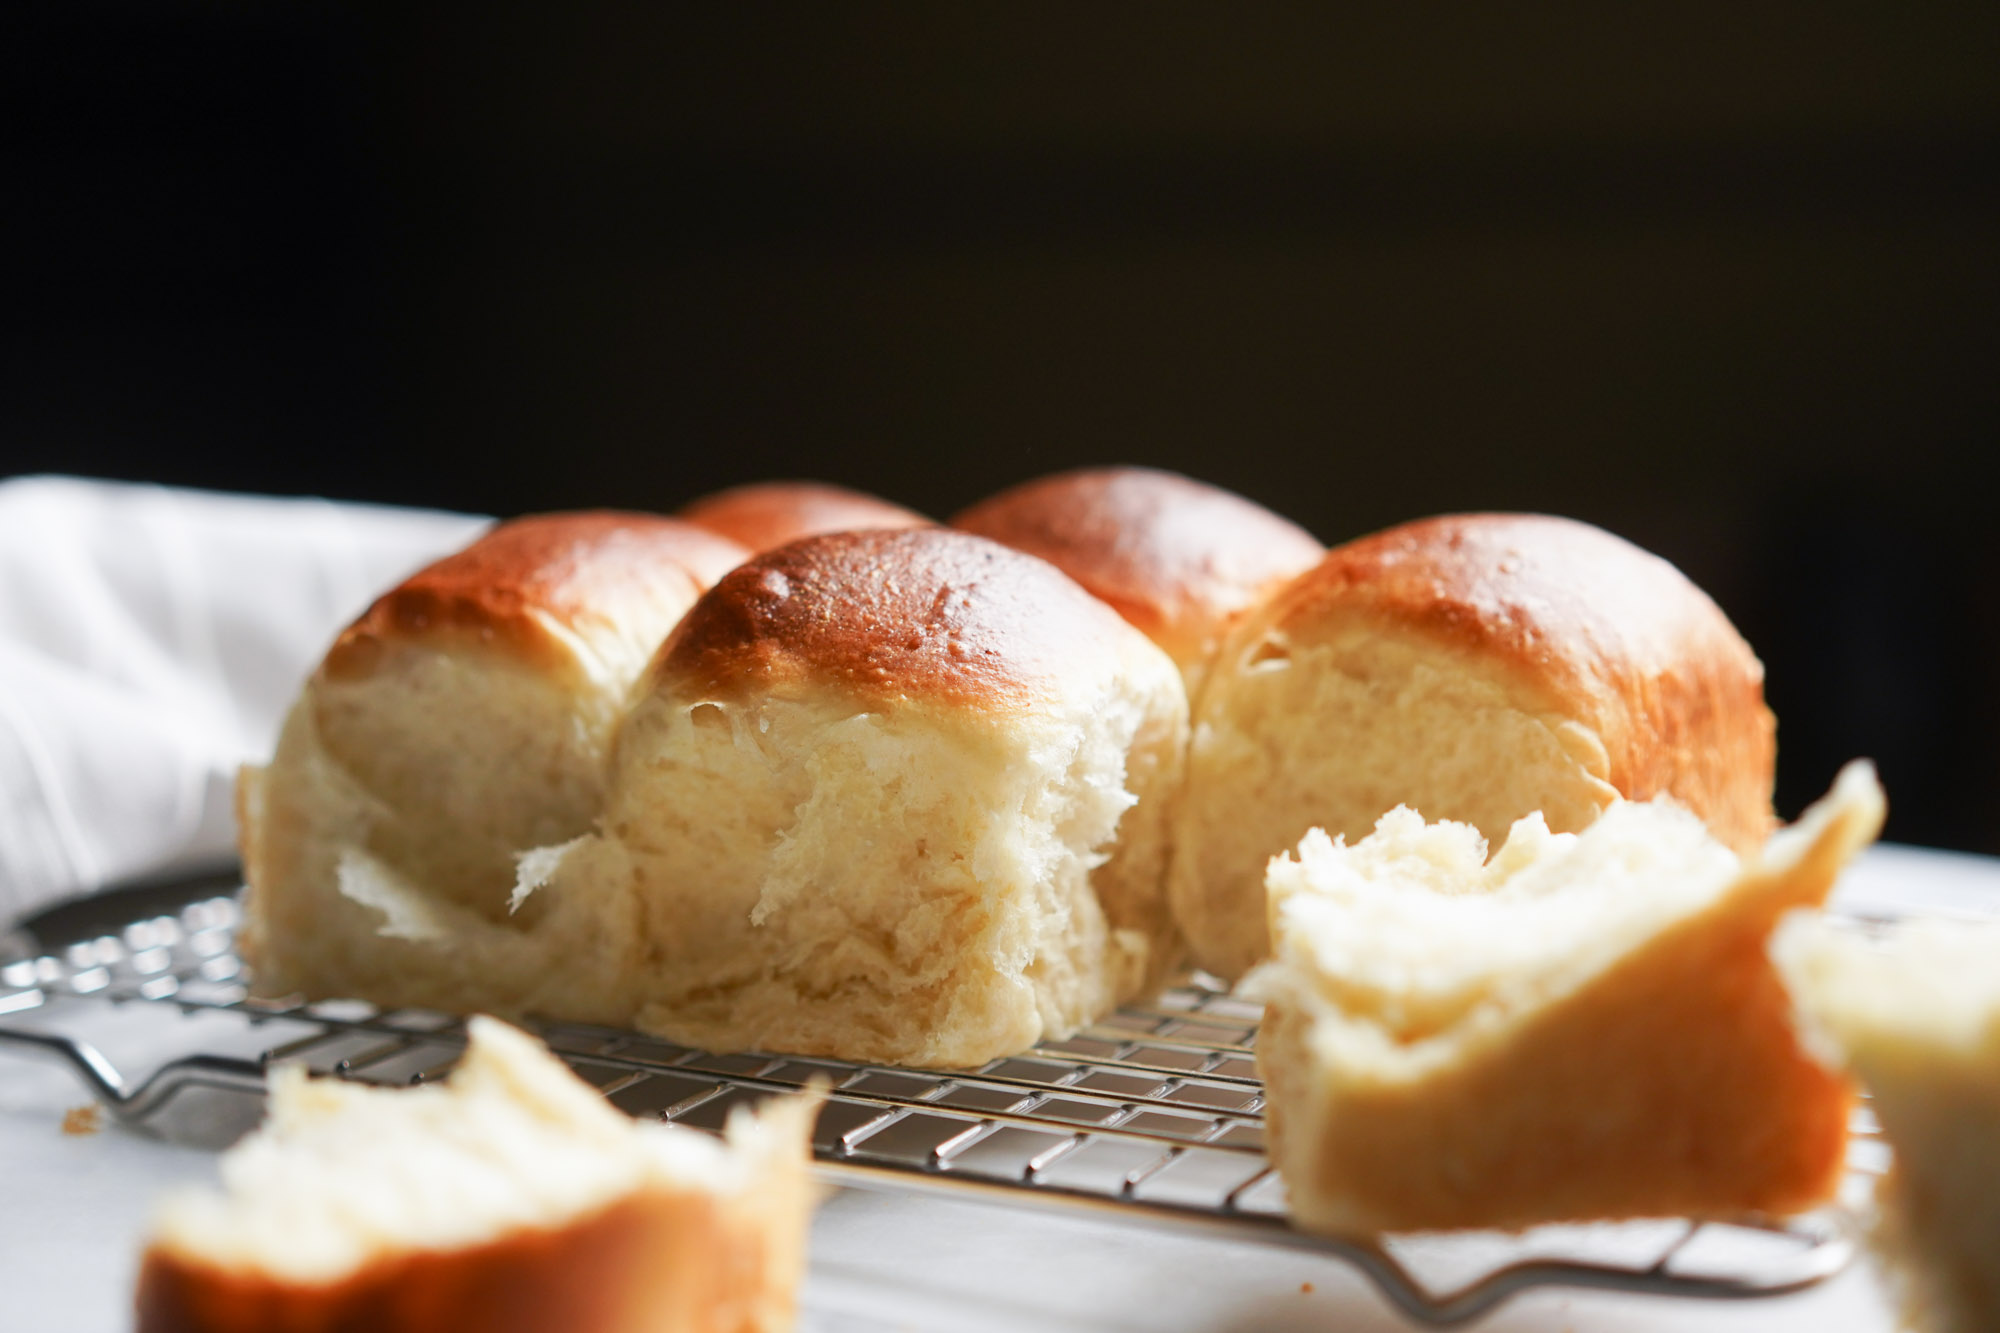
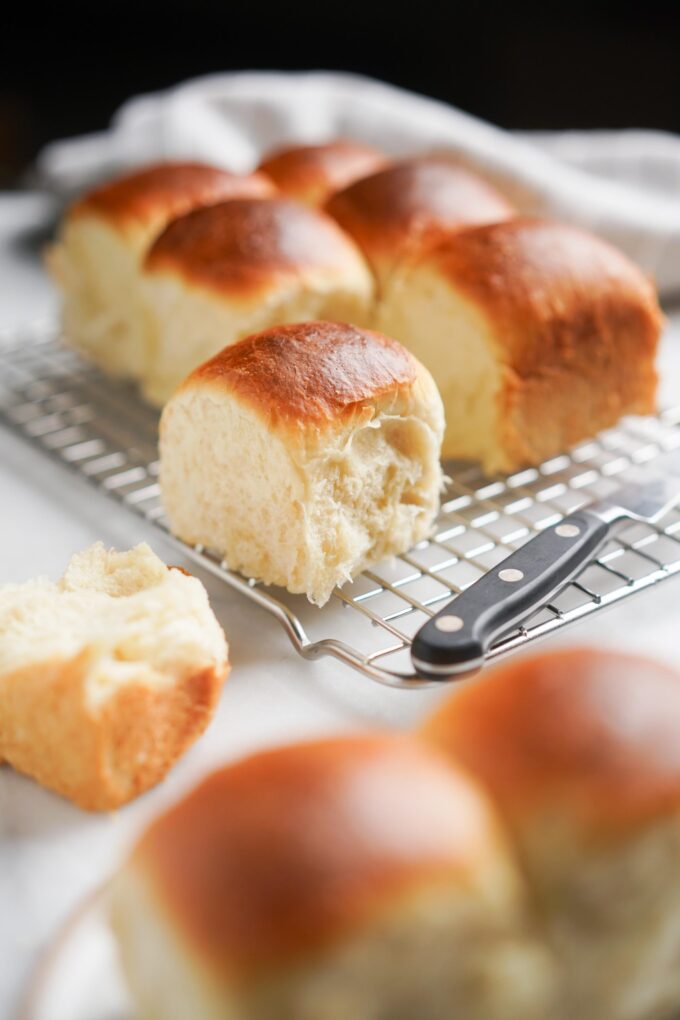
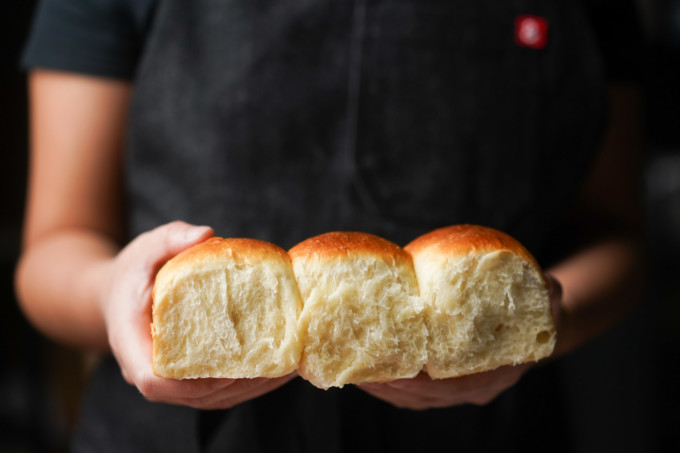
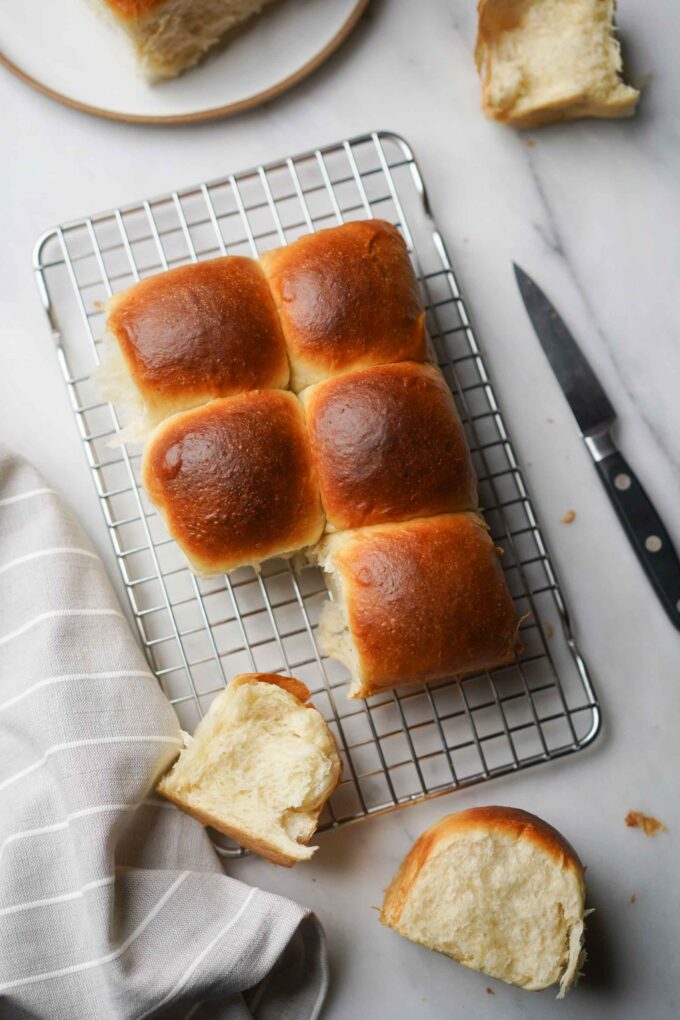
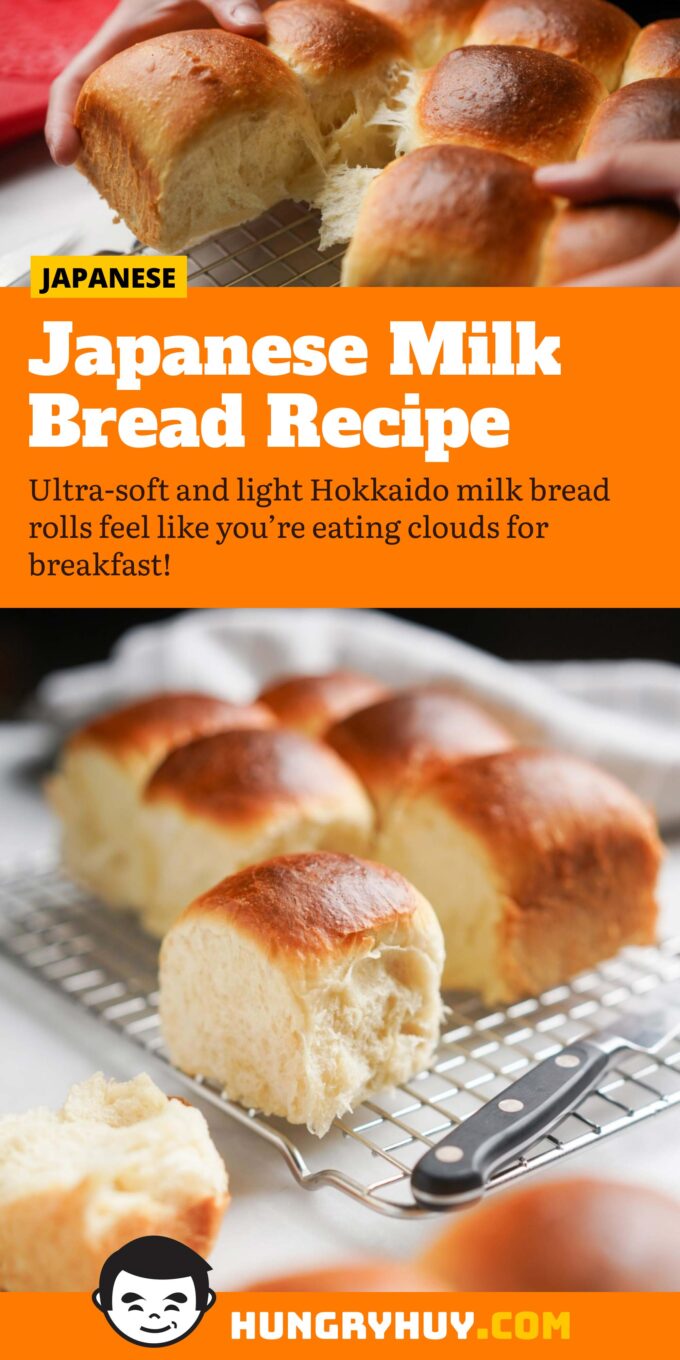
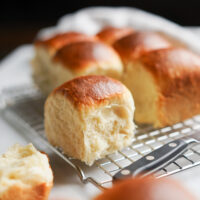
These ultra-soft and light Hokkaido milk bread rolls (also known as Japanese milk bread) feel like you’re eating clouds for breakfast! If you love the smell of fresh baked, sweet bread just as it’s coming out of the oven, then this bread is for you.
This Hokkaido milk bread recipe will teach you some tips and tricks, like making a tangzhong starter, to get the fluffiest bread rolls for your next dinner.
What is Hokkaido milk bread?
Hokkaido milk bread is a super soft and fluffy type of bread that originated in the Hokkaido region of Japan. While it’s sweeter and milkier in flavor than most western bread rolls or loaves, it’s quite popular in Japan and Asia in general.
You might have also heard of the term shokupan, which quite literally translates to “eating bread” and is also a general name for milk bread in Japanese. Hokkaido milk bread can be considered a type of shokupan that is slightly sweeter and milkier.
In the US, I’ve been fortunate enough to have local Asian bakeries that bake fresh milk bread rolls like Cream Pan or 85° Bakery and Cafe. I’ve always enjoyed making bread and wanted to recreate some of my favorite sweet milk bread rolls at home, like pandesal. Even when I’m lazy, I still like to make airfryer biscuits with premade dough.
The tangzhong method & starter

The special texture of Hokkaido (and most Japanese) milk bread is achieved from its high hydration percentage and the addition of a starter made by using two types of techniques:
- Yudane method: This is the traditional method of making milk bread in Japan. It’s a patented method involving mixing boiling water and flour and then letting it rest overnight. It uses 20% of the flour contents of the entire recipe, and then a ratio of 1-part flour to 1-part water.
- Tanzghong method: This method was popularized by blogger and author Christine Ho in the early 2010s after adjusting the method from Yvonne Chen’s book, “65° C Bread Doctor.” Tangzhong uses 7% of the entire flour contents of the recipe, and then a ratio of 1-part flour to 5-parts liquid. It’s a faster method and you just make a roux of flour and liquid (often water or milk or both), and heat it on the stove until it thickens to the consistency of thick paste. You are then able to use the starter in the dough once it’s cooled to the touch.
The more water in a dough, the softer and fluffier the end texture will be. This also amounts to the texture lasting longer after its baked. In previous trials, my milk bread stayed fluffy and fresh for at least one week on the counter in an air tight container.
Hokkaido milk bread dough usually has at least 70% hydration level, which might seem a bit scary because the more water in your dough, the stickier or more difficult it is to manage. However, the special starter (or roux) that is included in the dough makes it easier to work with.
Both of these starters include hot liquid mixed quickly with flour. When the liquid is heated with the flour, it gelatinizes and forms a stable structure as a paste. By adding the starter into the dough, you add more liquid into the dough overall without watering it down and making it extra sticky.
After testing various recipes with both types of started and adjusting to my own preferences, I made a recipe that uses the tangzhong method for making a starter to save a bit of time and get the same results as I did by using the yudane method.
How to make Japanese / Hokkaido milk bread
Making Hokkaido milk bread is very similar to other types of bread making with the addition of a starter: mixing the ingredients together, kneading for a period of time until you get smooth and elastic dough, proofing TWICE to get fluffy texture, shaping the dough, and then baking. Doesn’t that sound simple?
Well, if you feel overwhelmed, here are some tips to help you succeed in making Hokkaido milk bread at home.
Ingredient and dough making tips
- When measuring out any baking recipes, always use a scale! Not everyone uses the same brands of flour, sugar, or even measuring cups, so this is a fool proof way of getting an accurate measurement of each ingredient.
- As a reference, I use King Arthur bread flour, Kirkland’s organic cane sugar, Fleischmann’s rapid rise instant yeast, and Diamond Crystal salt for this recipe.
- You can use active yeast instead of instant yeast, just make sure to activate and bloom your yeast in the warm milk before you start mixing the ingredients together.
- Soften your butter and make sure to add it into the dough AFTER it’s formed into a ball to prevent the oil and fat in the butter from gluten formation.
- I would definitely recommend using a stand mixer if you have one to help your hands and forearms out while kneading. However, you can mix and knead by hand until your dough is smooth and elastic.
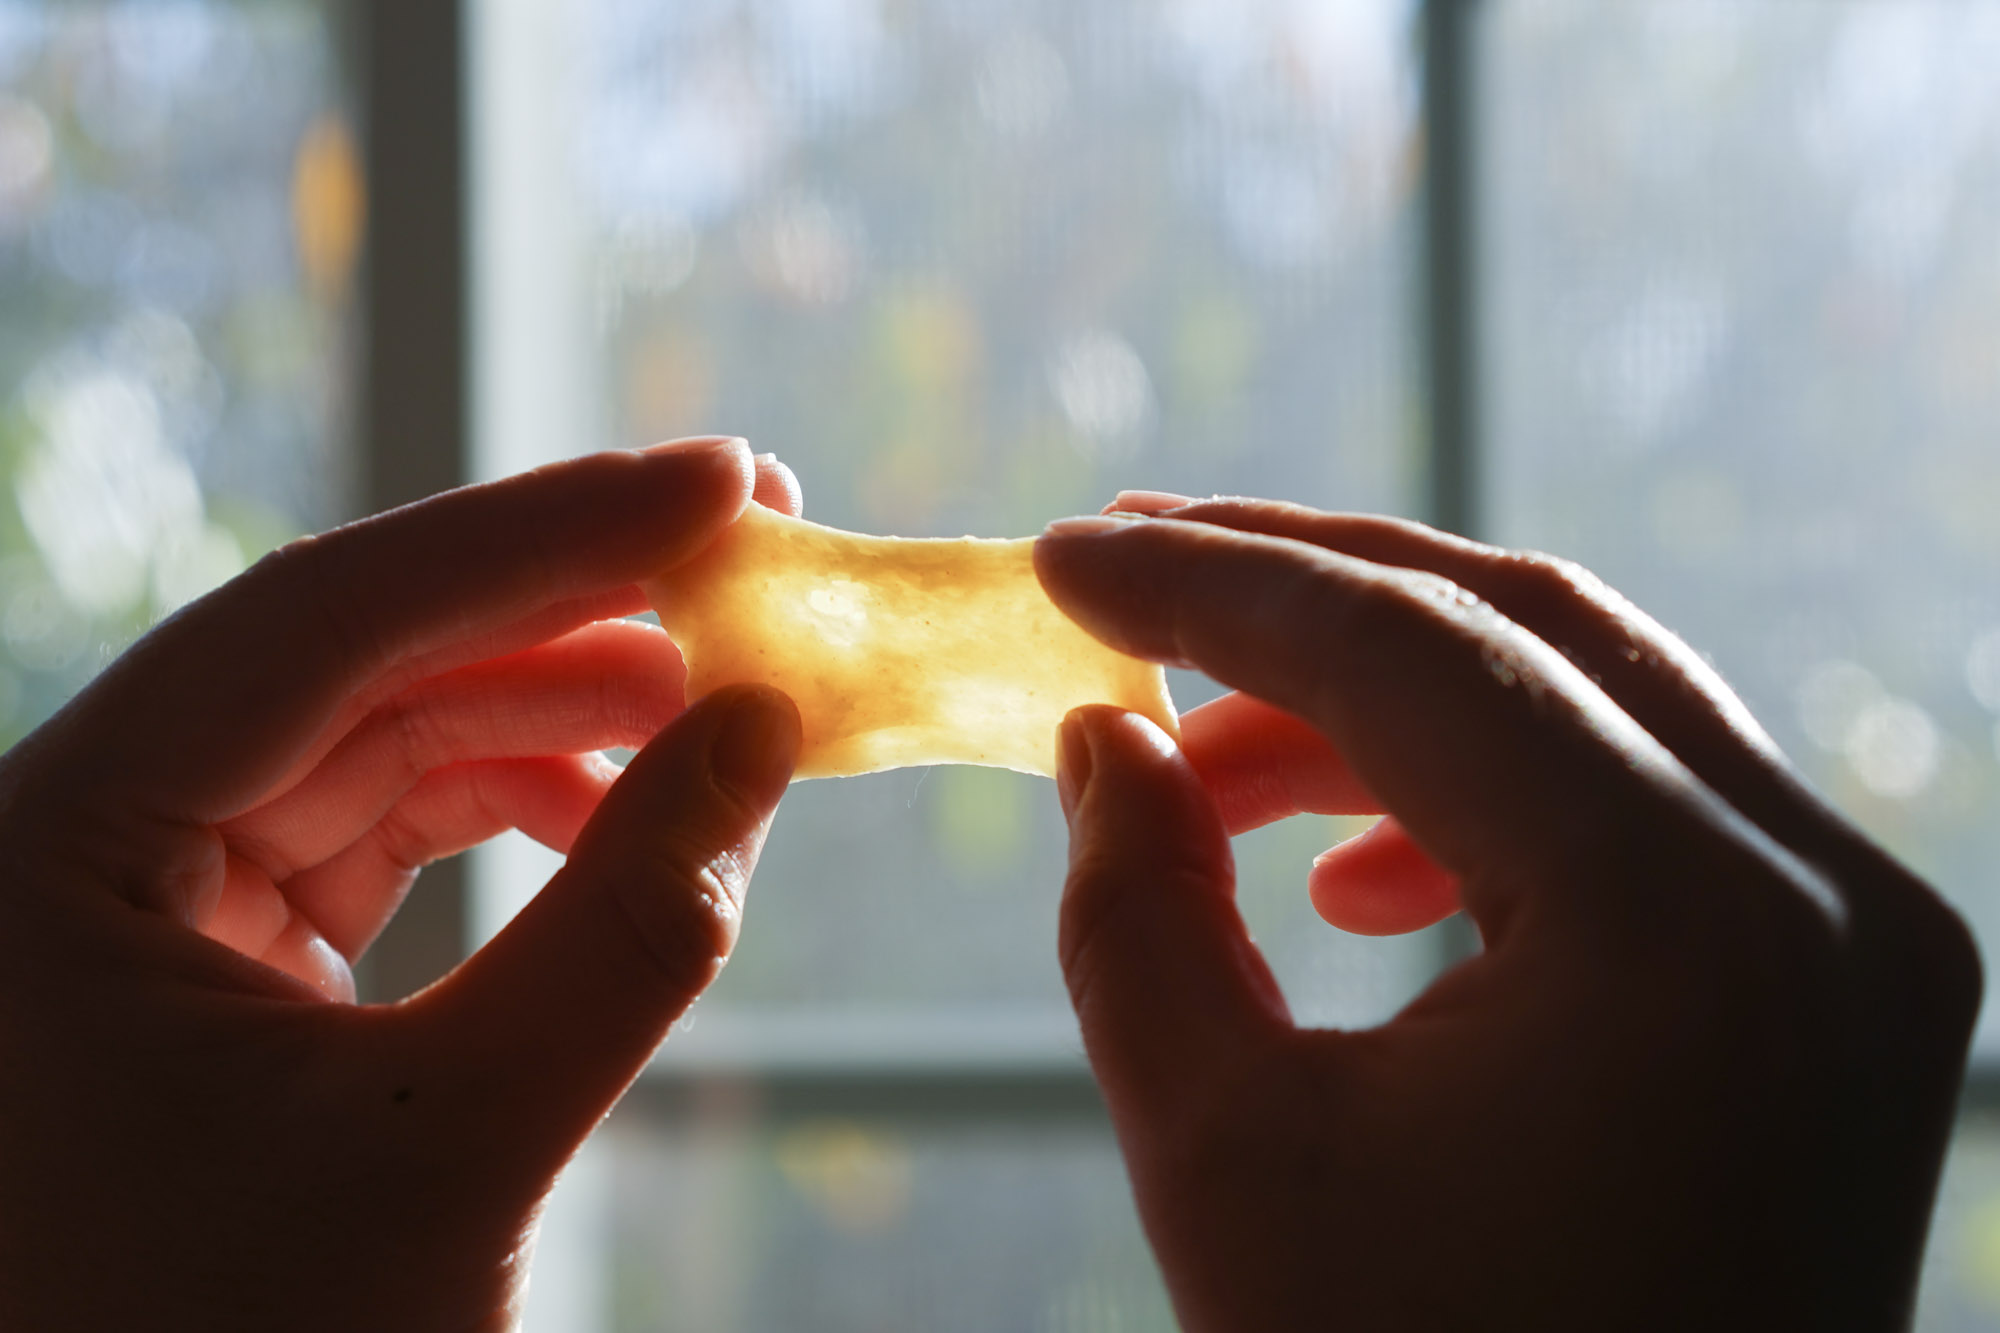
- Use the windowpane test to make sure the gluten has developed properly in your dough. While this dough is slightly stickier than other types of dough, you should be able to do this test. Pinch one teaspoon of the dough and use your thumbs, pointer finger, and index finger to carefully stretch the dough between your hands (for example, it should look like a rectangle or a window!). The center should turn slightly translucent enough so that light can pass through without the dough breaking.
Dough proofing and baking tips

- Typically, sweet doughs, like milk bread, can take longer to proof so proofing can take anywhere between 1 to 2 hours from my experience.
- If it’s particularly cold in your environment, I like to use a warm oven to proof the dough to make sure it rises properly. Ideally you want to proof dough in between 75°-90° F.
- After rising, punch the dough to remove the excess gas. This can prevent bubbly bread.
- Proof the bread TWICE. Yes, bread making definitely takes a long time, but the second proofing period after shaping the rolls is critical to having big, fluffy balls of clouds.
- Butter your pan before placing your dough to help with releasing the baked rolls.
Storing
One great thing about this recipe is that it lasts longer on the counter than other types of bread—that’s due to the starter. The bread should last at least one week on the counter in an airtight container.
Japanese Milk Bread Recipe (Hokkaido Milk Bread Rolls)
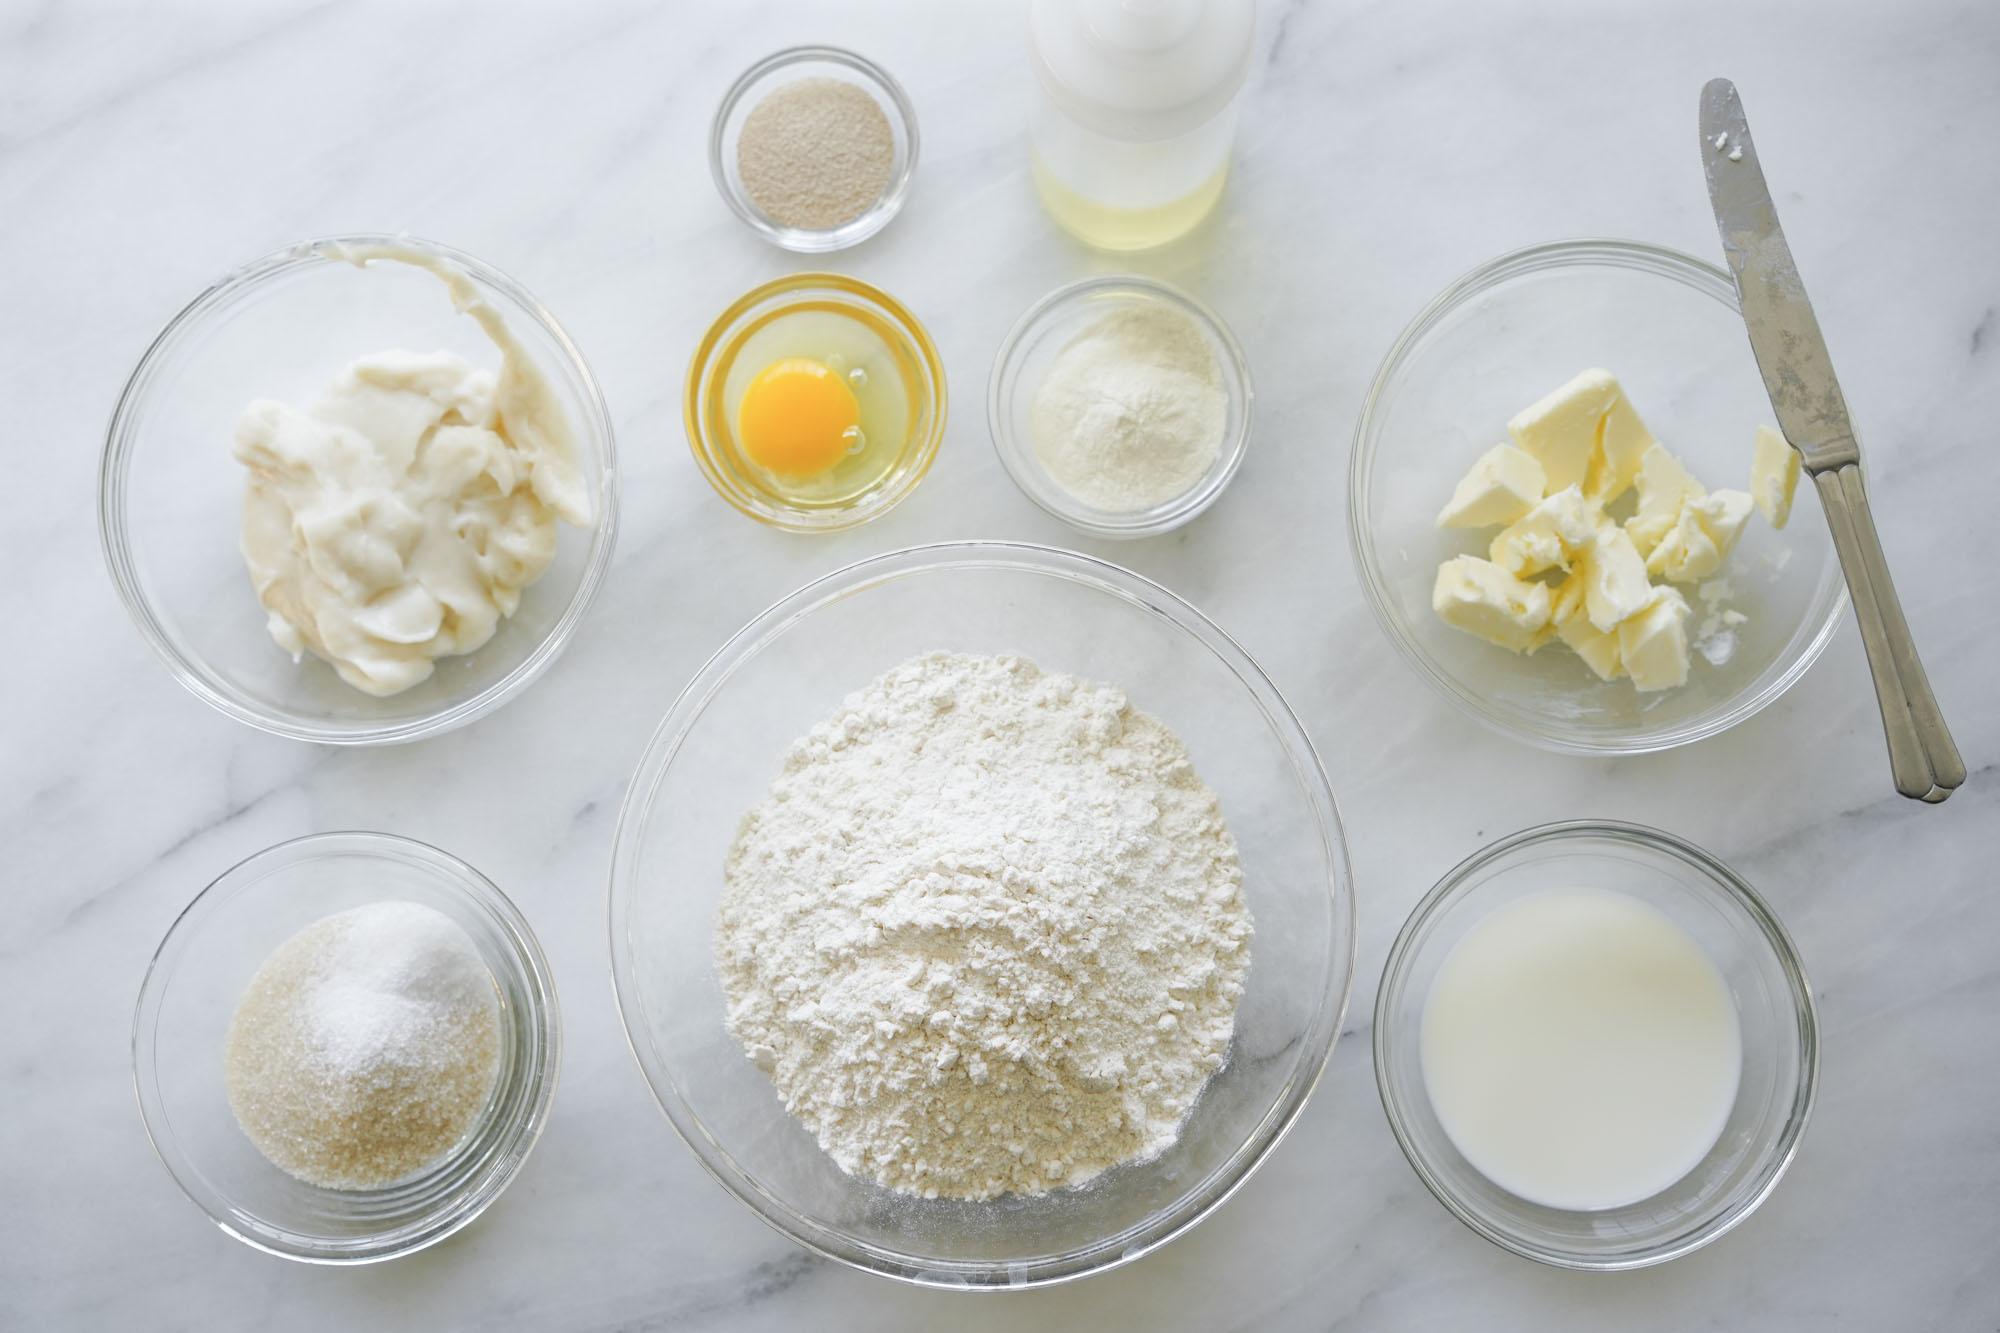
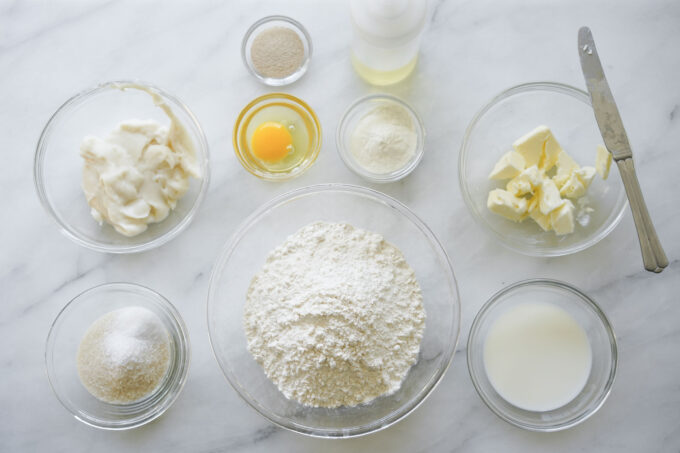
Ingredients
Tangzhong starter
- 24 g bread flour
- 2 fl oz water
- 2 fl oz whole milk
Dough
- 1 egg room temperature
- 2 fl oz whole milk room temperature
- 350 g bread flour
- 7.3 g instant yeast
- 16 g milk powder
- 75 g white granulated sugar
- 4.5 g salt
- 57 g unsalted butter cubed and softened
- vegetable oil
Equipment Used
- stand mixer or mixing bowl and wooden spoon
- rectangular or square baking pan
Instructions
Tangzhong starter
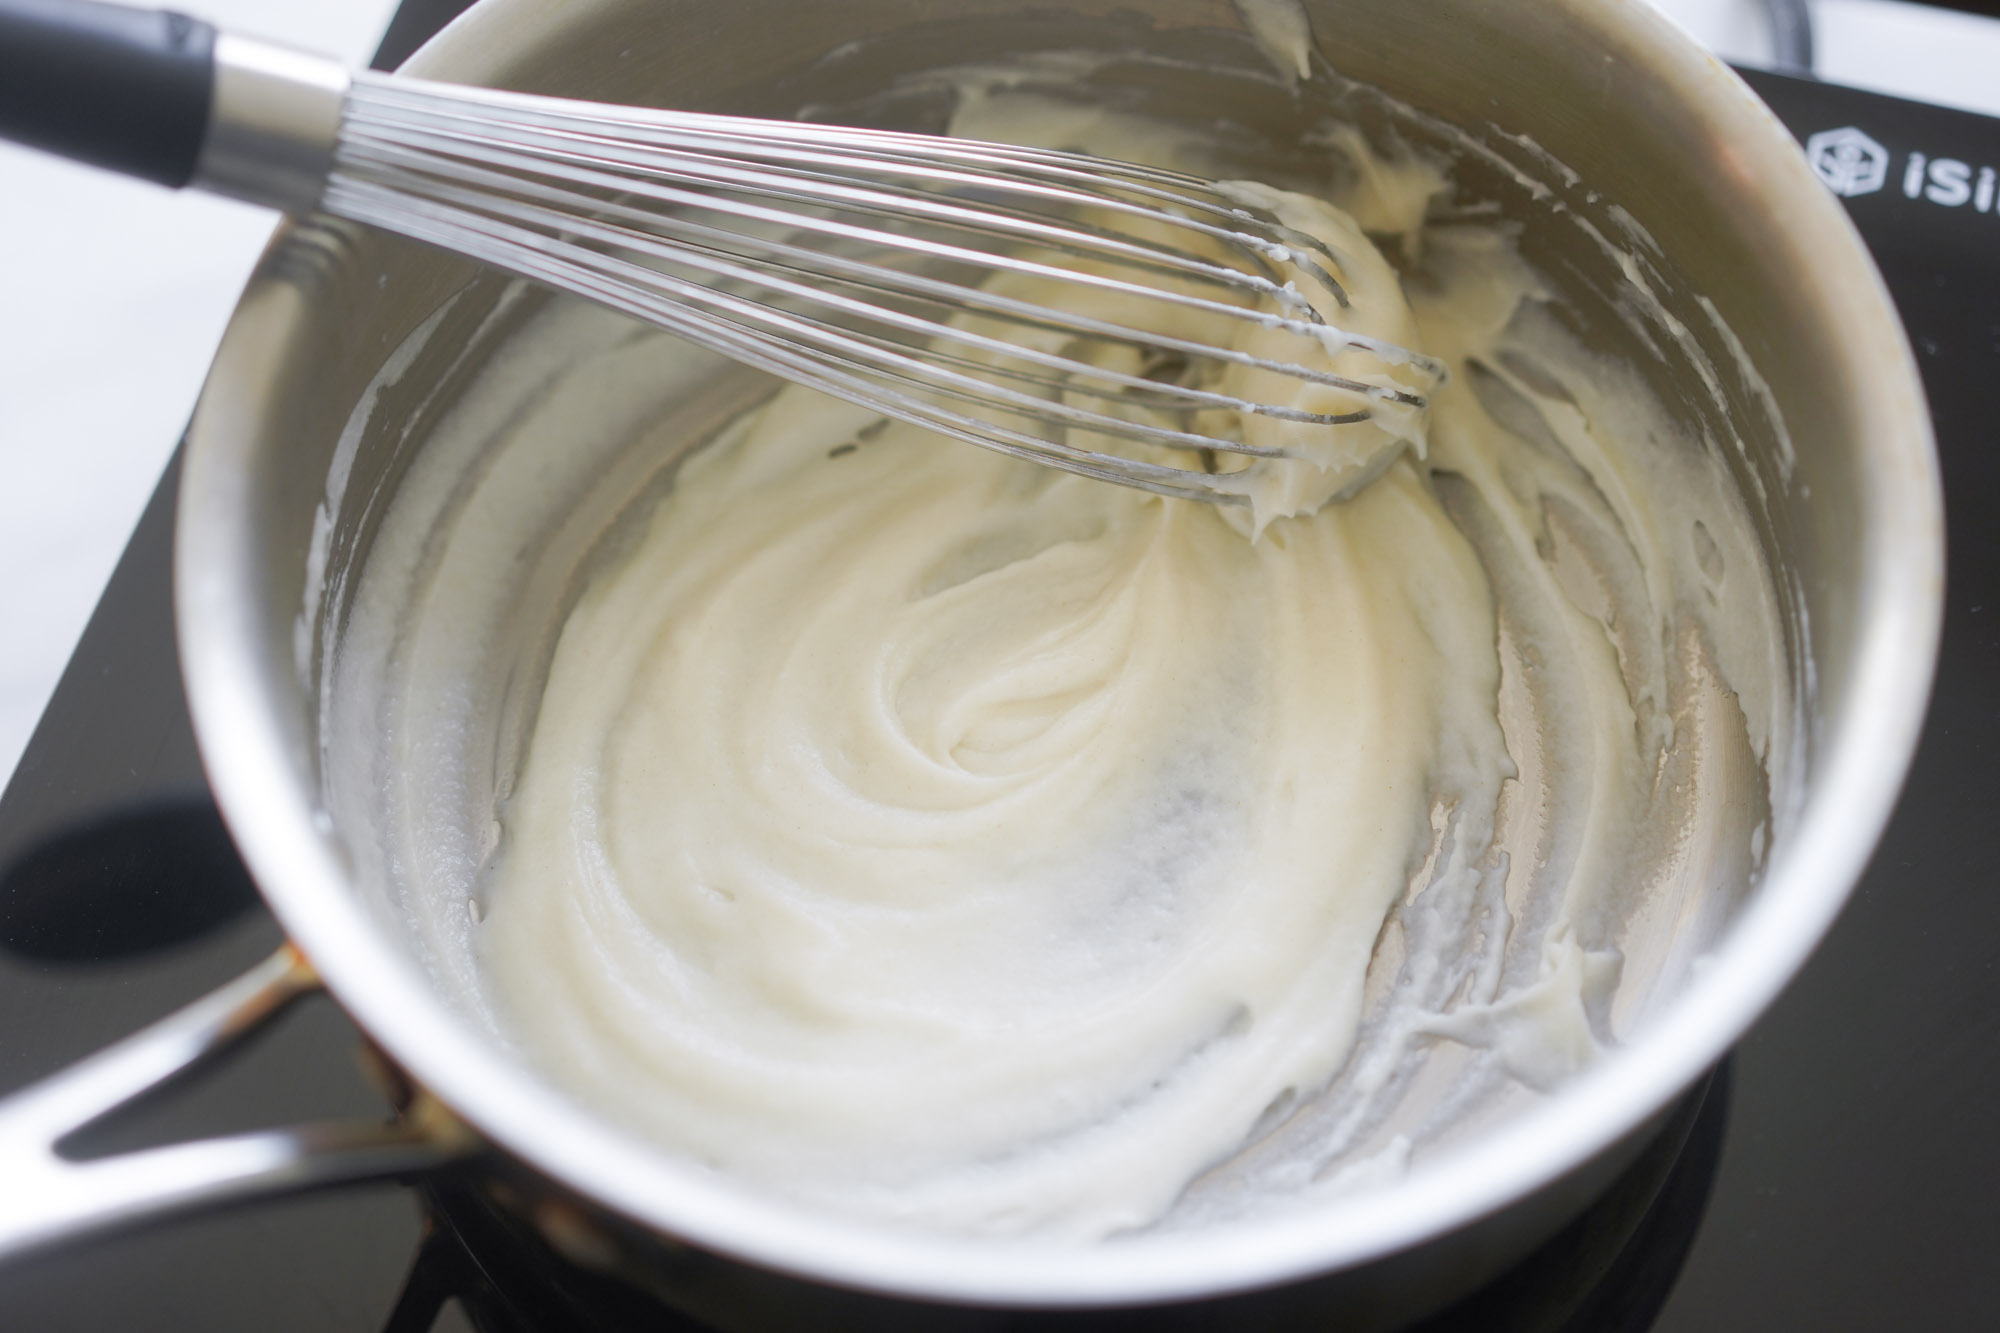
- In a small sauce pan, whisk together the water, milk, and flour until the flour is dissolved. Turn on the heat to medium-high and whisk consistently until the liquid begins to boil.
- Reduce the heat to medium and continue to whisk until the liquid begins to thicken to the same consistency as pudding.
- Remove from the heat and transfer to a heat safe container. Let it cool on the counter for about 10-15 minutes.
Dough
- Whisk together the egg and whole milk until combined.
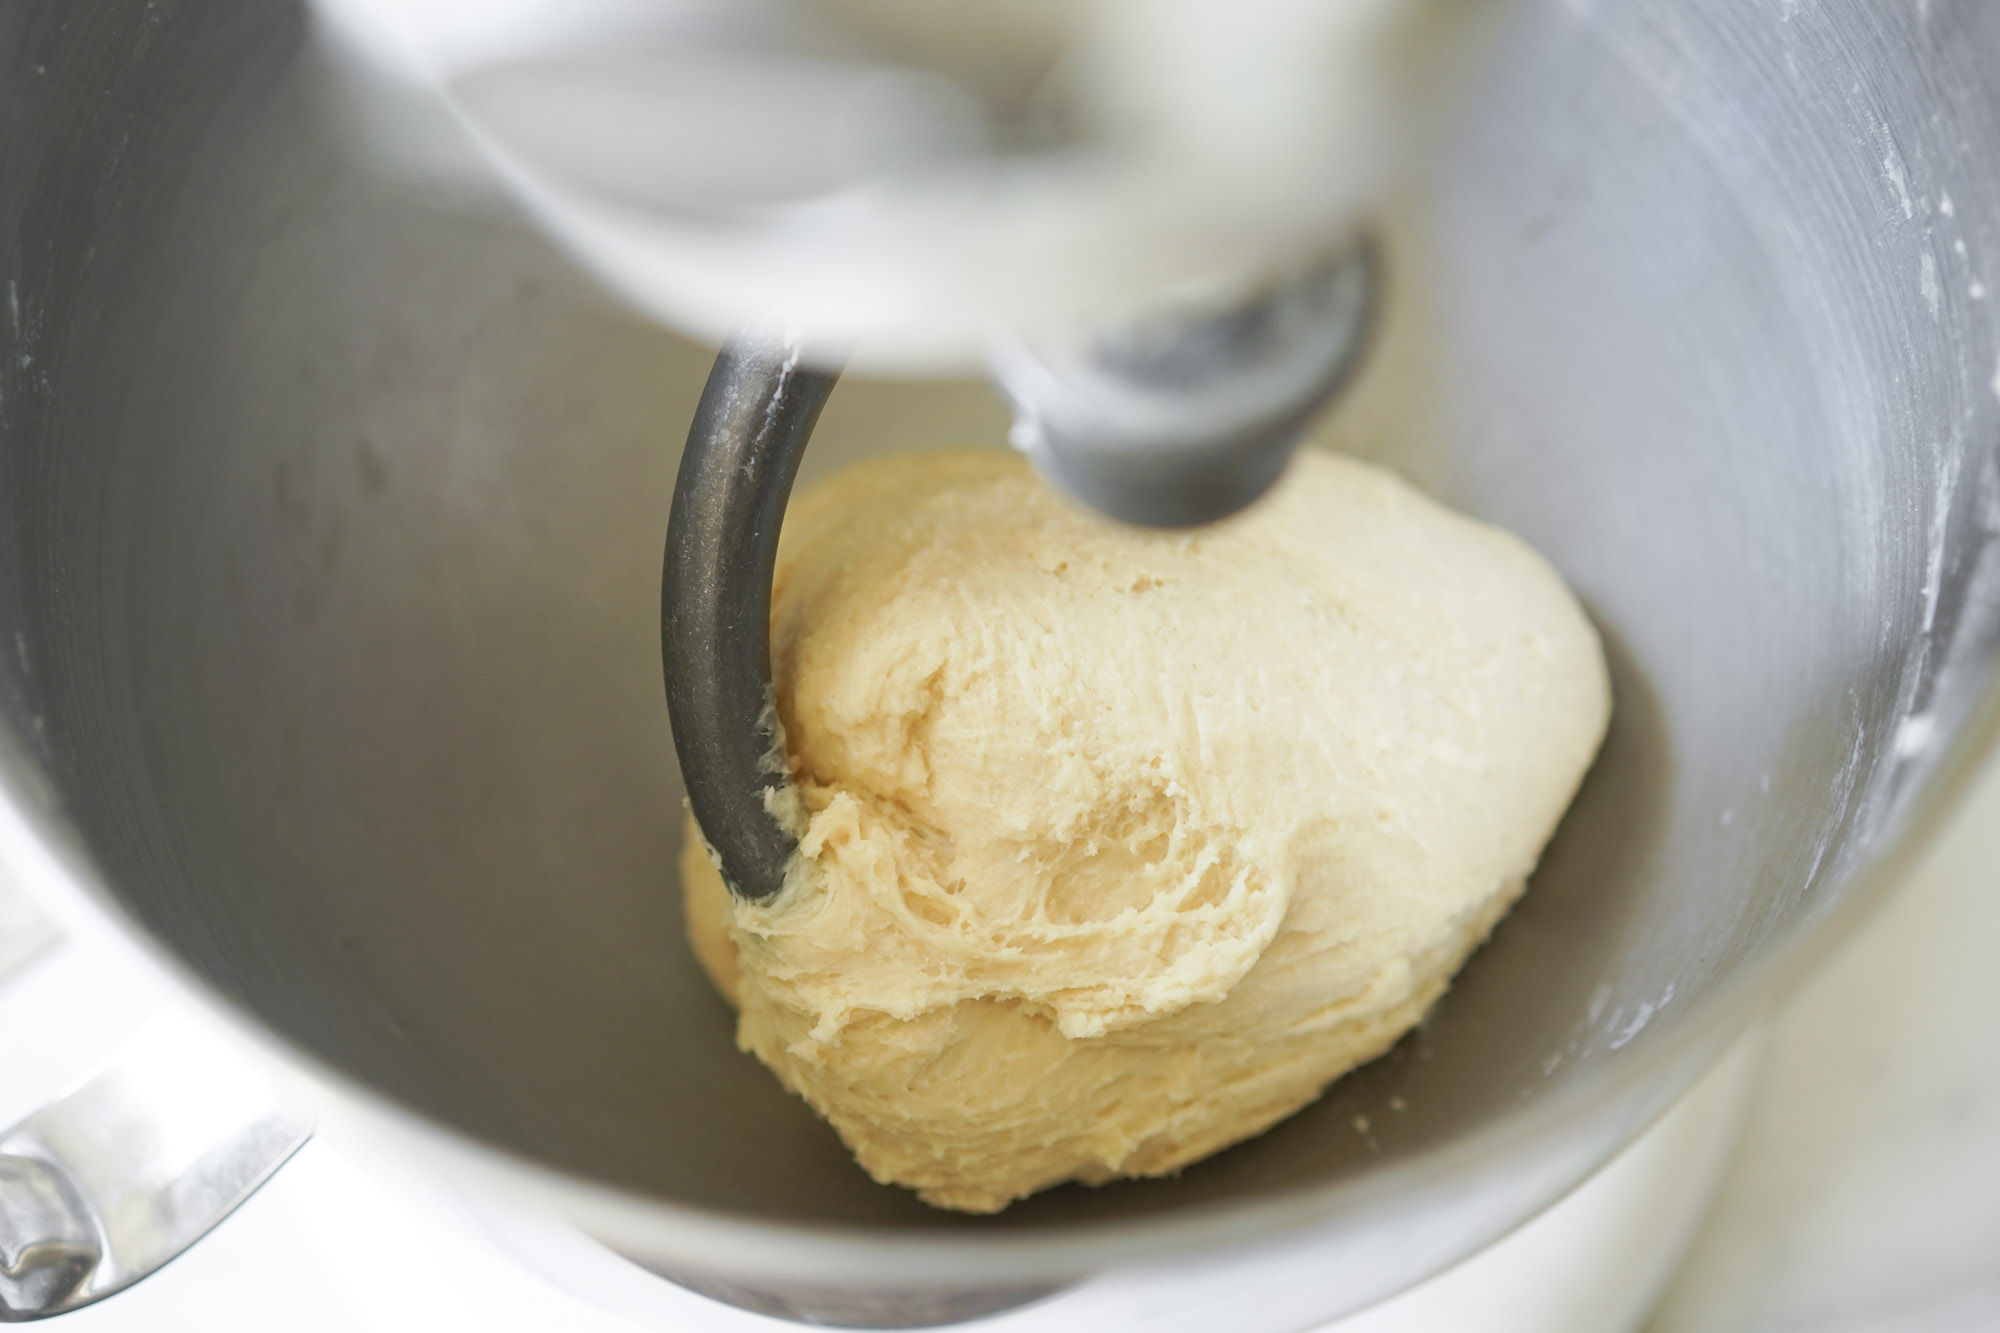
- In a stand mixer with the dough hook attachment (or bowl), stir together the bread flour, yeast, milk powder, sugar, and salt. Pour the egg and milk liquid and move the medium level (or level 5 on my Kitchen Aid). Add the tangzhong. Continue to mix for about 2 minutes or until the dough forms into a ball.
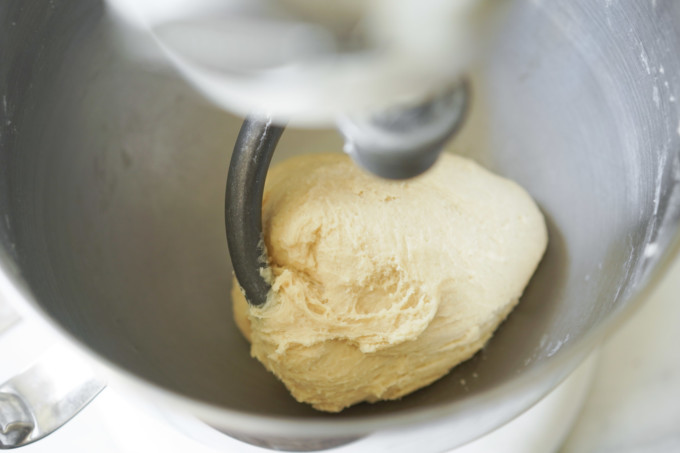
- Add butter into the stand mixer and continue to mix at the medium level for 5 to 7 minutes. The dough should fully incorporate the butter and become smooth and elastic.
- Windowpane test: Test the dough for sufficient gluten formation with the windowpane test. Pinch off about 1 teaspoon of dough and slowly stretch it between your pointer fingers, index fingers, and thumbs. Stretch it thin and hold it up to a source of light. If its thin enough to let light through like a “windowpane," you've developed enough gluten and can proceed. If the dough breaks or can’t be stretched, continue to knead for another 2 minutes and retry the test. Note: this dough has a stickier consistency, so be careful when stretching.

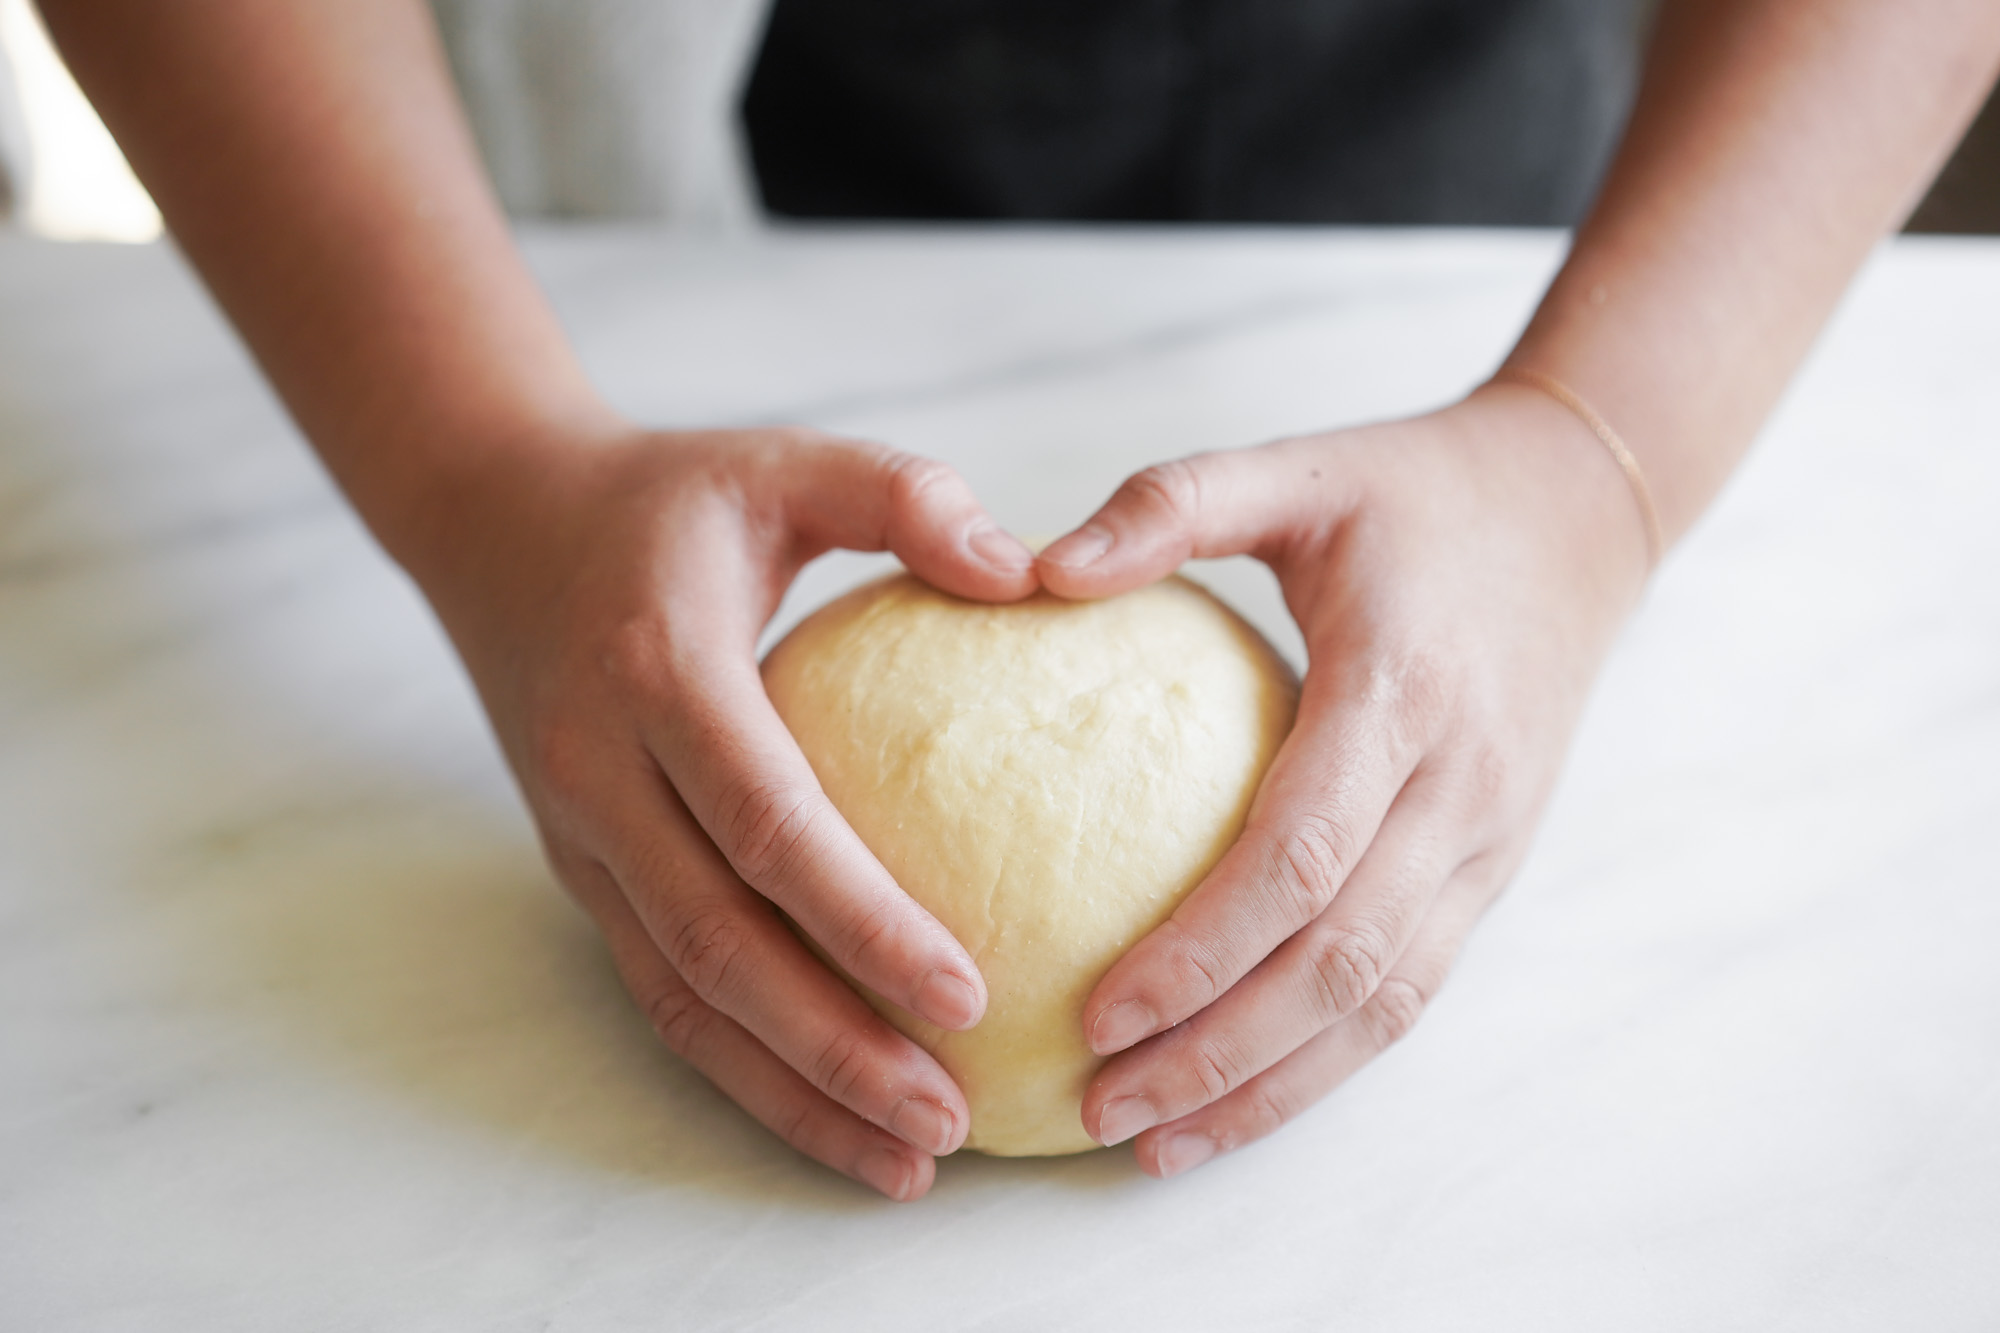
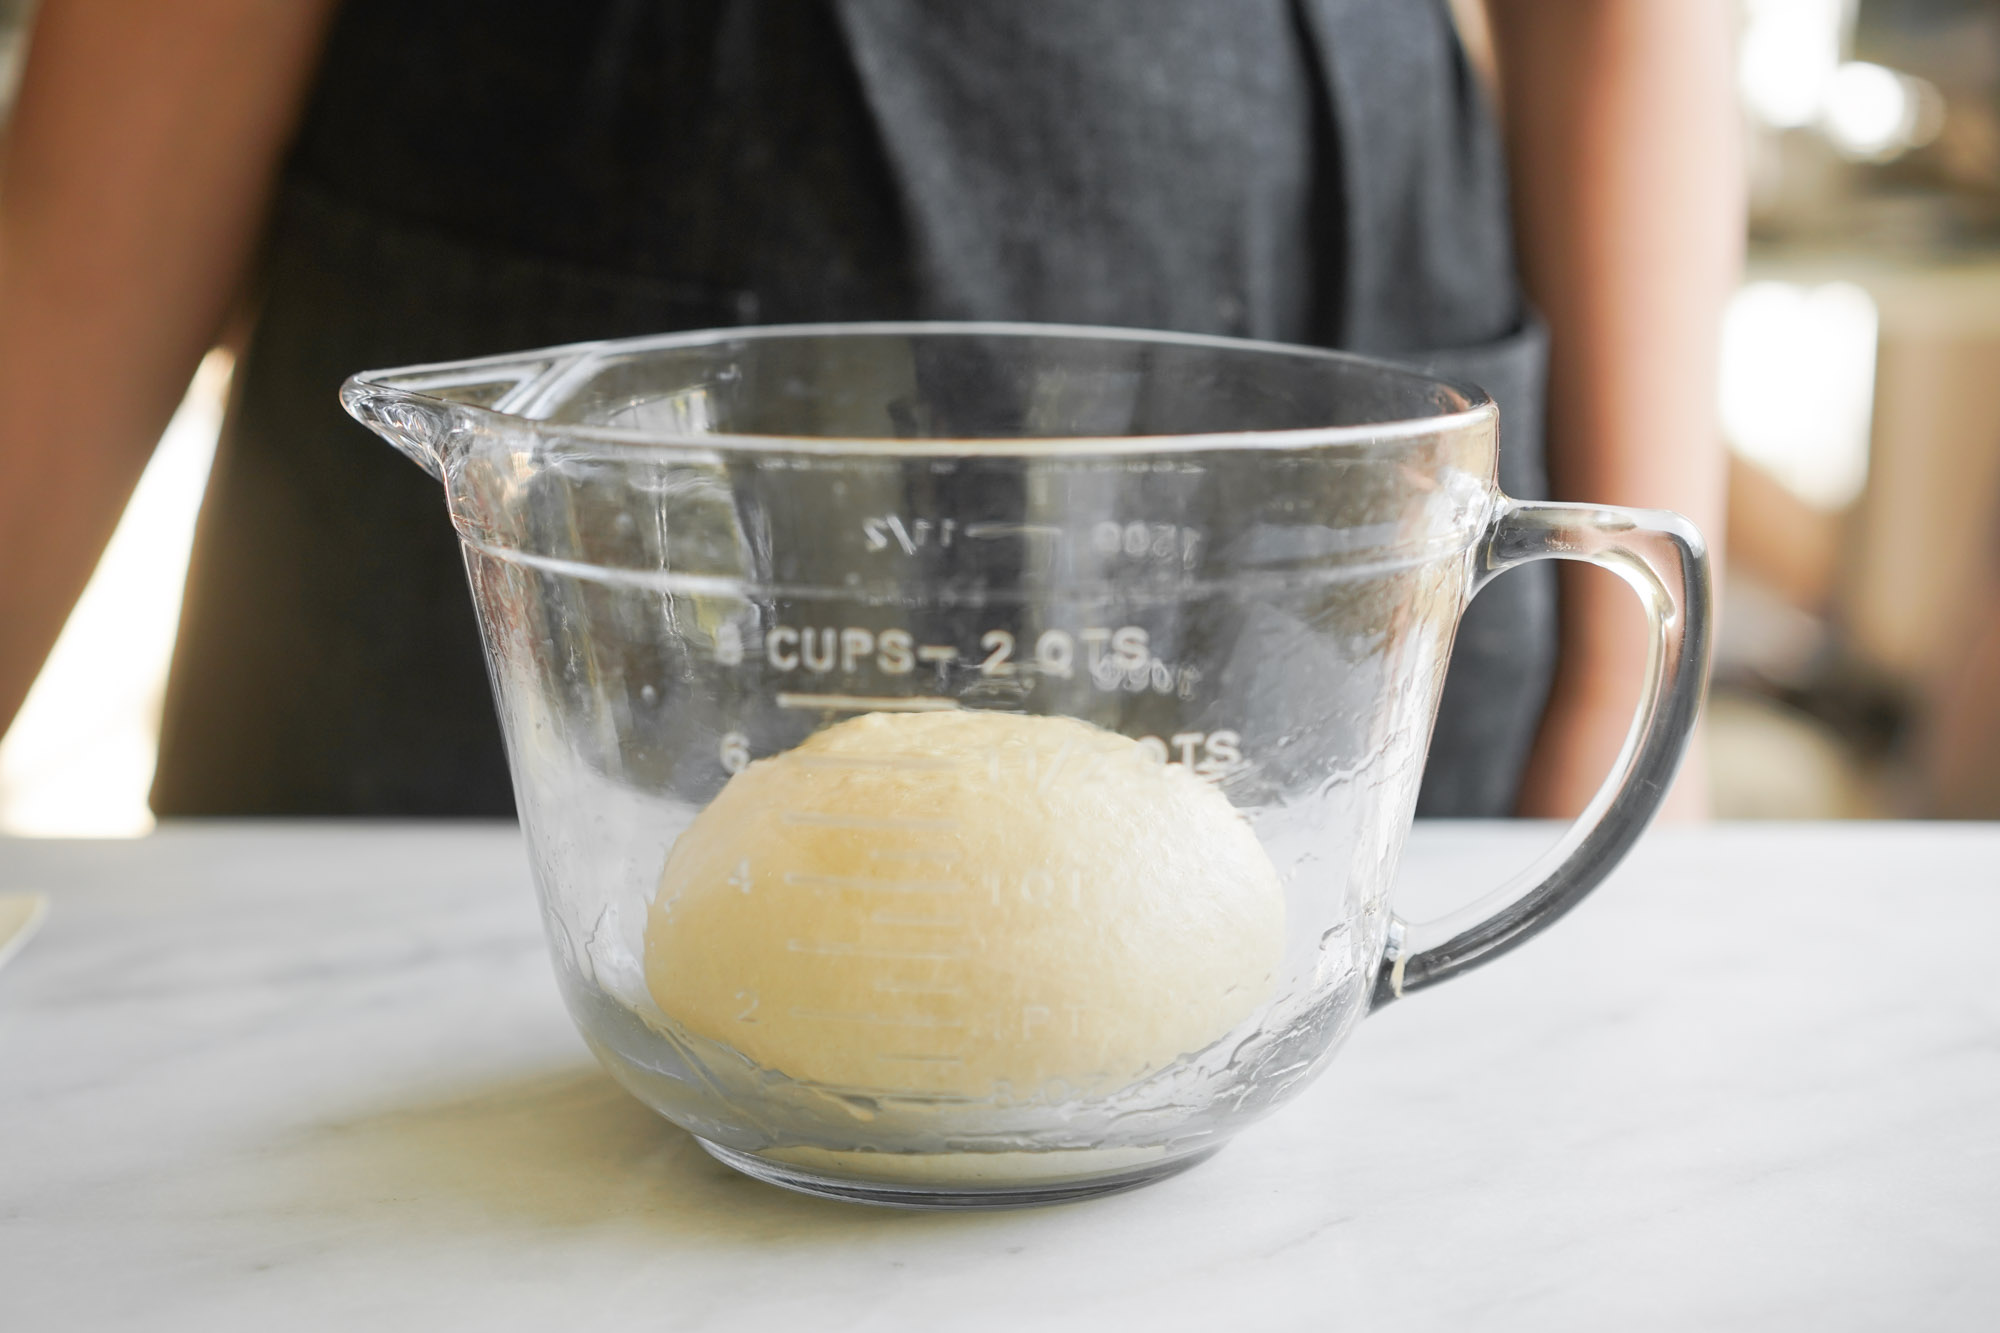
- Remove the dough and transfer it onto a clean surface. Form the dough into a smooth ball by encasing the dough in the middle of your hands. Make a heart with your pointer fingers and thumbs, then move your hands and the dough in a circular fashion until it forms a ball.

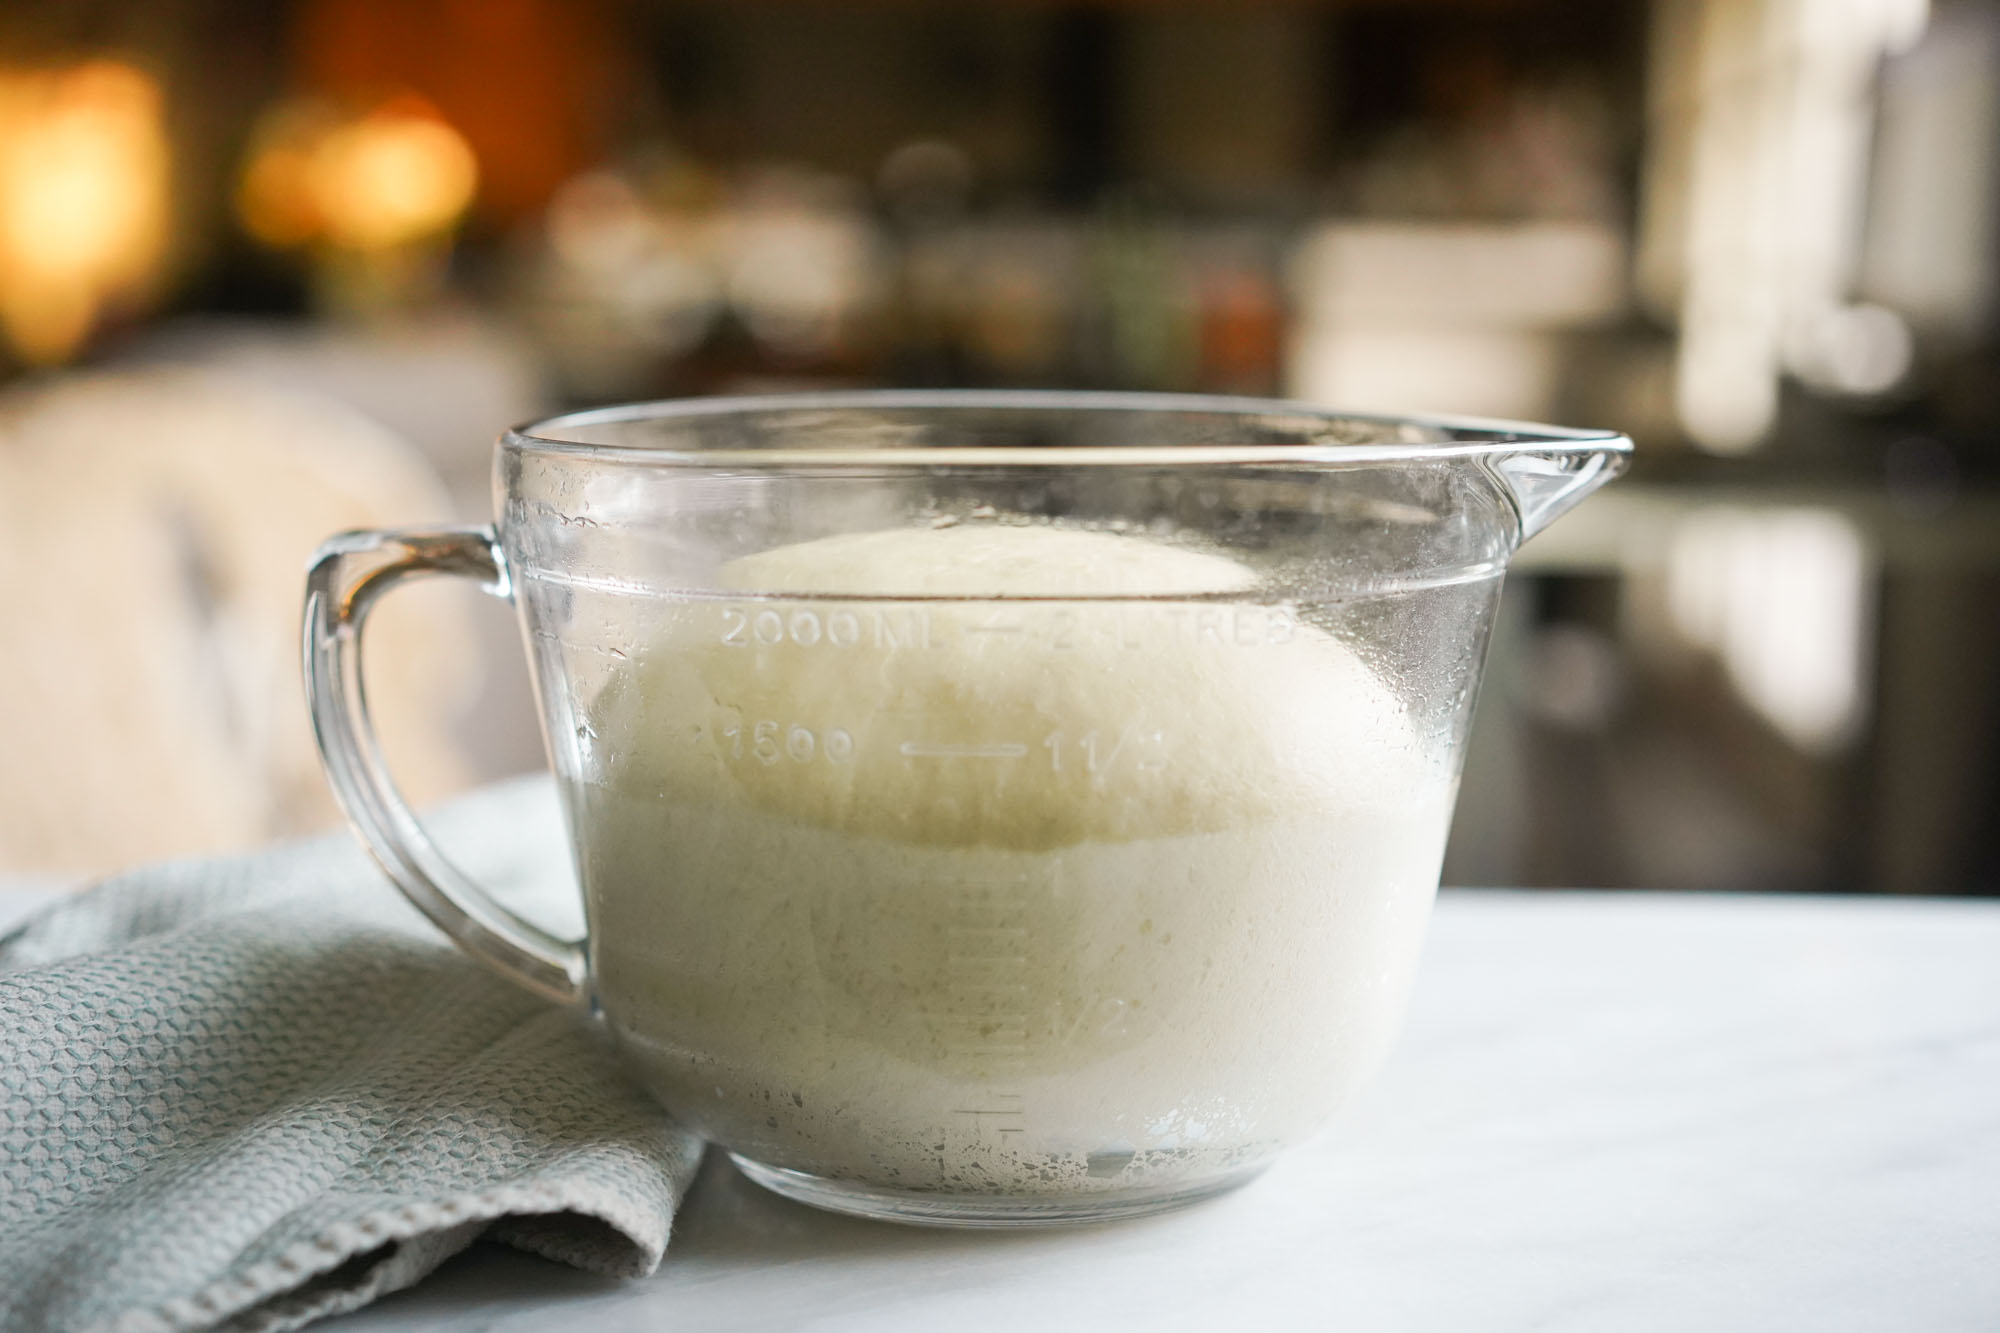
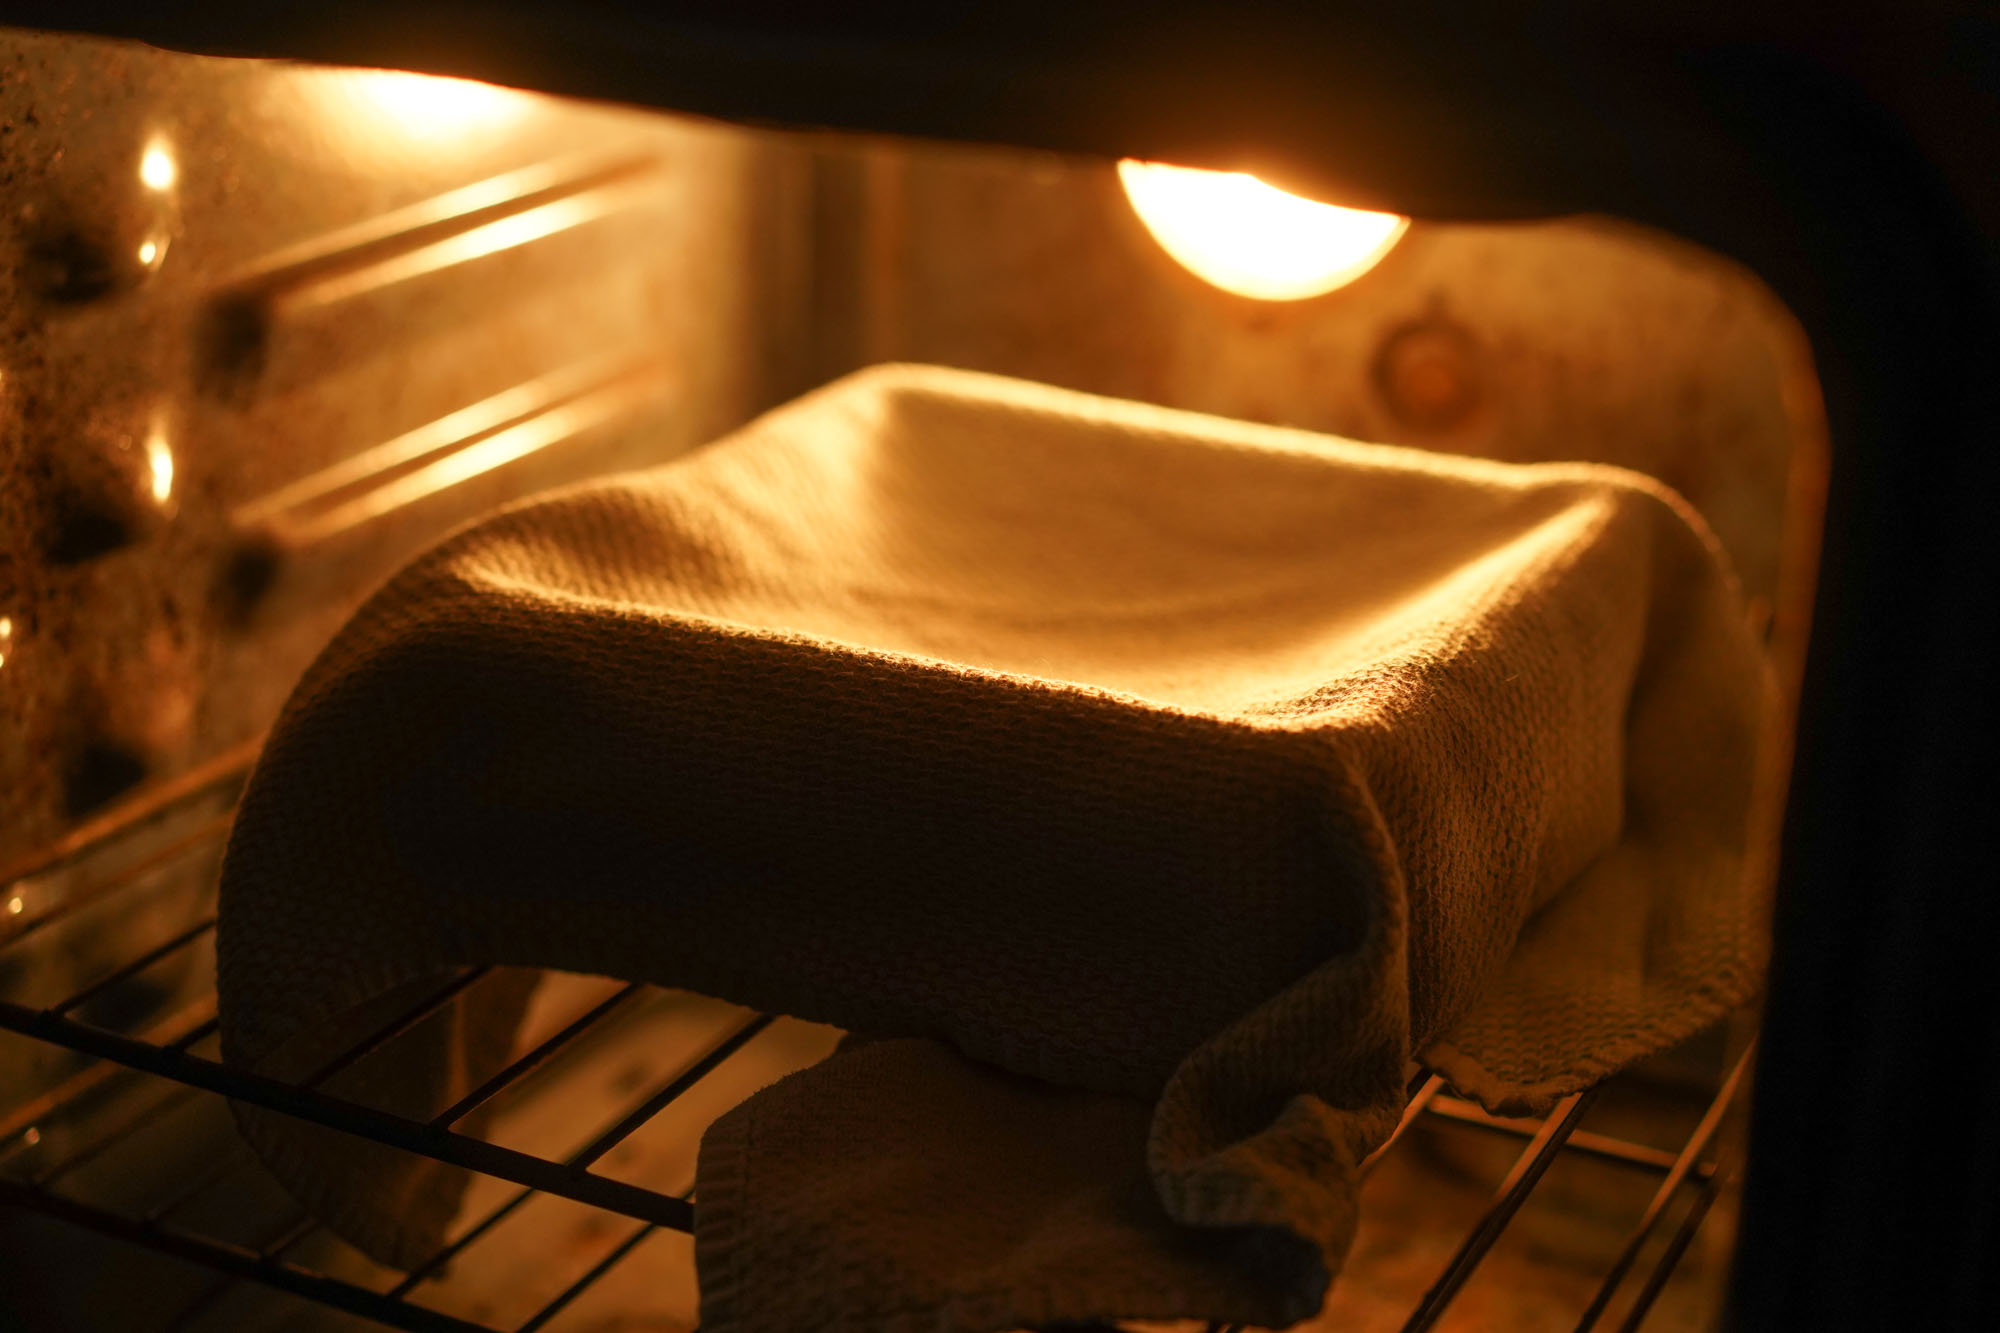
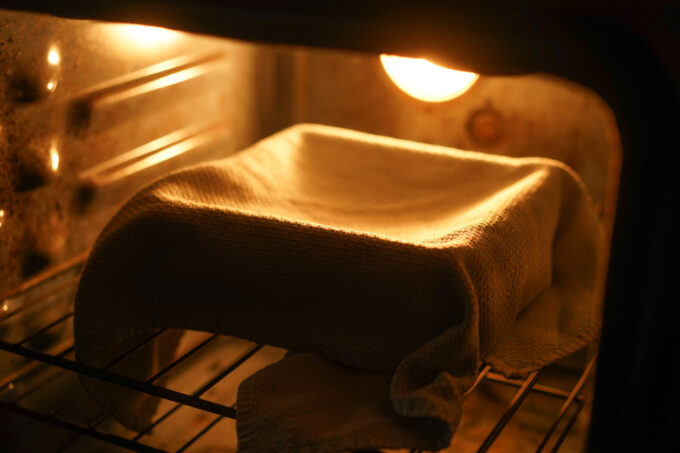
- Brush on a small amount of vegetable oil in a mixing bowl to coat the inside of the bowl. Transfer the ball of dough into this bowl and cover with a dish towel. Leave it in a warm place (or in an oven that’s turned off) for 1-2 hours or until the dough doubles in size. Note: some newer ovens have a “proofing” setting so this might also work.

- Check every 30 minutes or so to see if the dough has doubled in size. Here's what it should look like.
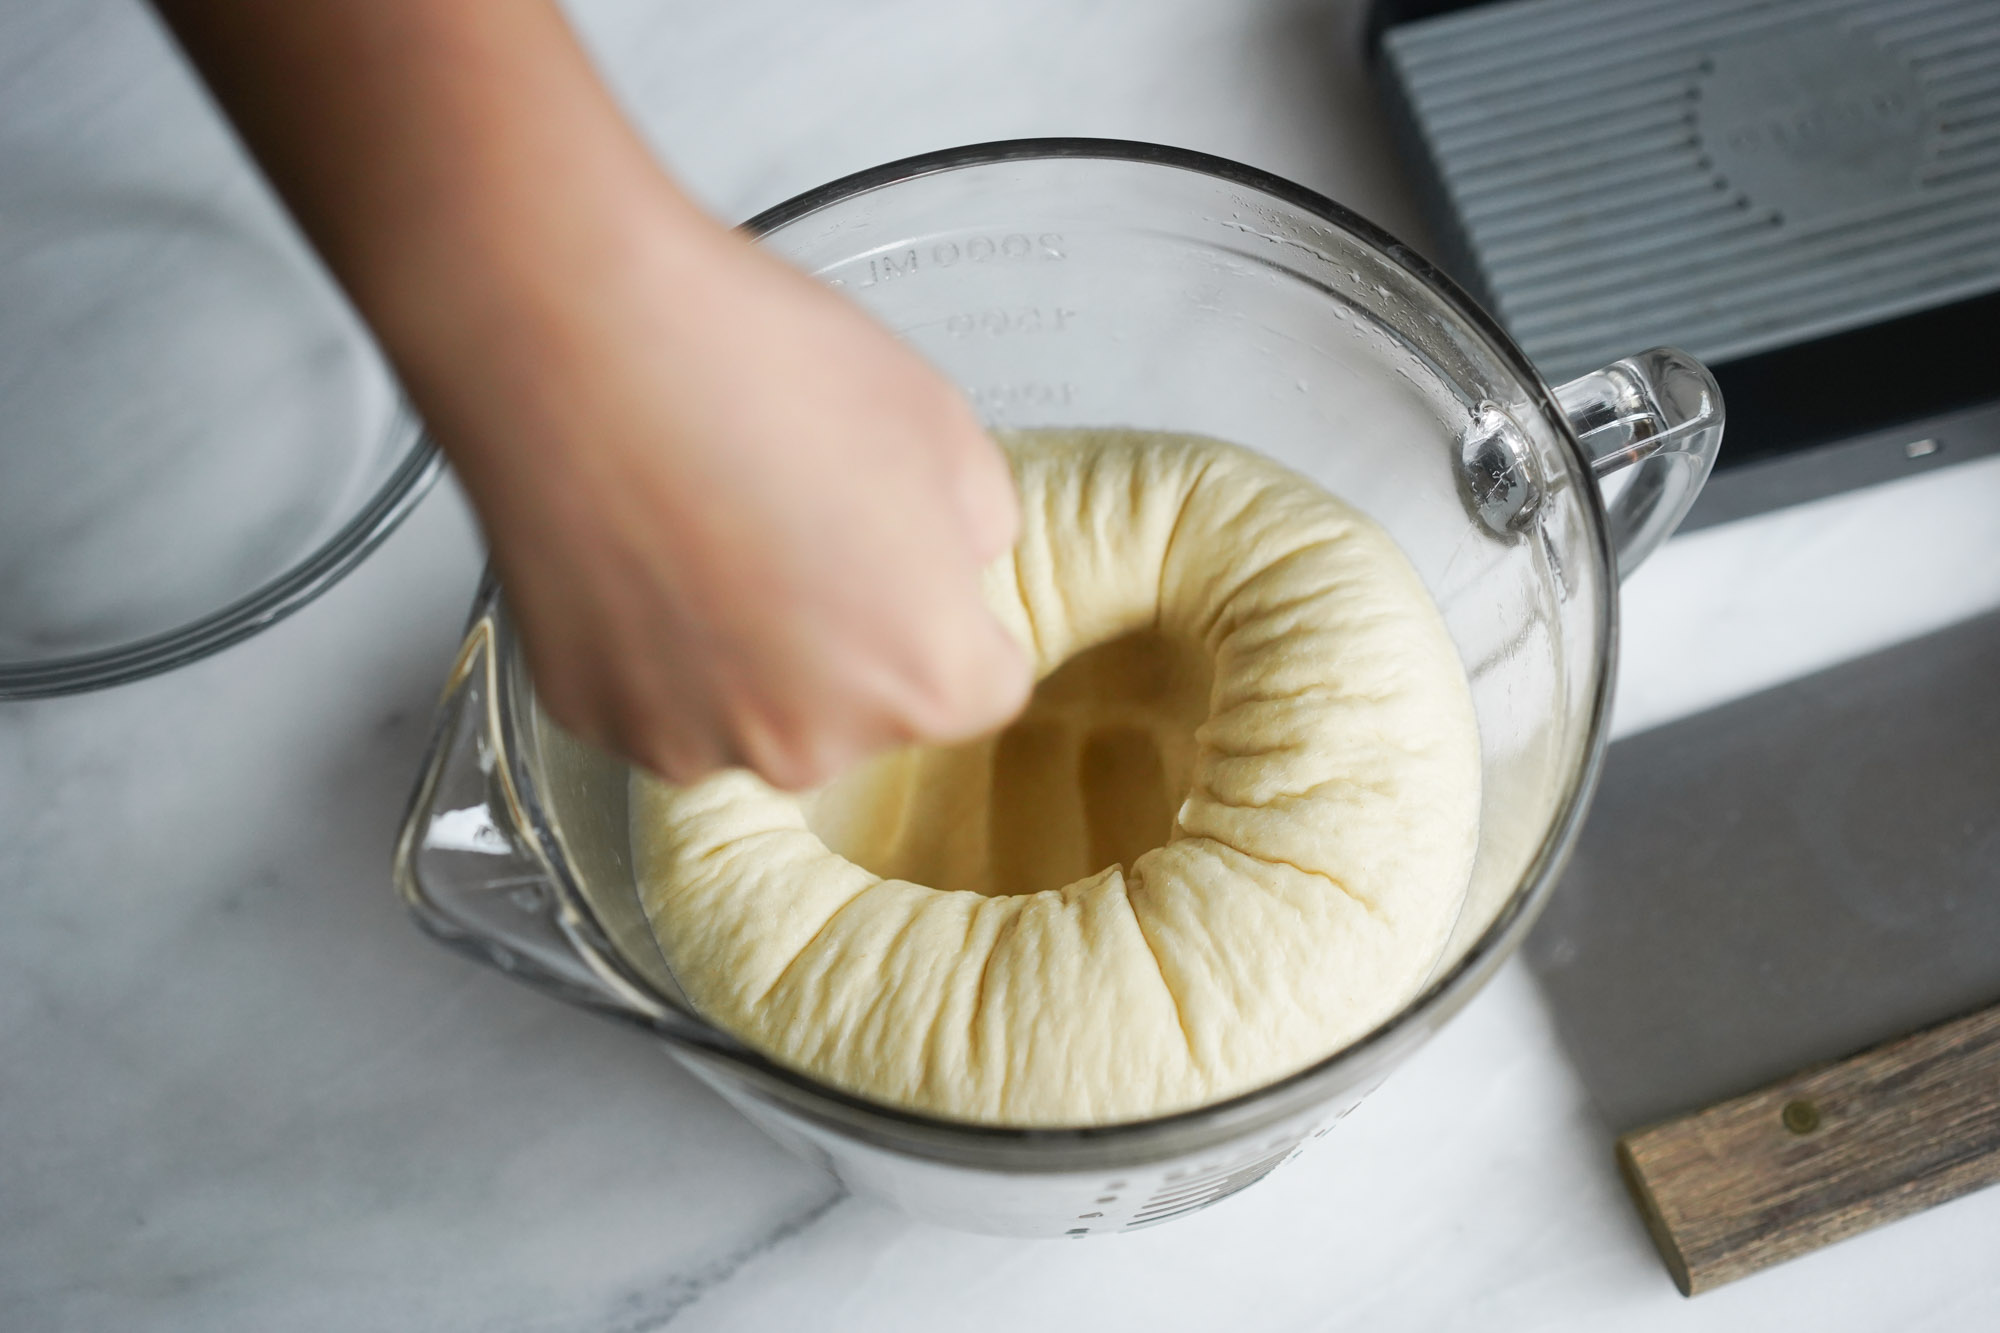
- Once it has, remove it from the oven, remove the towel, and punch the dough down once to remove excess gas.

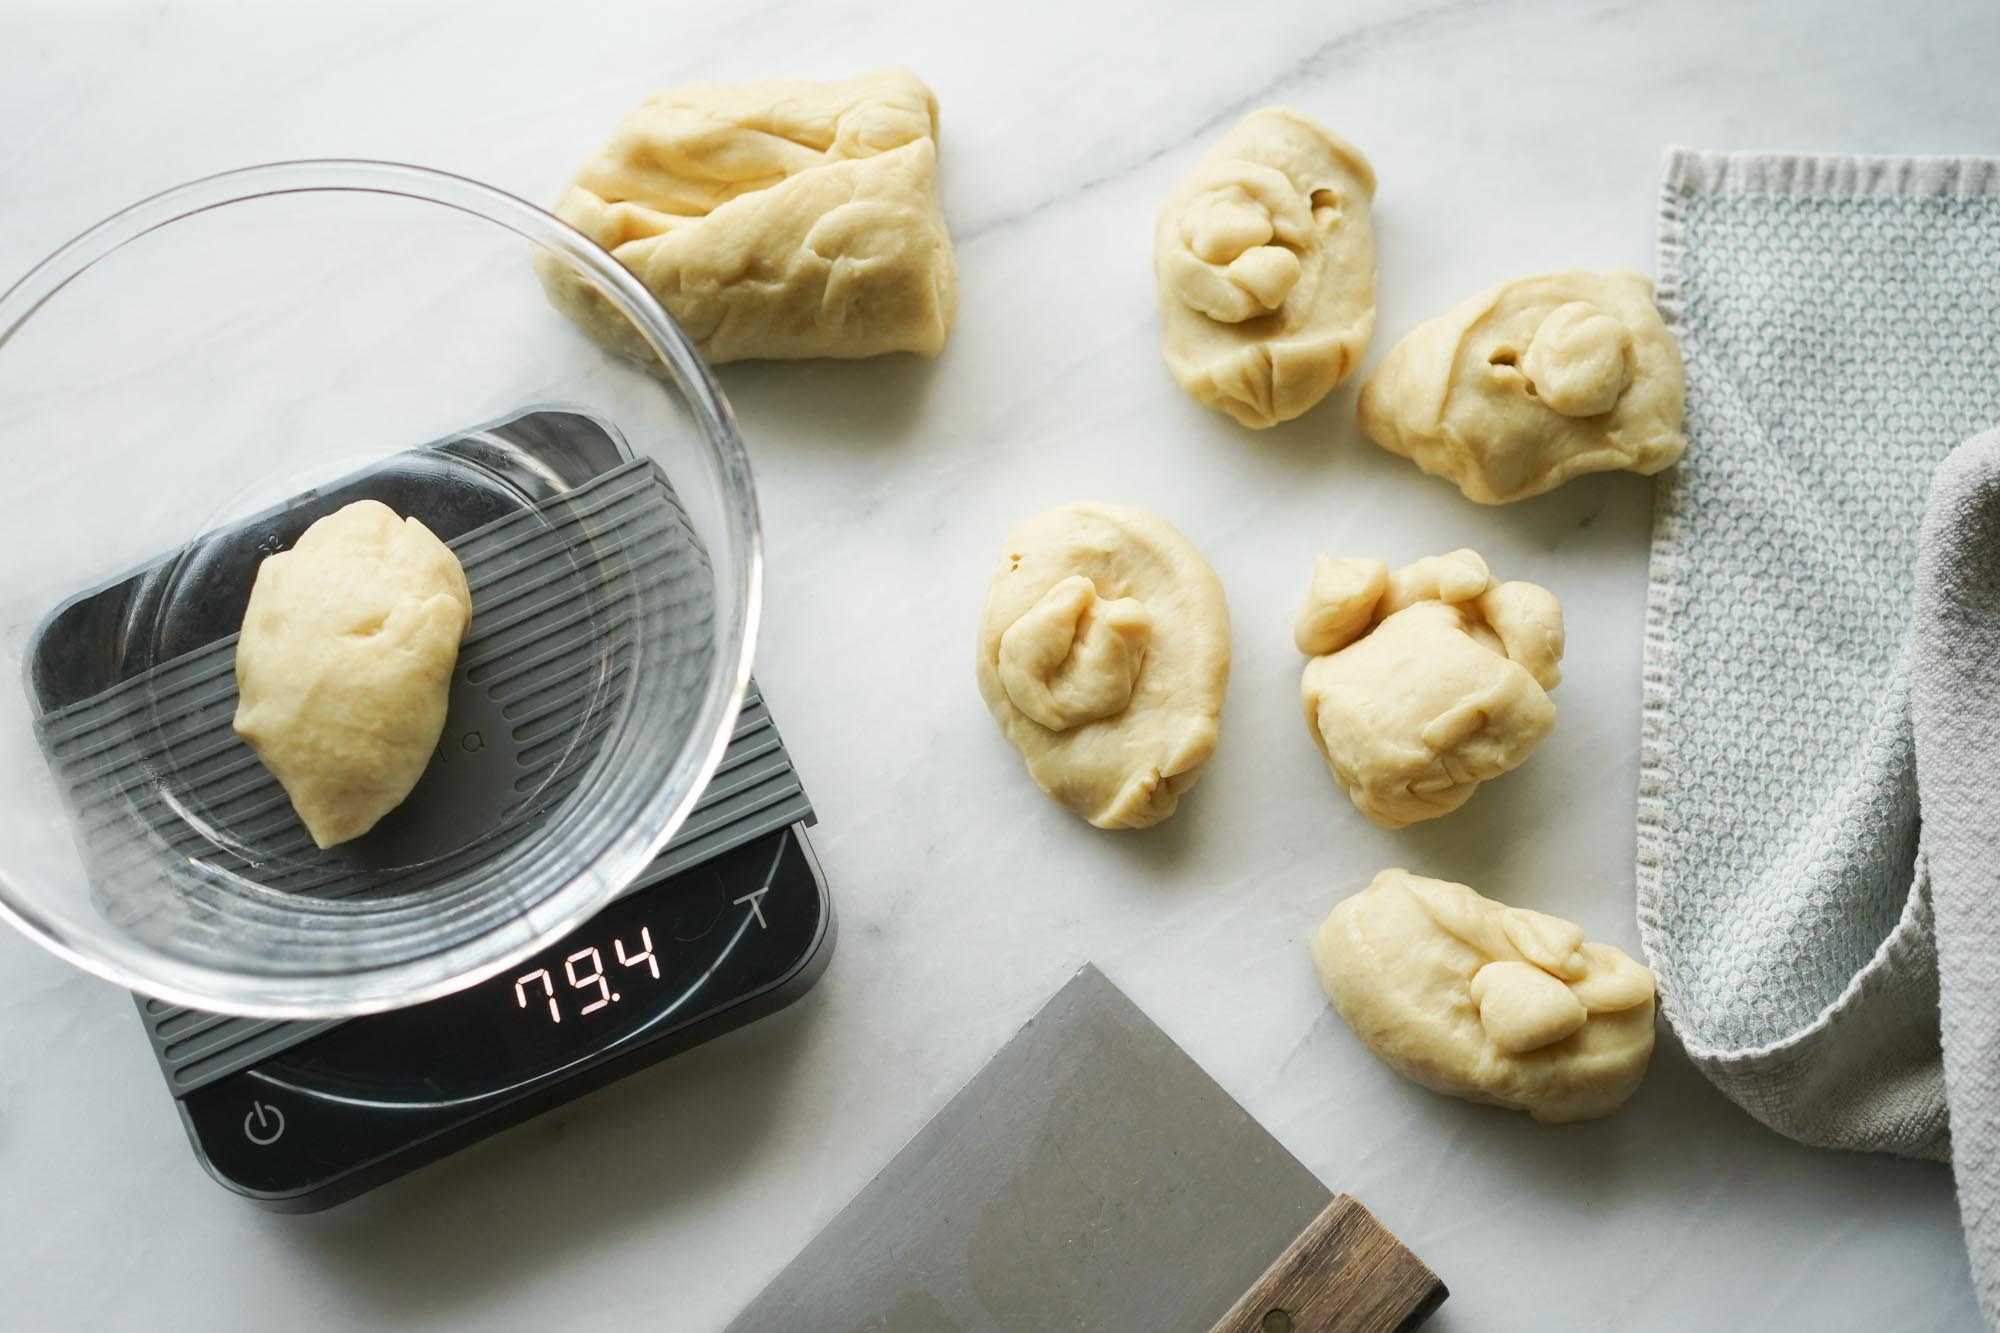
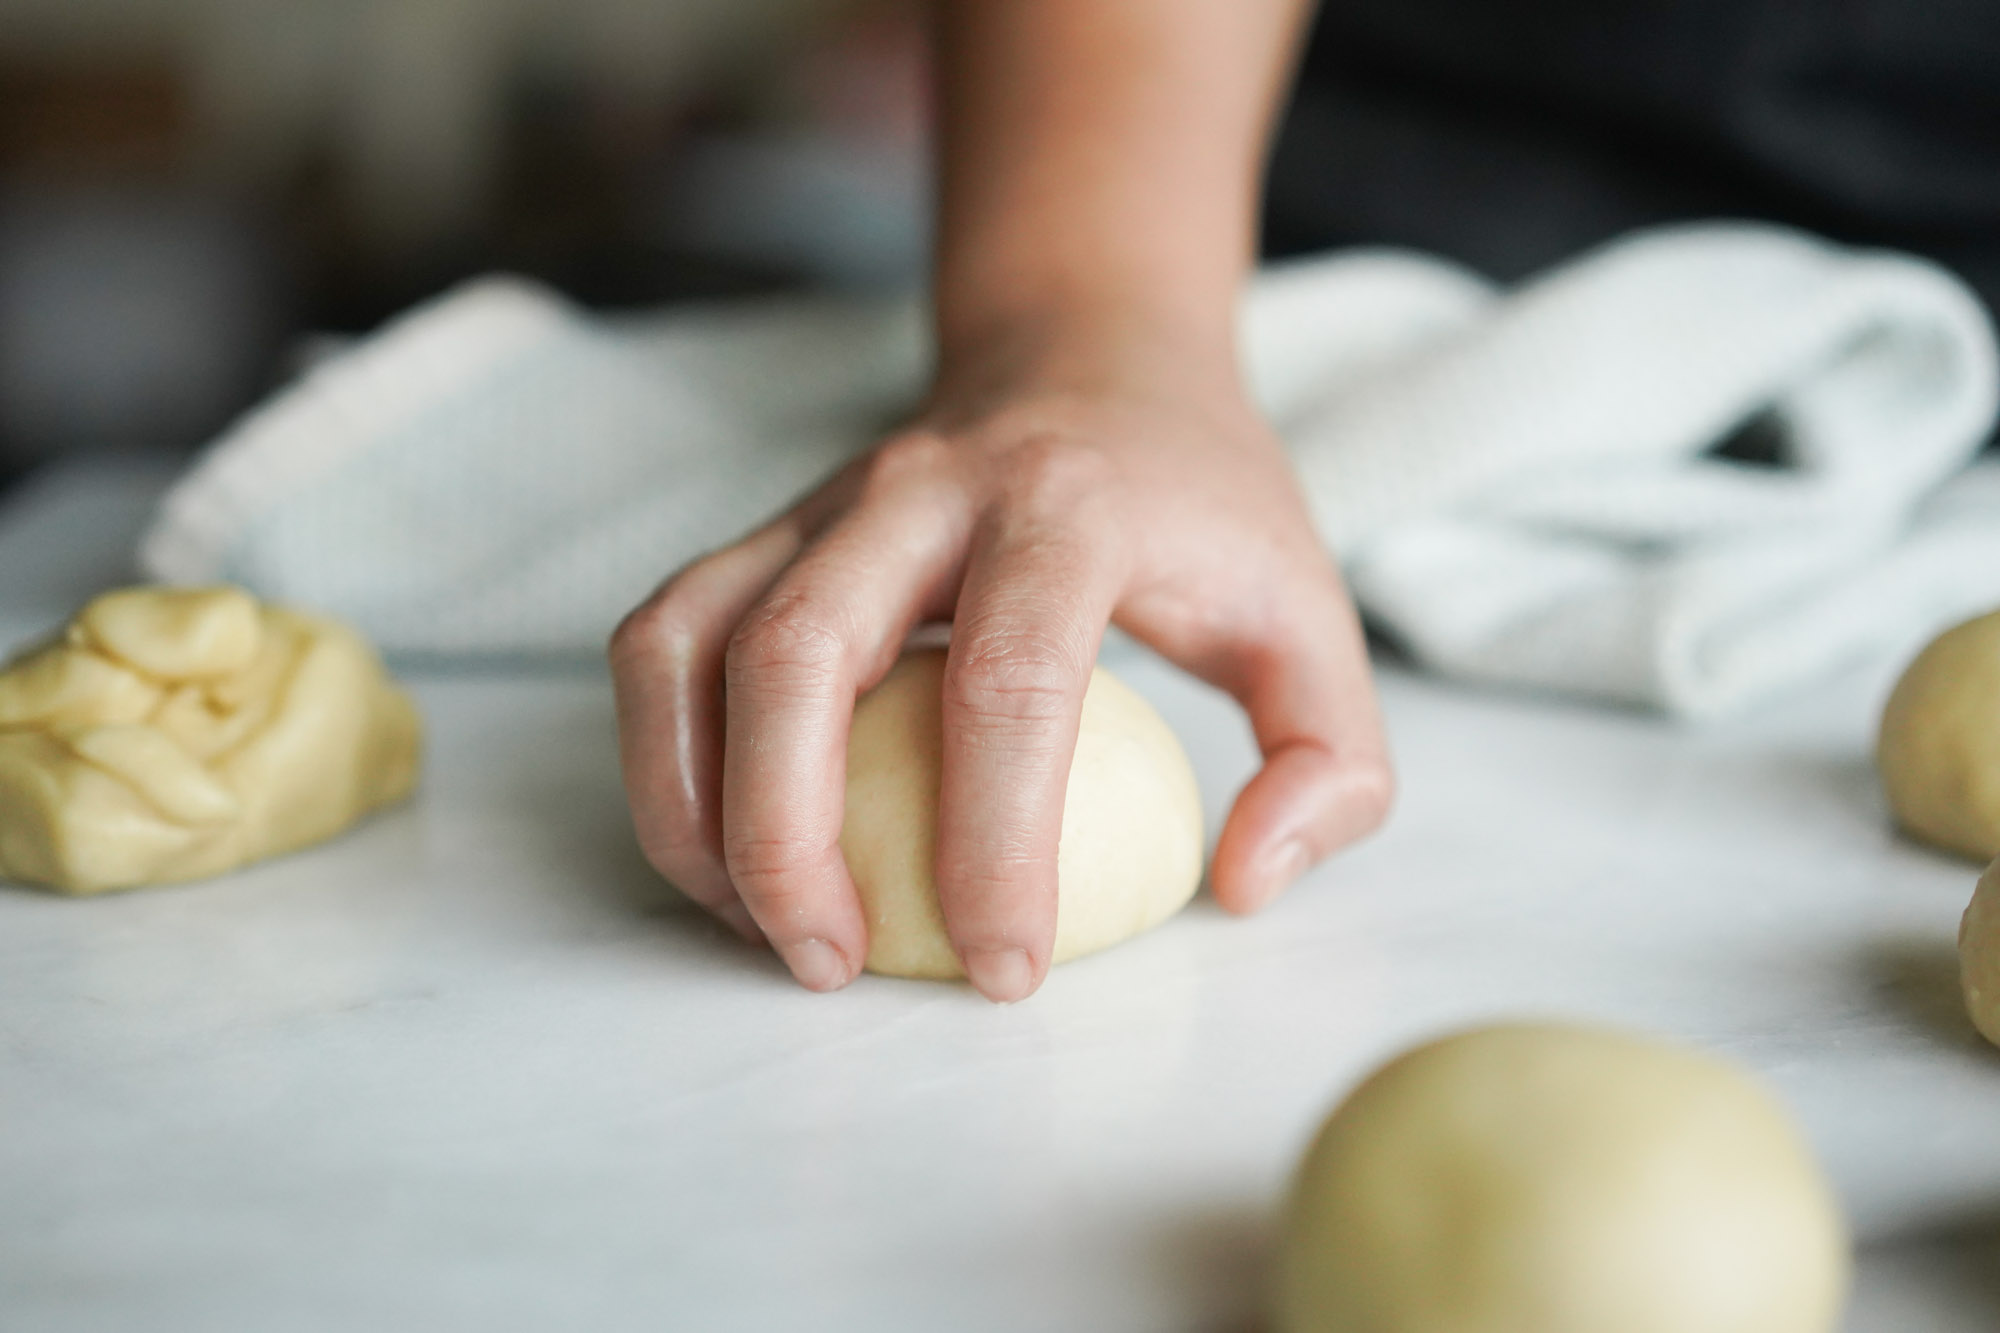
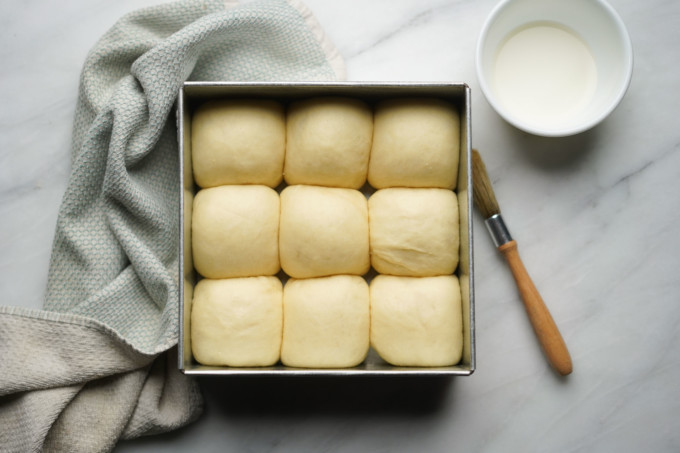
- Transfer onto a clean surface. Roll into a large log and cut into 9 equal pieces. If you scaled this recipe, it will be easier to weigh out each ball instead to 80 grams each, but in general weighing will ensure your rolls are all the exact same size.
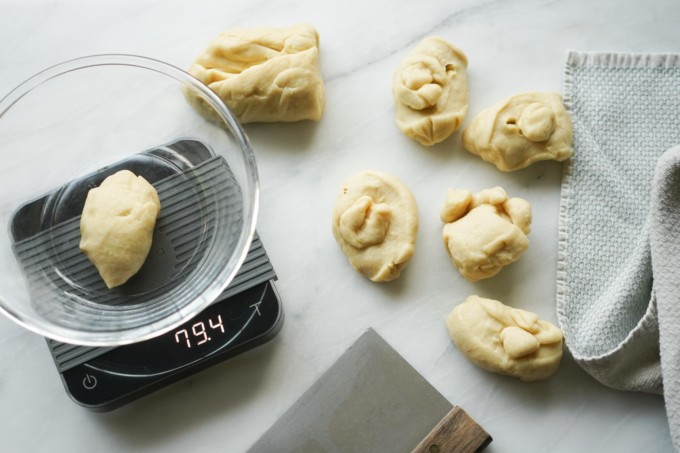
- Quickly reroll each ball of dough to smooth out the entire surface. Using a claw shape with your hand lets you move it around and control it better without too much sticking. Any creases or texture left on the dough at this point will be seen in the final baked result so make sure it's smooth!

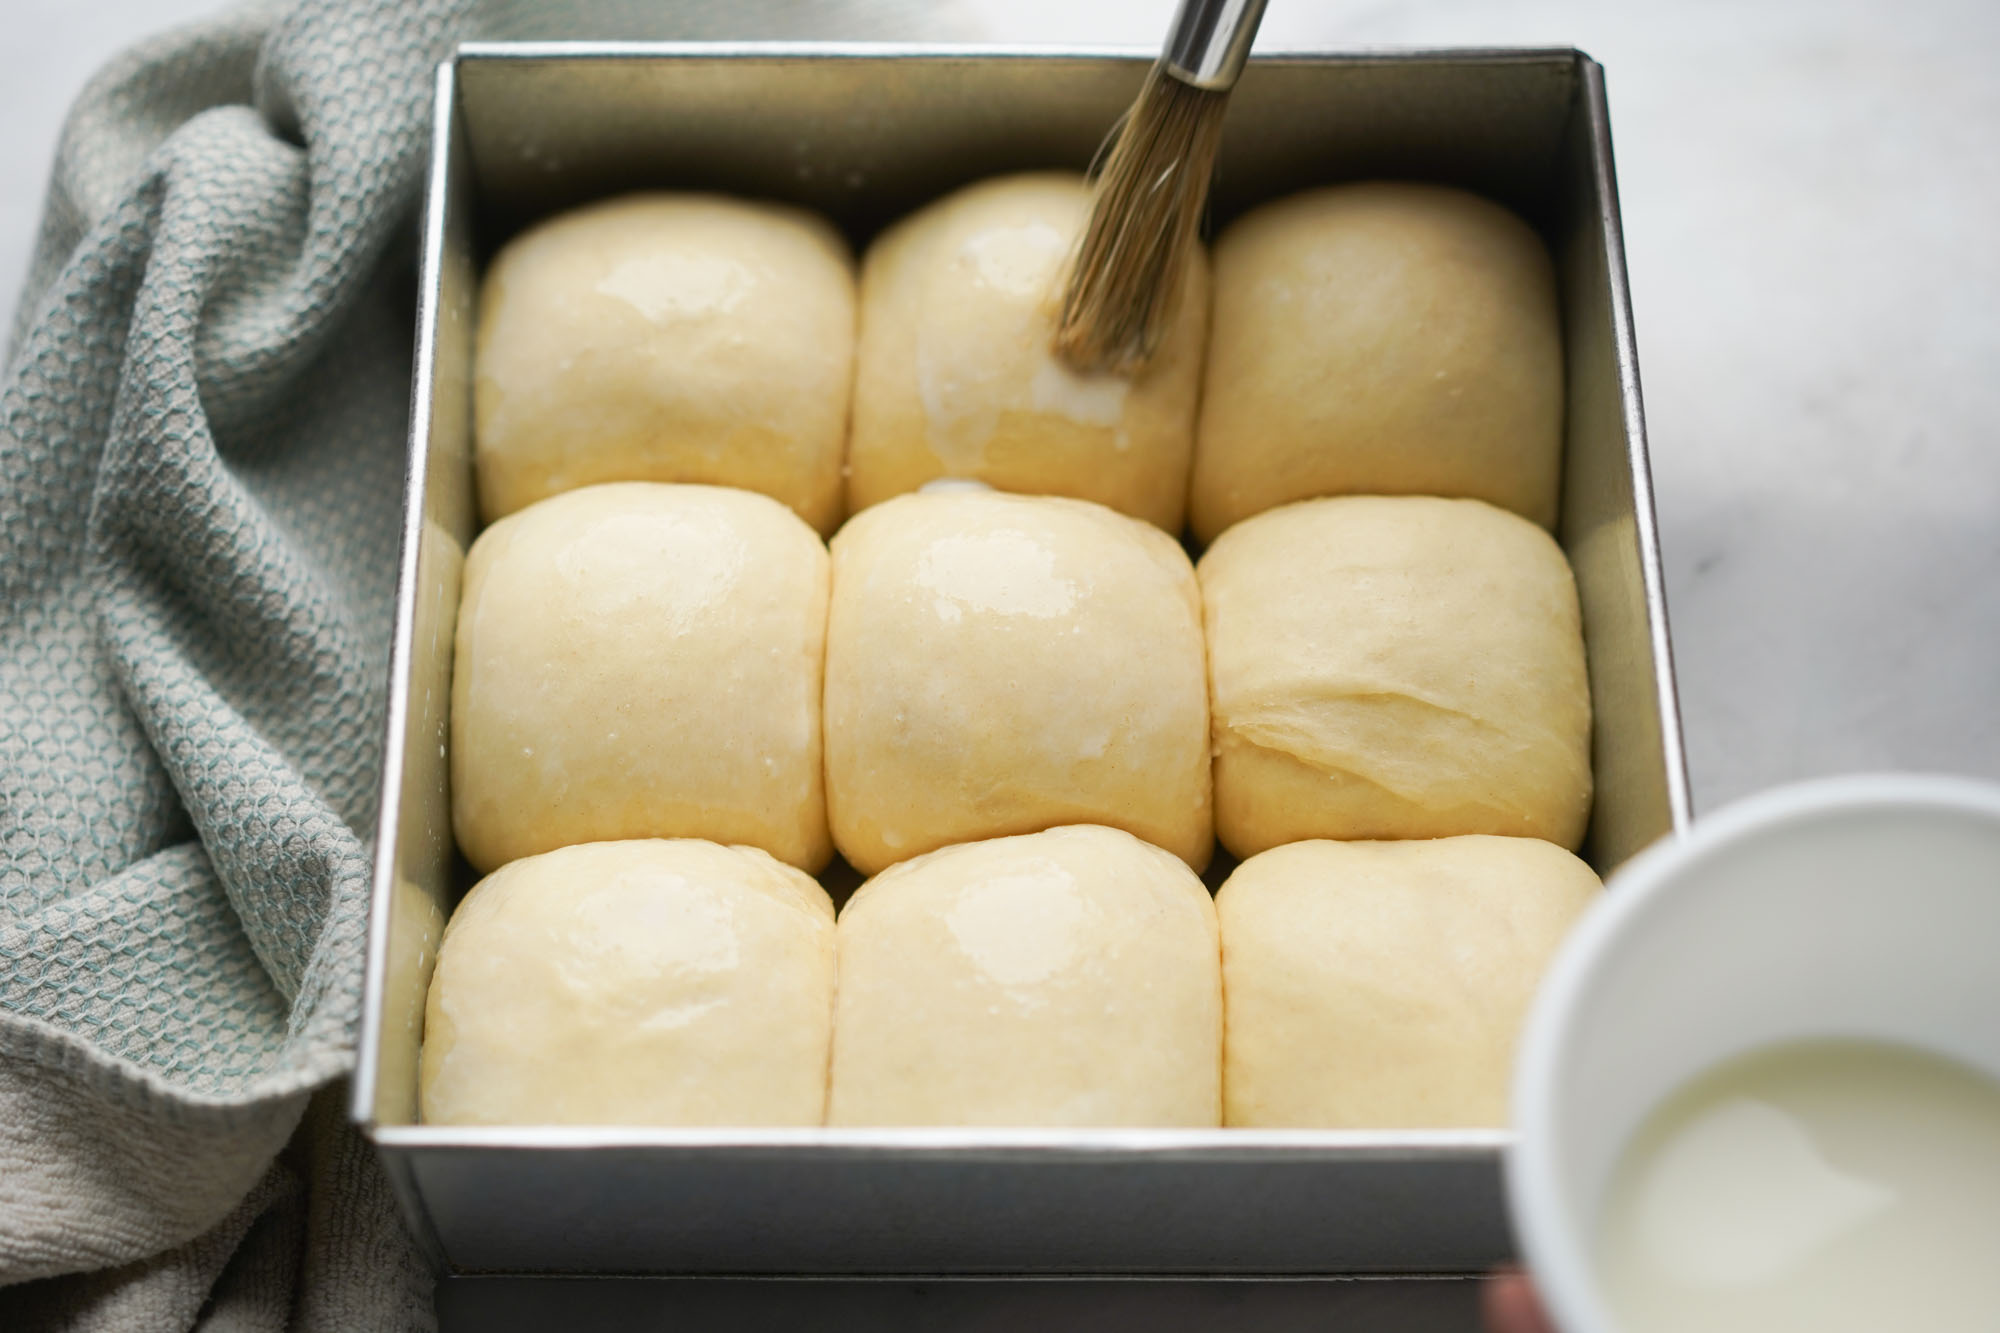
- Butter your pan to prevent the bread from sticking. Place all the pieces of dough into the pan.

- Cover the pan with the dish towel and let it proof once again for one hour or until it doubles in size.
- Here's what it should look like once the dough has doubled in size. Then, preheat the oven to 350 °F to prepare for baking.
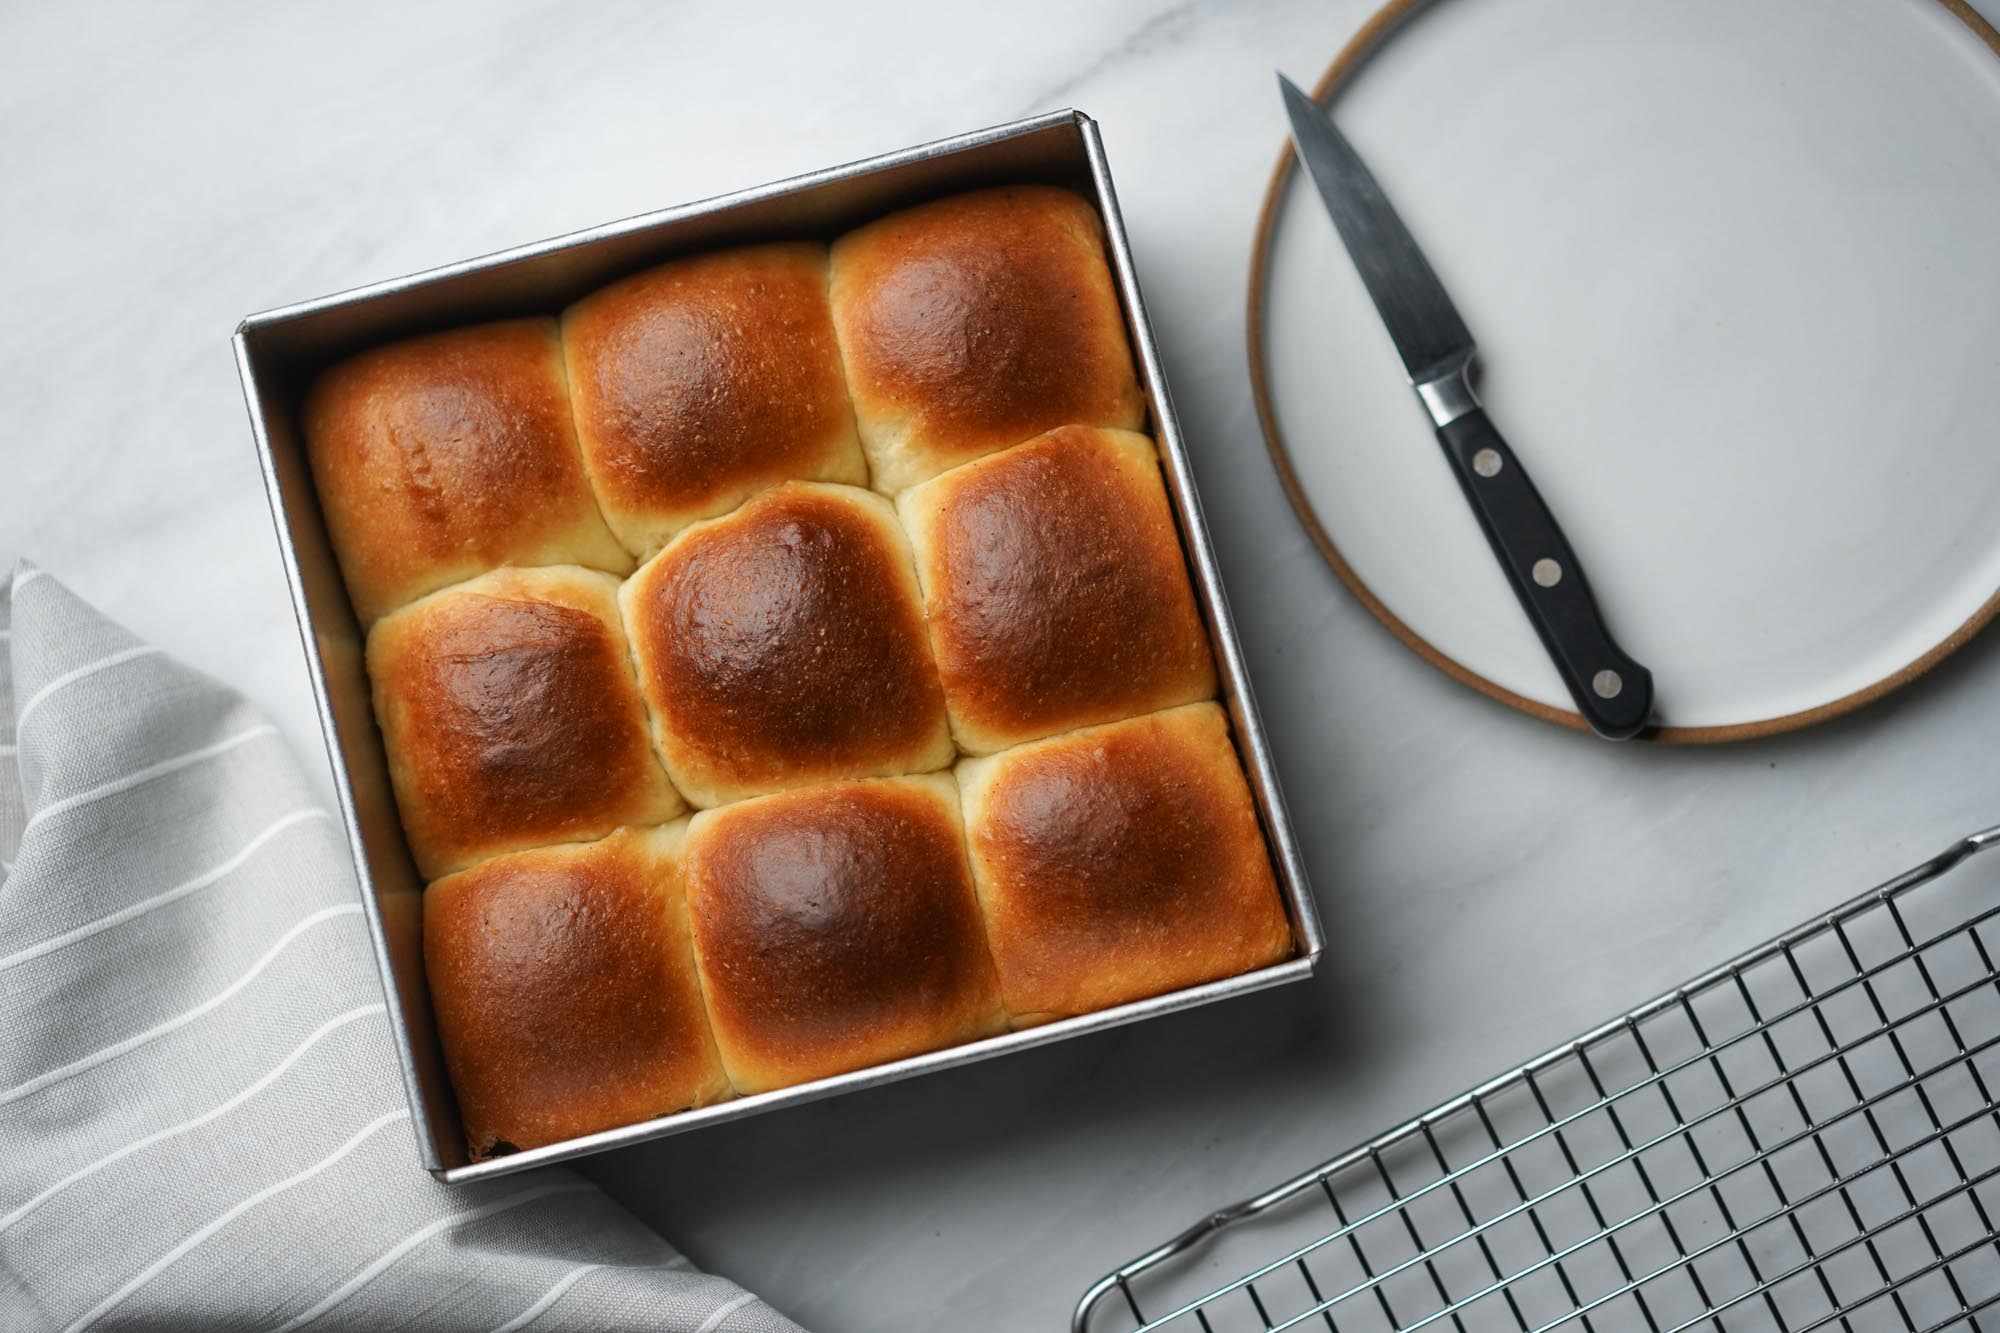
- Brush some milk over the tops of each roll and place it in the oven for 15-20 minutes or until the rolls are golden and shiny on top.

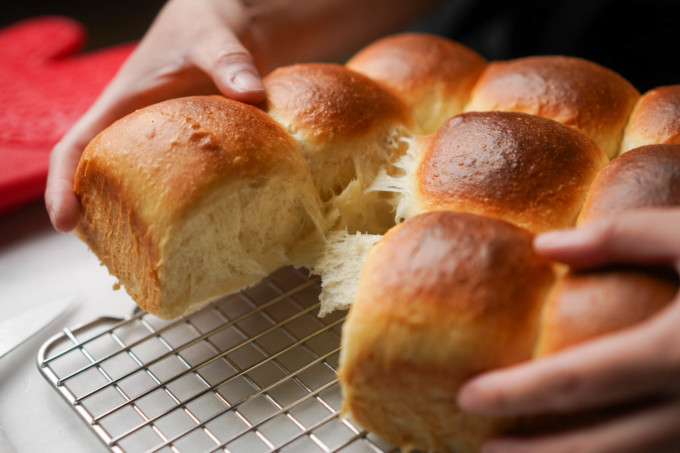
- Remove the pan from the oven and let it cool on a rack for about 5-10 minutes. I like to remove the bread from the pan to prevent further baking from residual heat and rest it on the cooling rack.
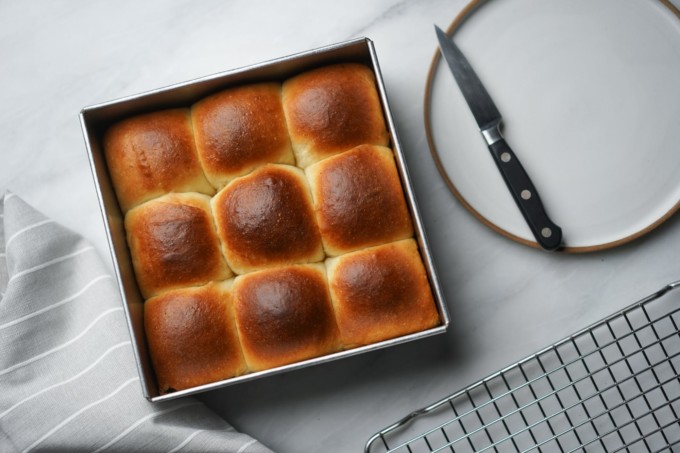
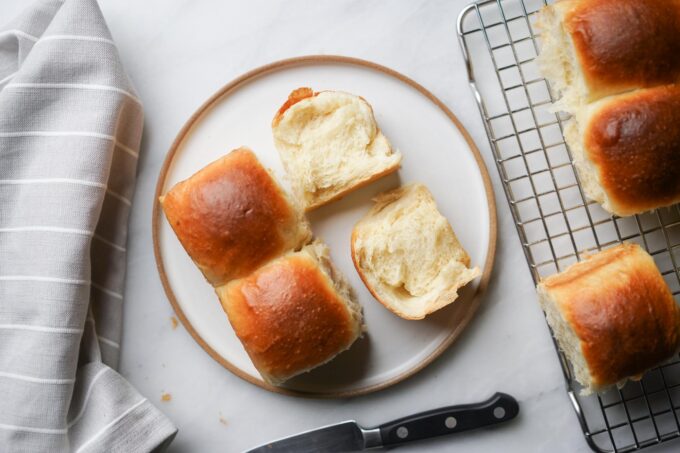
- Serve immediately or place in an airtight container for up to one week on the counter.