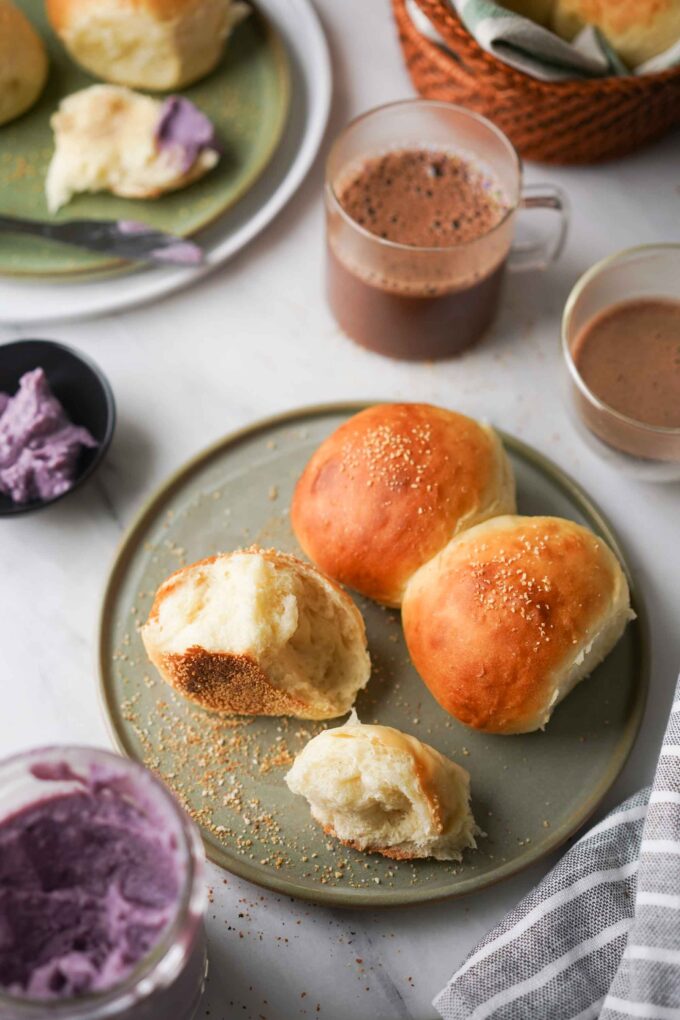
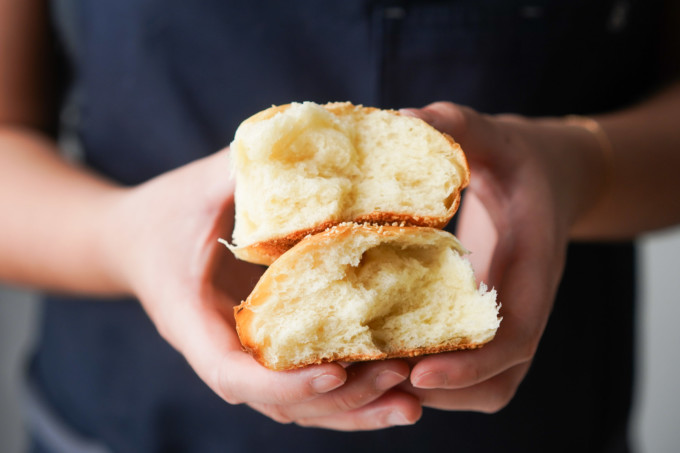
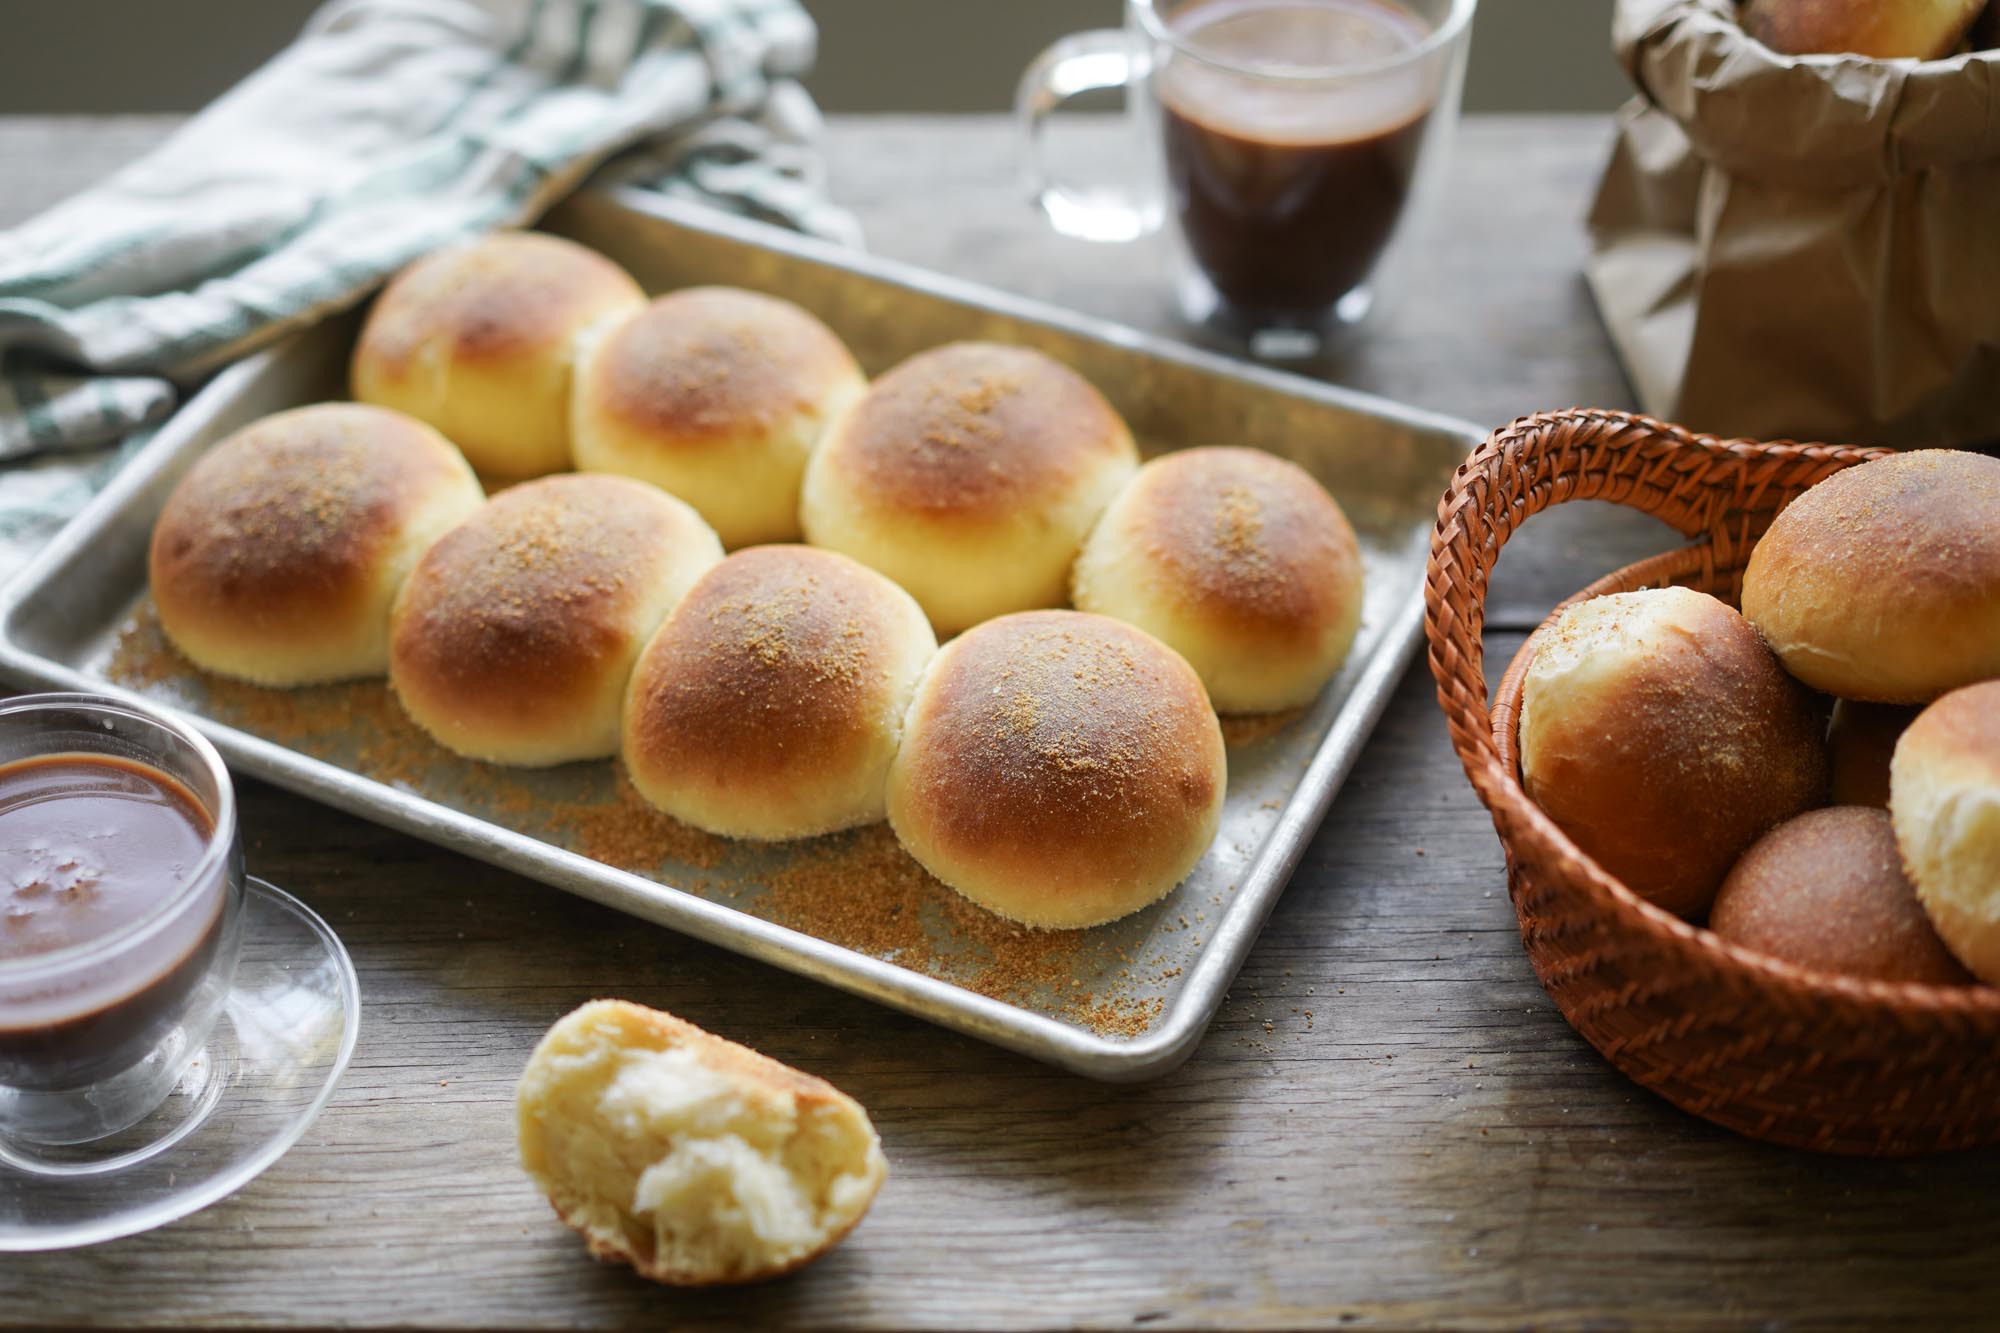
Piping hot right out of the oven, these pandesal rolls fill your mouth with buttery and slightly sweet flavors. Its fluffy center combined with the crisp outer layer of bread crumbs make every bite heavenly.
Like many Filipino breakfast staples (such as Filipino garlic fried rice), it’s so good you’ll want to make this pandesal recipe for every meal!
Background
Pandesal is eaten by many Filipinos in the Philippines and all over the world. While it translates to “salt bread” in Spanish, don’t be fooled because it’s actually got a fairly sweet and not salty flavor. The name “pan de sal” was given by the Spaniards because the original recipe incorporated salt in the recipe.
It originated from an earlier version of bread called “pan de suelo” during Spanish colonization when Spaniards tried to recreate their version of a French baguette. Since wheat flour was not as accessible to the Philippines, they used a more affordable type of flour that resulted in bread that was more airy and soft.
Pandesal variations
These days you can find this breakfast staple in many forms like ube pandesal, Baliwag pandesal, stuffed with various braised meat, and even cheese. While I’ve been super lucky to grow up with uncles and aunts who make pandesal from scratch, after moving out I’ve had to find alternatives. One of my favorite places to buy pandesal is Goldilocks.
Eating pandesal always takes me back to my childhood trips to Cebu to visit my grandma. She always woke up early (even before the roosters started calling) to buy fresh baked pandesal from the local bakery.
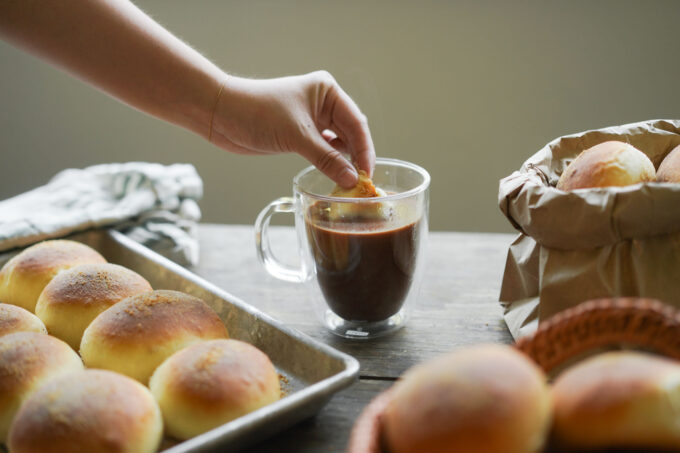
A handful of times I got to go with her to see the bakers pull new batches of bread from the ovens and plop a dozen piping-hot pandesal into a paper bag. I was always so excited to walk back to the family compound because there was always a fresh pot of rich tsokolate (or hot chocolate) to dip my delectable pandesal into.
After years of buying so many different types of pandesal, I’ve finally figured out my perfect pandesal ratio: airy soft centers and slightly crisp outer layer. This recipe has an ample amount of sweetness in flavor, but also a buttery texture that makes an egg sandwich that much better. What’s great is that it’s also great the next day in the toaster. Fresh pandesal lasts for at least one week in the fridge.
Tips for making pandesal
- Use an equal amount of bread flour and all purpose flour to get the perfect pandesal ratio of soft and tender centers with crispy crusts. If you would prefer an even softer bread, like many of the pandesal rolls you can buy at different bakeries or grocery stores, you can adjust the ratio to add more all purpose flour than bread flour. To get an accurate recipe, use a scale to weigh all the ingredients–it’s fool proof!
- Use instant active dry yeast to save time, all you have to do is add the yeast directly into the flour mixture.
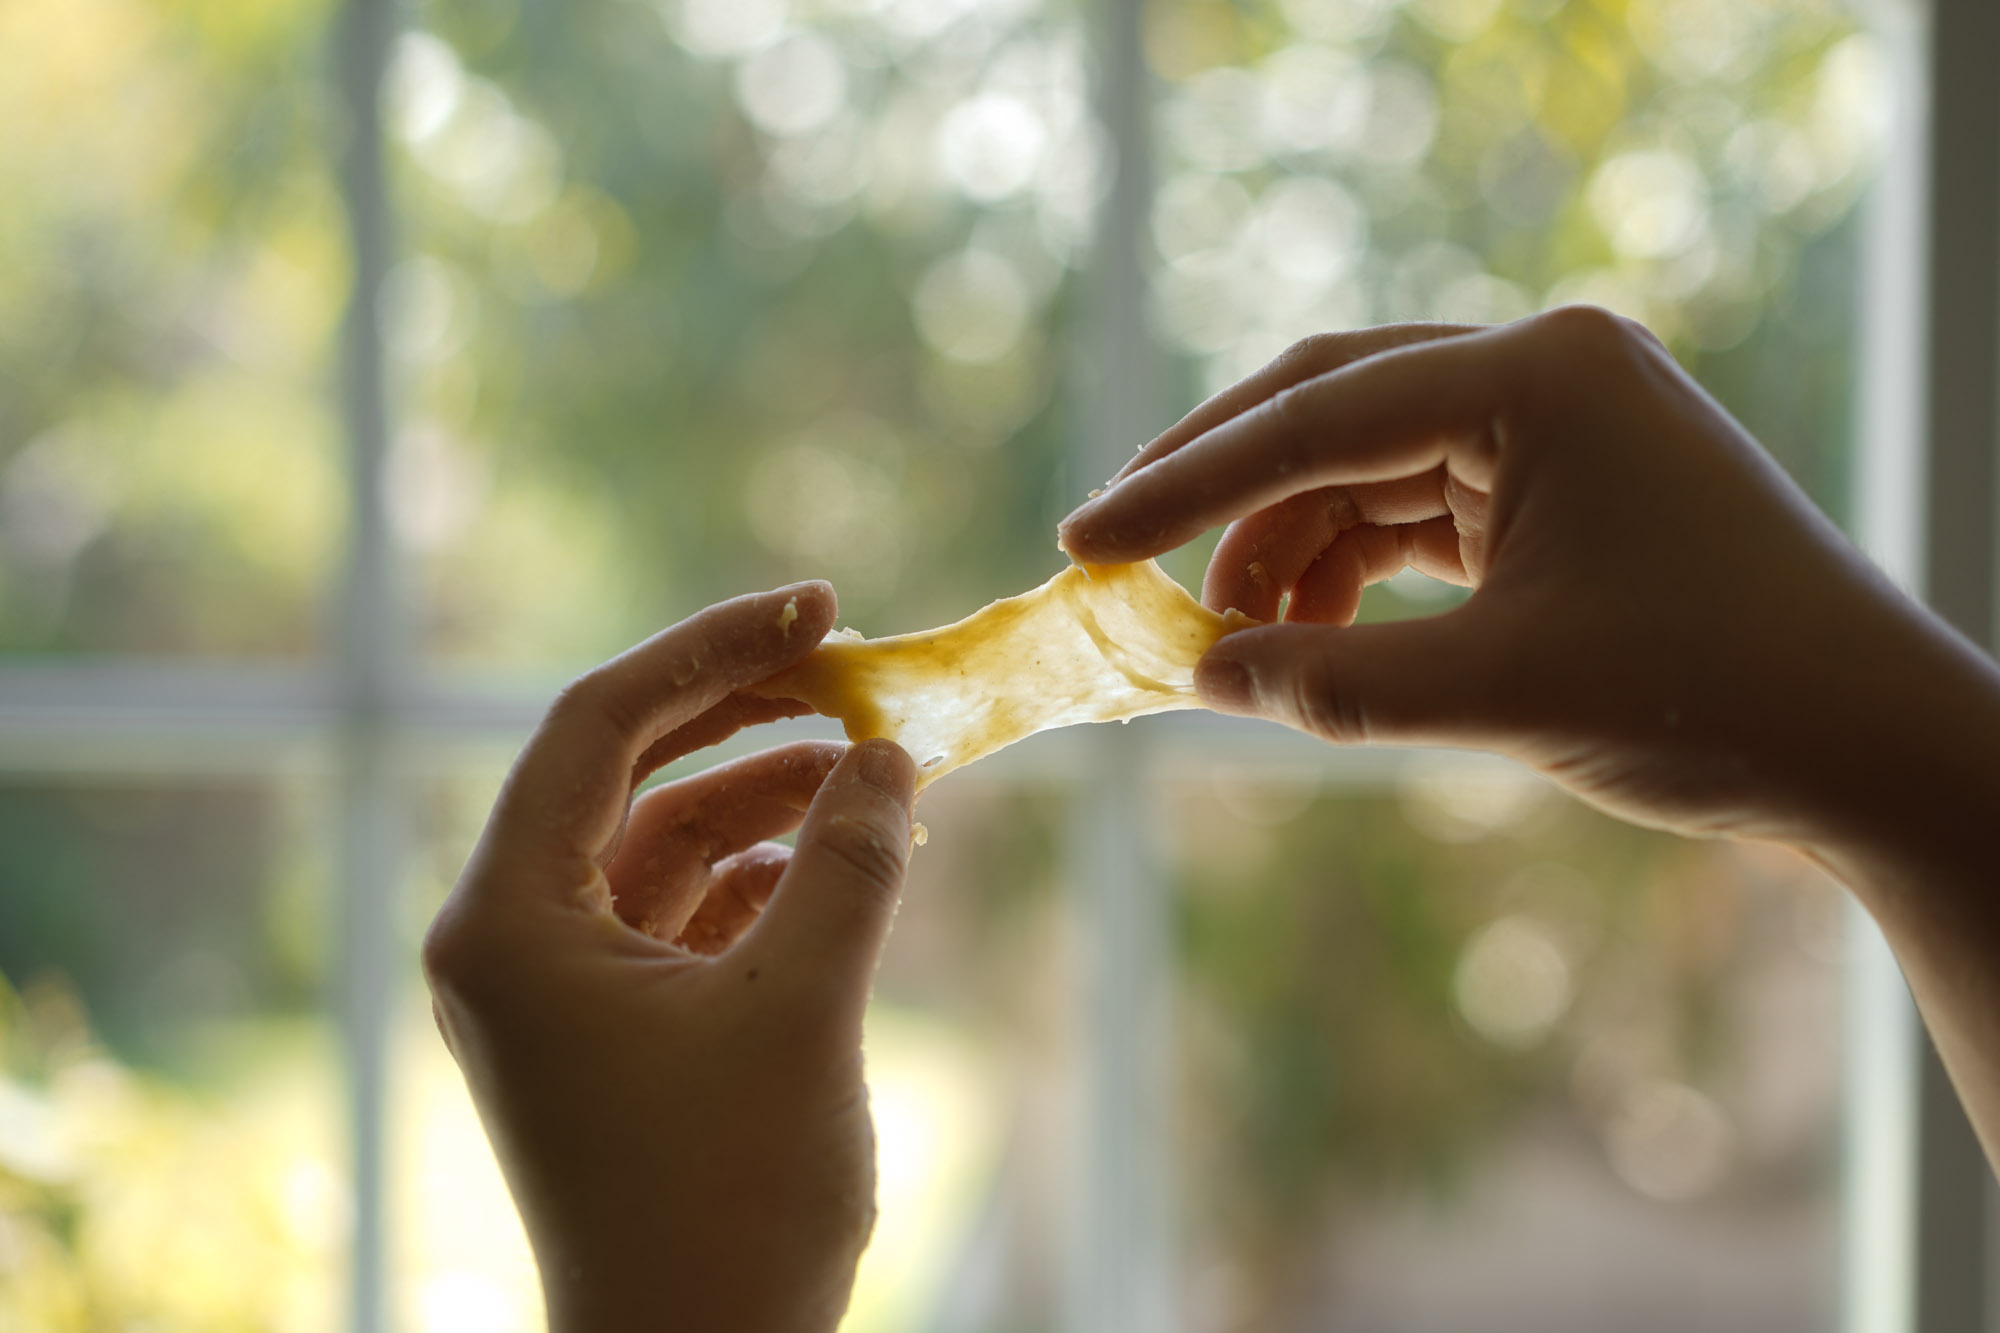
- Use the windowpane test to make sure the gluten has formed and you are done kneading. After kneading for about eight to ten minutes, take a piece of the dough and use your fingers to stretch it into a small rectangle. If the dough stretches and becomes translucent in the center without breaking (like a windowpane), then you are done kneading.
- Knead in the softened butter while shaping the dough. Butter is super fatty and adds great flavor to the dough, but you don’t want to add it in too early and get in the way of gluten formation. By kneading in the softened butter after the gluten has formed and the dough texture is smooth, you still get the rich flavor without denaturing the gluten. Although this part is super messy, DO NOT ADD flour during this portion of kneading. If you continue to knead for about five minutes, the dough will eventually soak up the butter and form a nice and smooth dough.
- Room temperature matters during proofing. Ideally you want the room temperature to be around 75 °F. Temperatures higher than 90 °F while proofing can result in the gluten structure breaking down, while too low of a temperature (like 50 °F ) will make the yeast go dormant. If you don’t trust your room temperature, I like to place the dough in the oven that’s turned off.
- Don’t forget to punch the air out of your dough! I made this mistake before and unfortunately had too many bubbles of air in my dough that left me with gaping holes. When you’re finished with your first proofing, make sure to punch the dough in the mixing bowl.
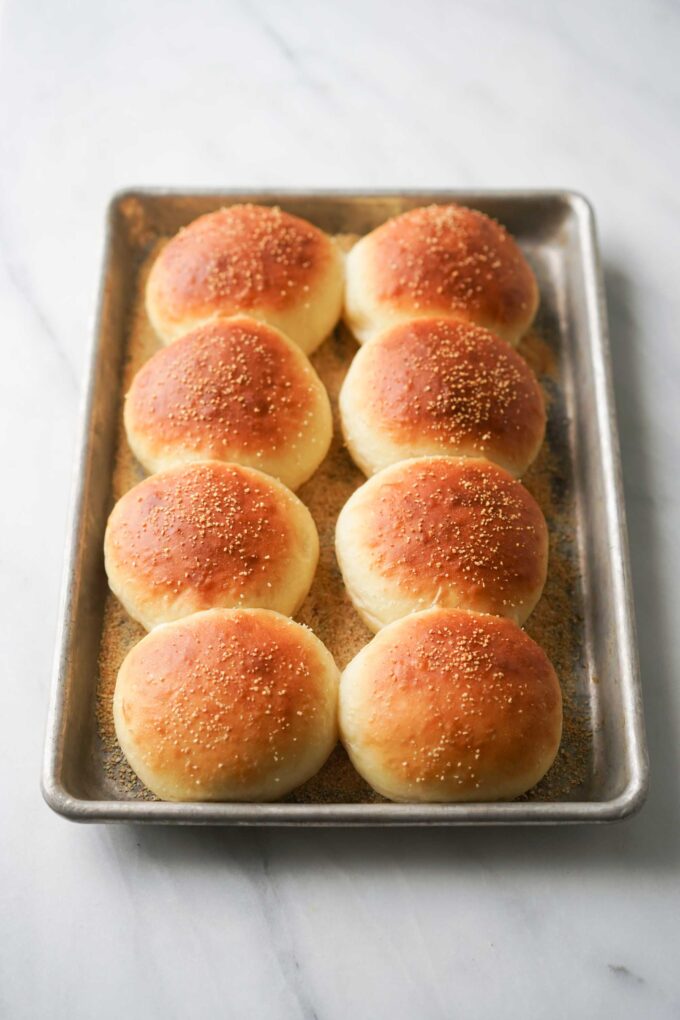
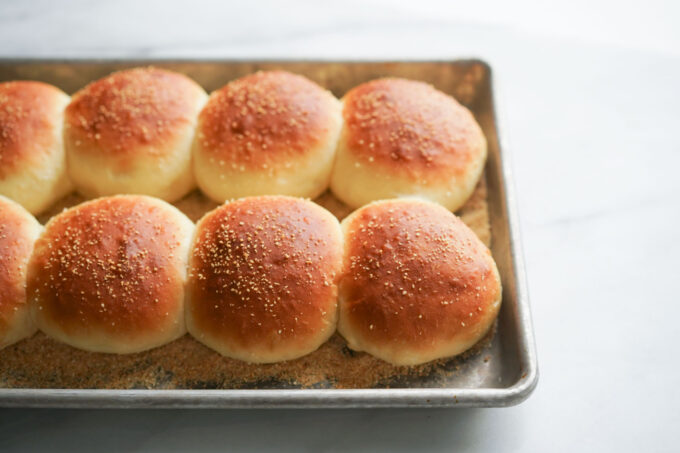
- Add breadcrumbs to the pan before adding your pandesal. I like doing this for extra texture and it also helps when you remove the pandesal rolls after baking.
- Don’t crowd the pandesal. Place the pandesal rolls at least 2 inches away from each other because they will get larger during the second proof and also expand in the oven.
How to serve
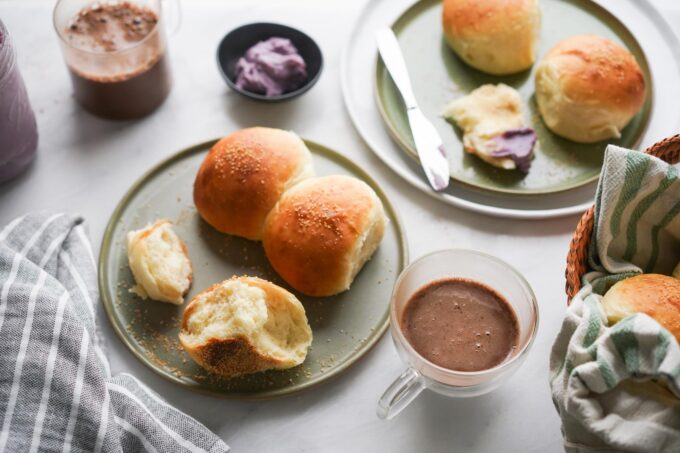
Pandesal is best served fresh while it’s steaming hot. As I said, I love dipping it in rich tsokolate or even coffee in the morning. My mom used to pack me pandesal egg sandwiches for lunch and even now as an adult I make them for a light snack or late-night meal.
I’ve even made pandesal sandwiches with Filipino BBQ skewers. You can save pandesal in an airtight container and retoast the next day to re-crisp the crust. It lasts for about a week in the fridge.
If you want to try your hand at making a Japanese version of milk bread rolls, I would recommend trying Japanese Hokkaido milk bread or shokupan if you want a loaf-style bread. If you want some shortcuts to bread, try my airfryer biscuit recipe.
Why is my pandesal so hard?
If your pandesal is hard out of the oven (and not burnt), it might not have proofed enough and the gluten did not develop properly. Try to test your yeast to make sure it’s not expired by blooming it in warm milk before adding into your flour.
Why is it called pandesal?
Pandesal is named after the addition of salt to the bread by Spaniards.
Is pandesal Spanish or Filipino?
Pandesal is a traditional Filipino bread roll that originated during Spanish colonization. While it translates to salt bread, it’s actually pretty sweet and not salty at all.


Pandesal (Soft & Fluffy Filipino Bread Rolls)
Ingredients
- 7.3 g (2 ¼ tsp) instant active yeast or active dry yeast (see instructions below)
- 260 g (2 c) all purpose flour
- 2 tbsp all purpose flour for kneading
- 260 g (2 c) bread flour
- 100 g (1/2 c) white sugar
- 6 g (2 tsp) salt
- 8 oz warm milk about 110 °F
- 2 eggs
- 56.7 g (4 tbsp) butter softened to room temperature
- 6 tbsp bread crumbs
Instructions
- If using active dry yeast bloom it first. In a bowl with the warm milk (not hotter than 110 °F), add the active dry yeast and wait 10 minutes for the yeast to bloom. If using instant active yeast, there's no need to bloom.
- In a large mixing bowl (or your stand up mixer bowl with the dough hook attachment), combine all dry ingredients: all purpose flour, bread flour, sugar, salt, and yeast.
- Combine the milk (unless you used it in step 1 for active dry yeast) and eggs into the large mixing bowl with the dry ingredients.
- If you are using a stand mixer, place it on the lowest mixing setting (mine is 2) until the dough is incorporated, sometimes scraping sides if necessary (about 3 min).
- Then transfer to a floured surface and knead by hand. This is super sticky, buttery to not add too much flour during this time. I sprinkle about 2 tbsp of all purpose flour during this kneading process. I knead for about 8 to 10 minutes. TIP: Do the windowpane test to make sure the gluten has formed. Take a piece of dough and carefully stretch it to form a rectangle or square shape. The dough should stretch and become translucent in the middle without breaking. This tells you the gluten has formed enough.

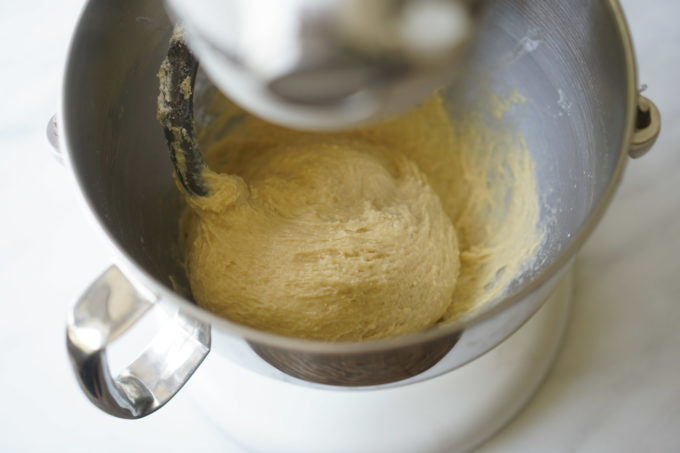
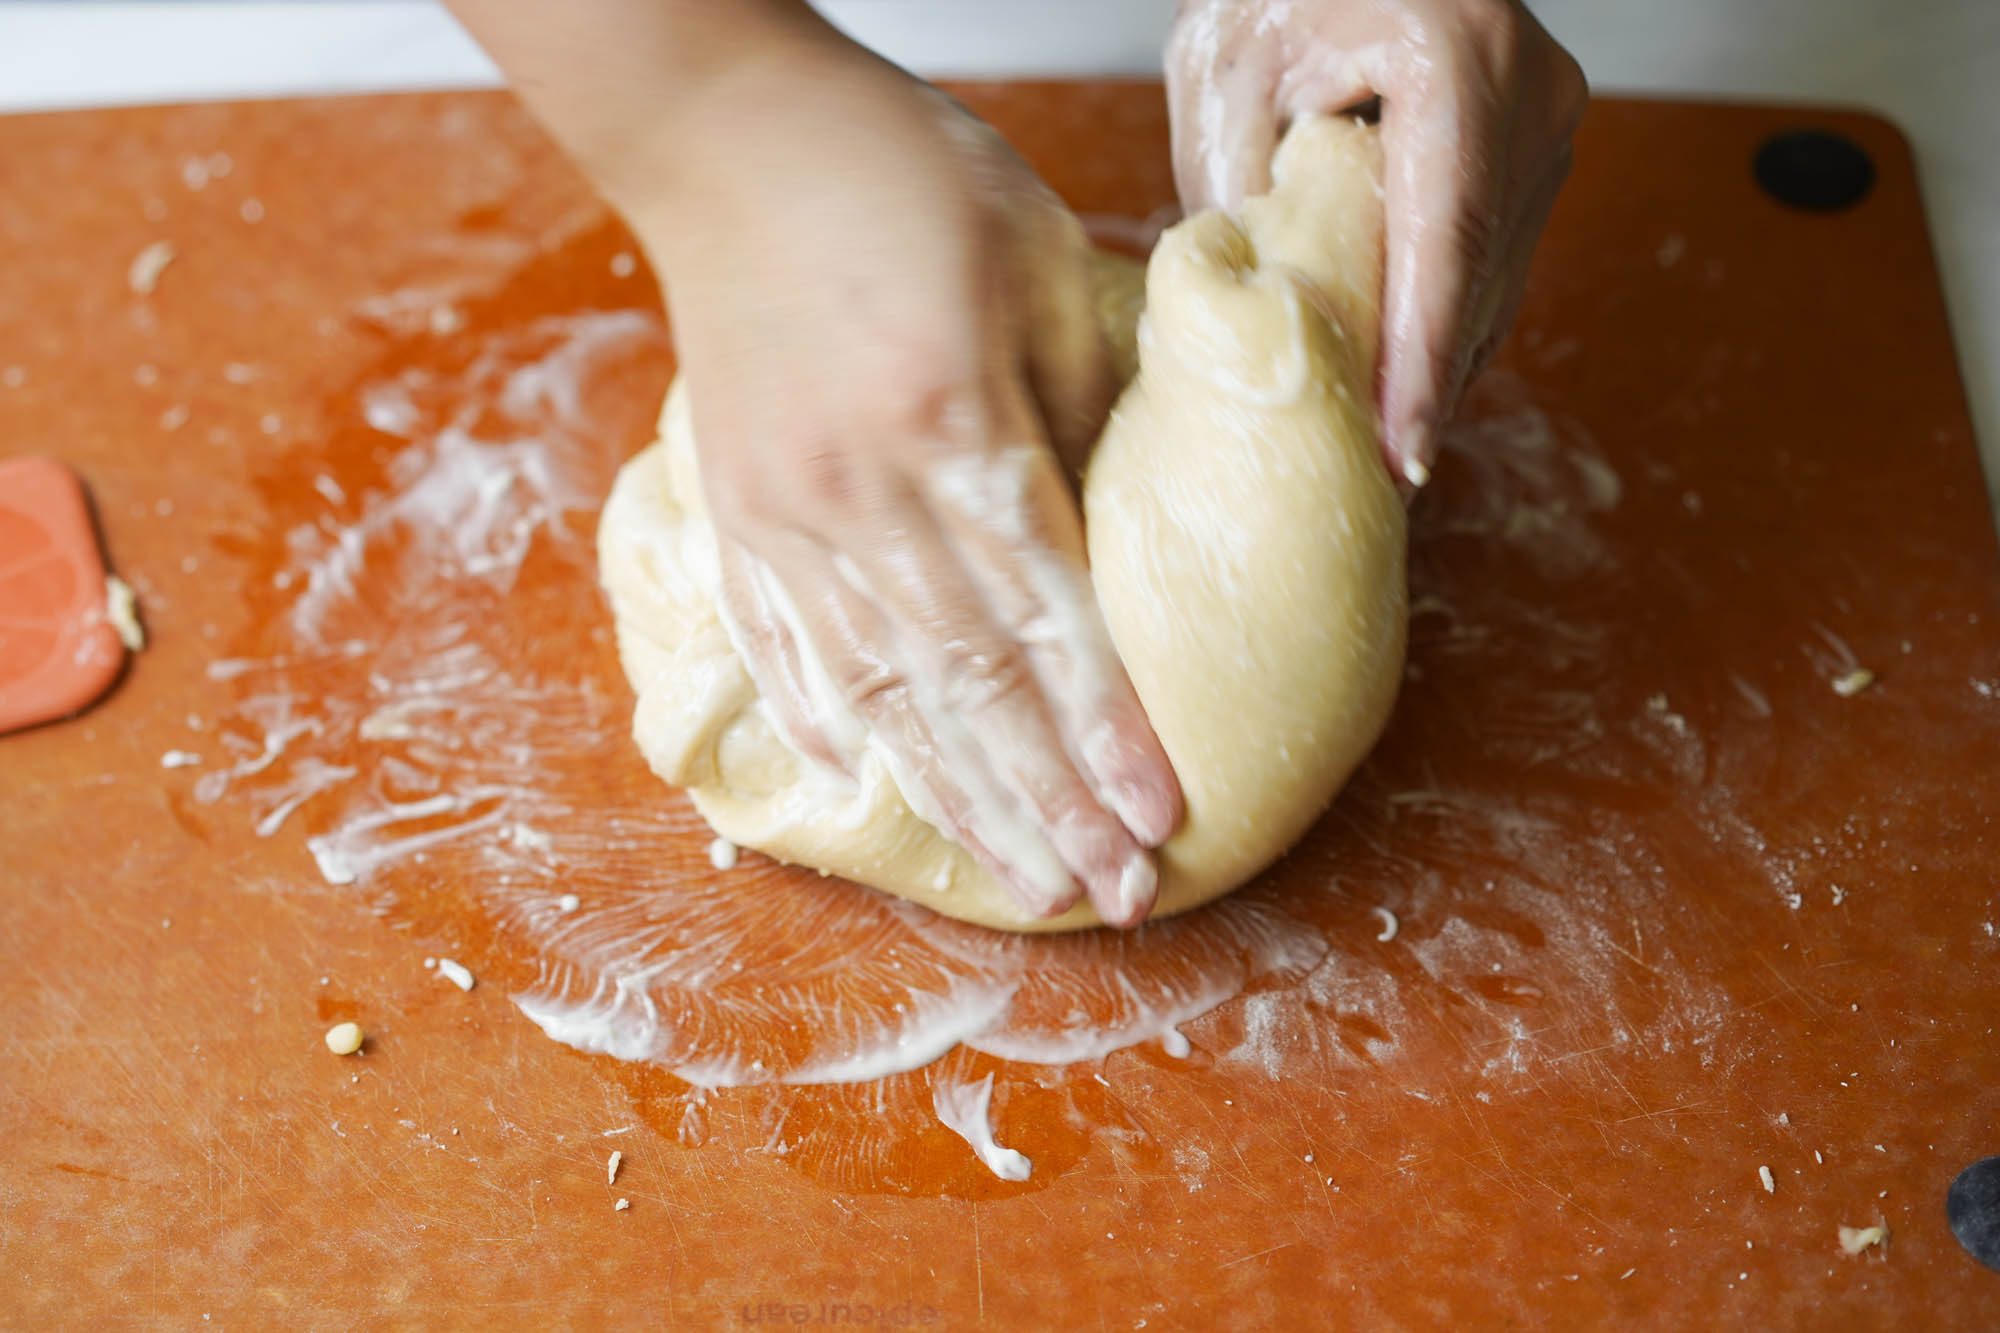
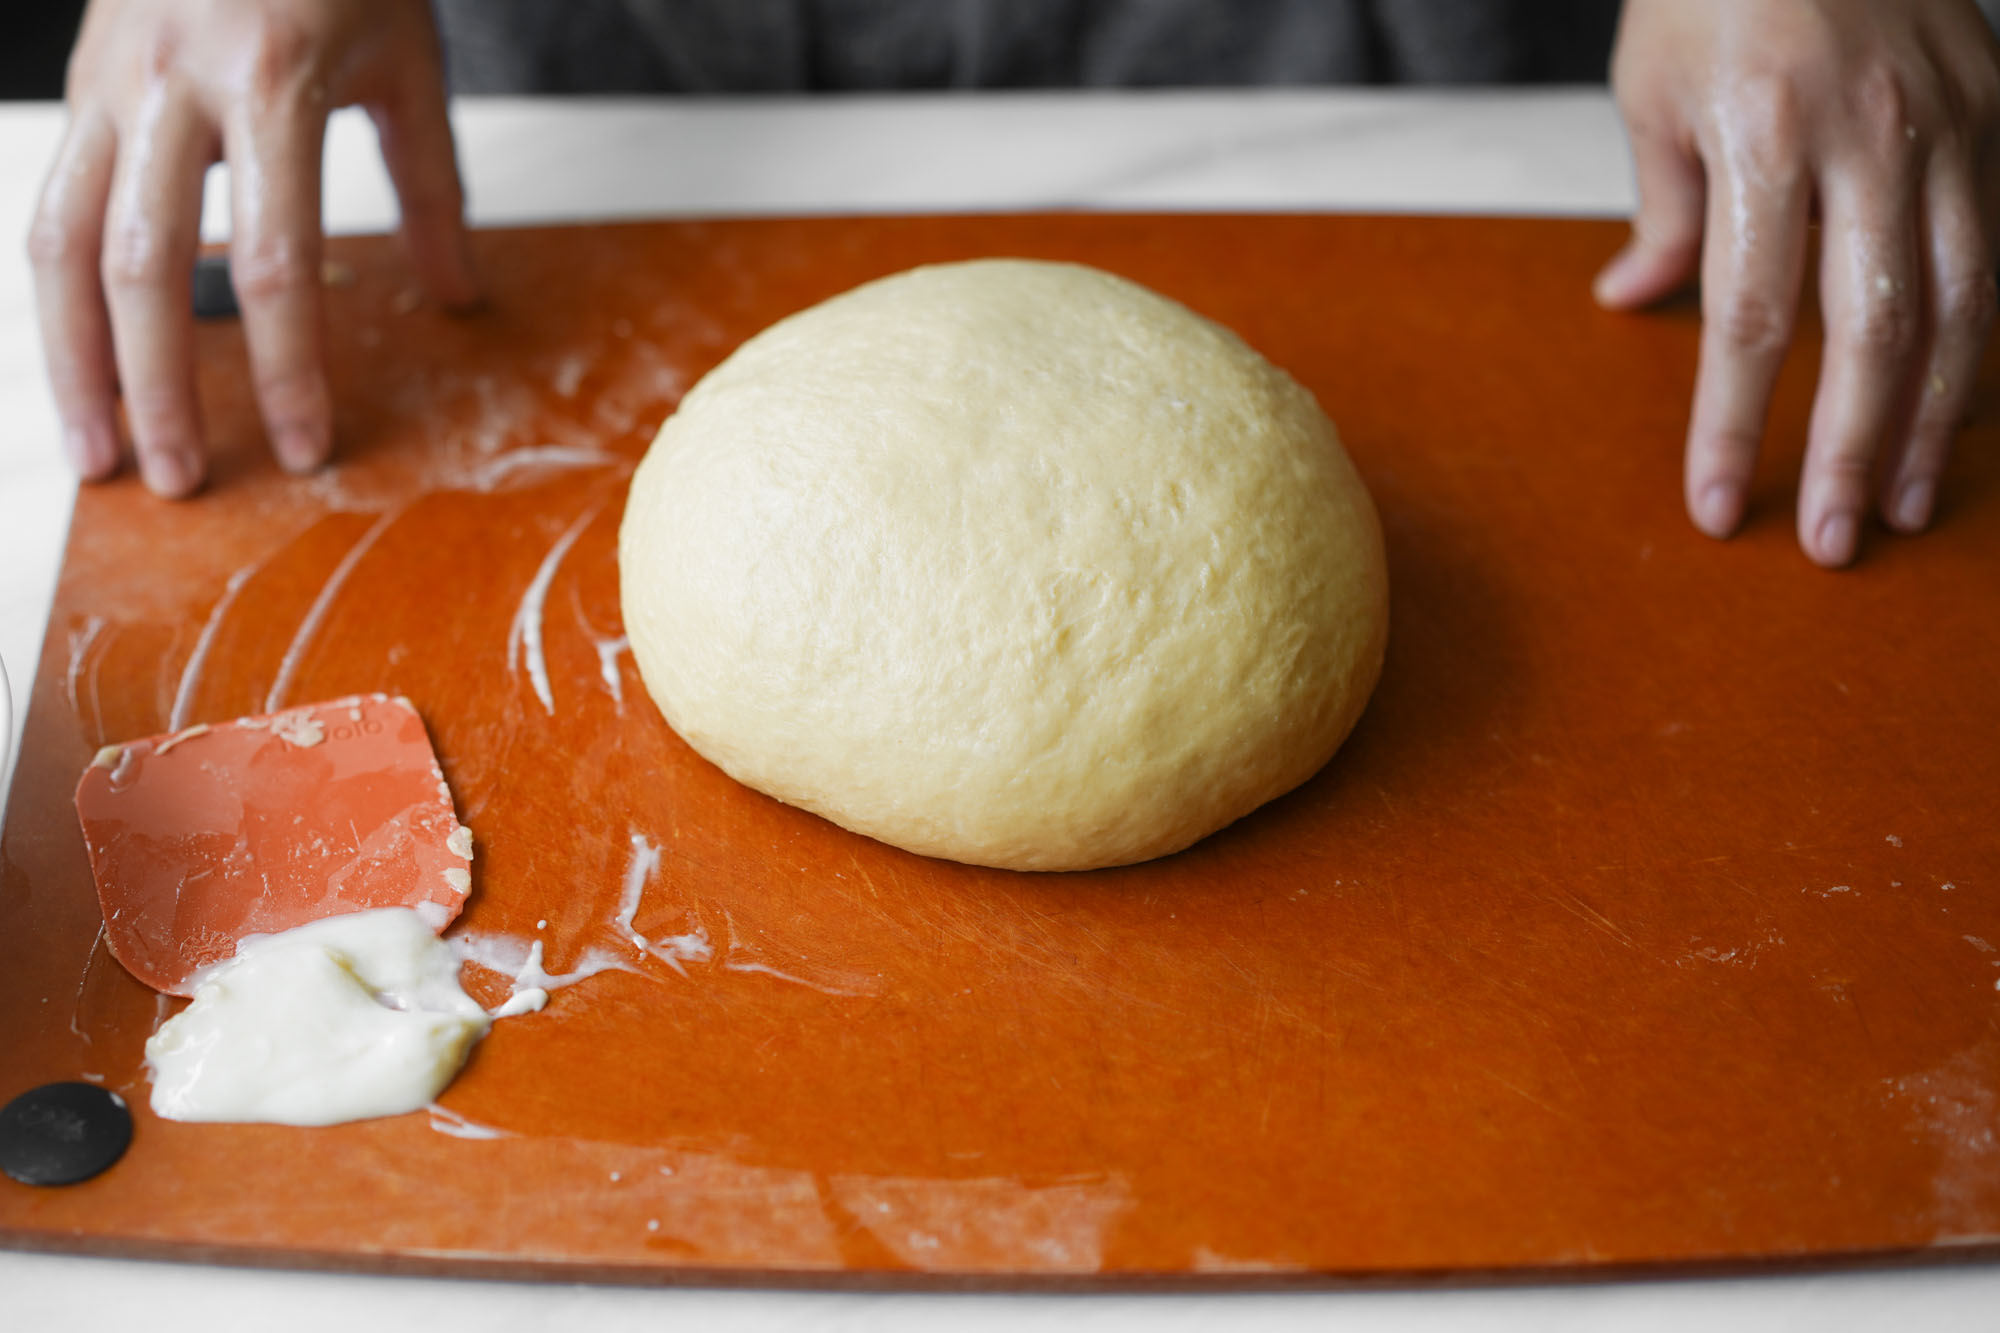
- Now, slowly knead in the softened butter into the dough. Do not add additional flour during this period. Continue to hand knead until the butter is completely incorporated and the texture of the dough has smoothed over. It will seem like the butter is hard to incorporate at first, it took about five minutes of kneading.

- Here's what it looks like after kneading butter into the dough.

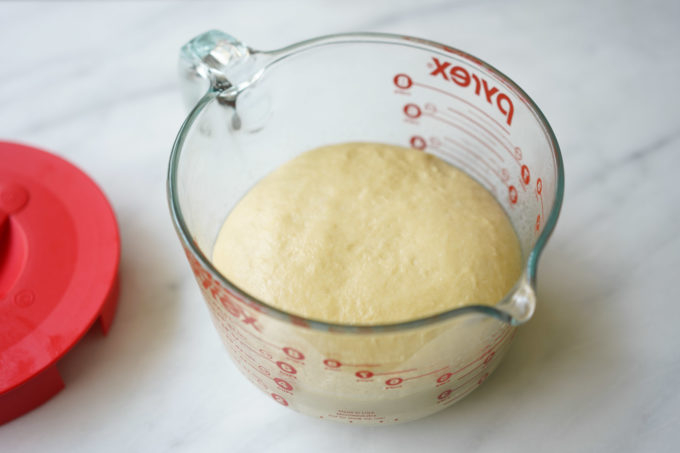
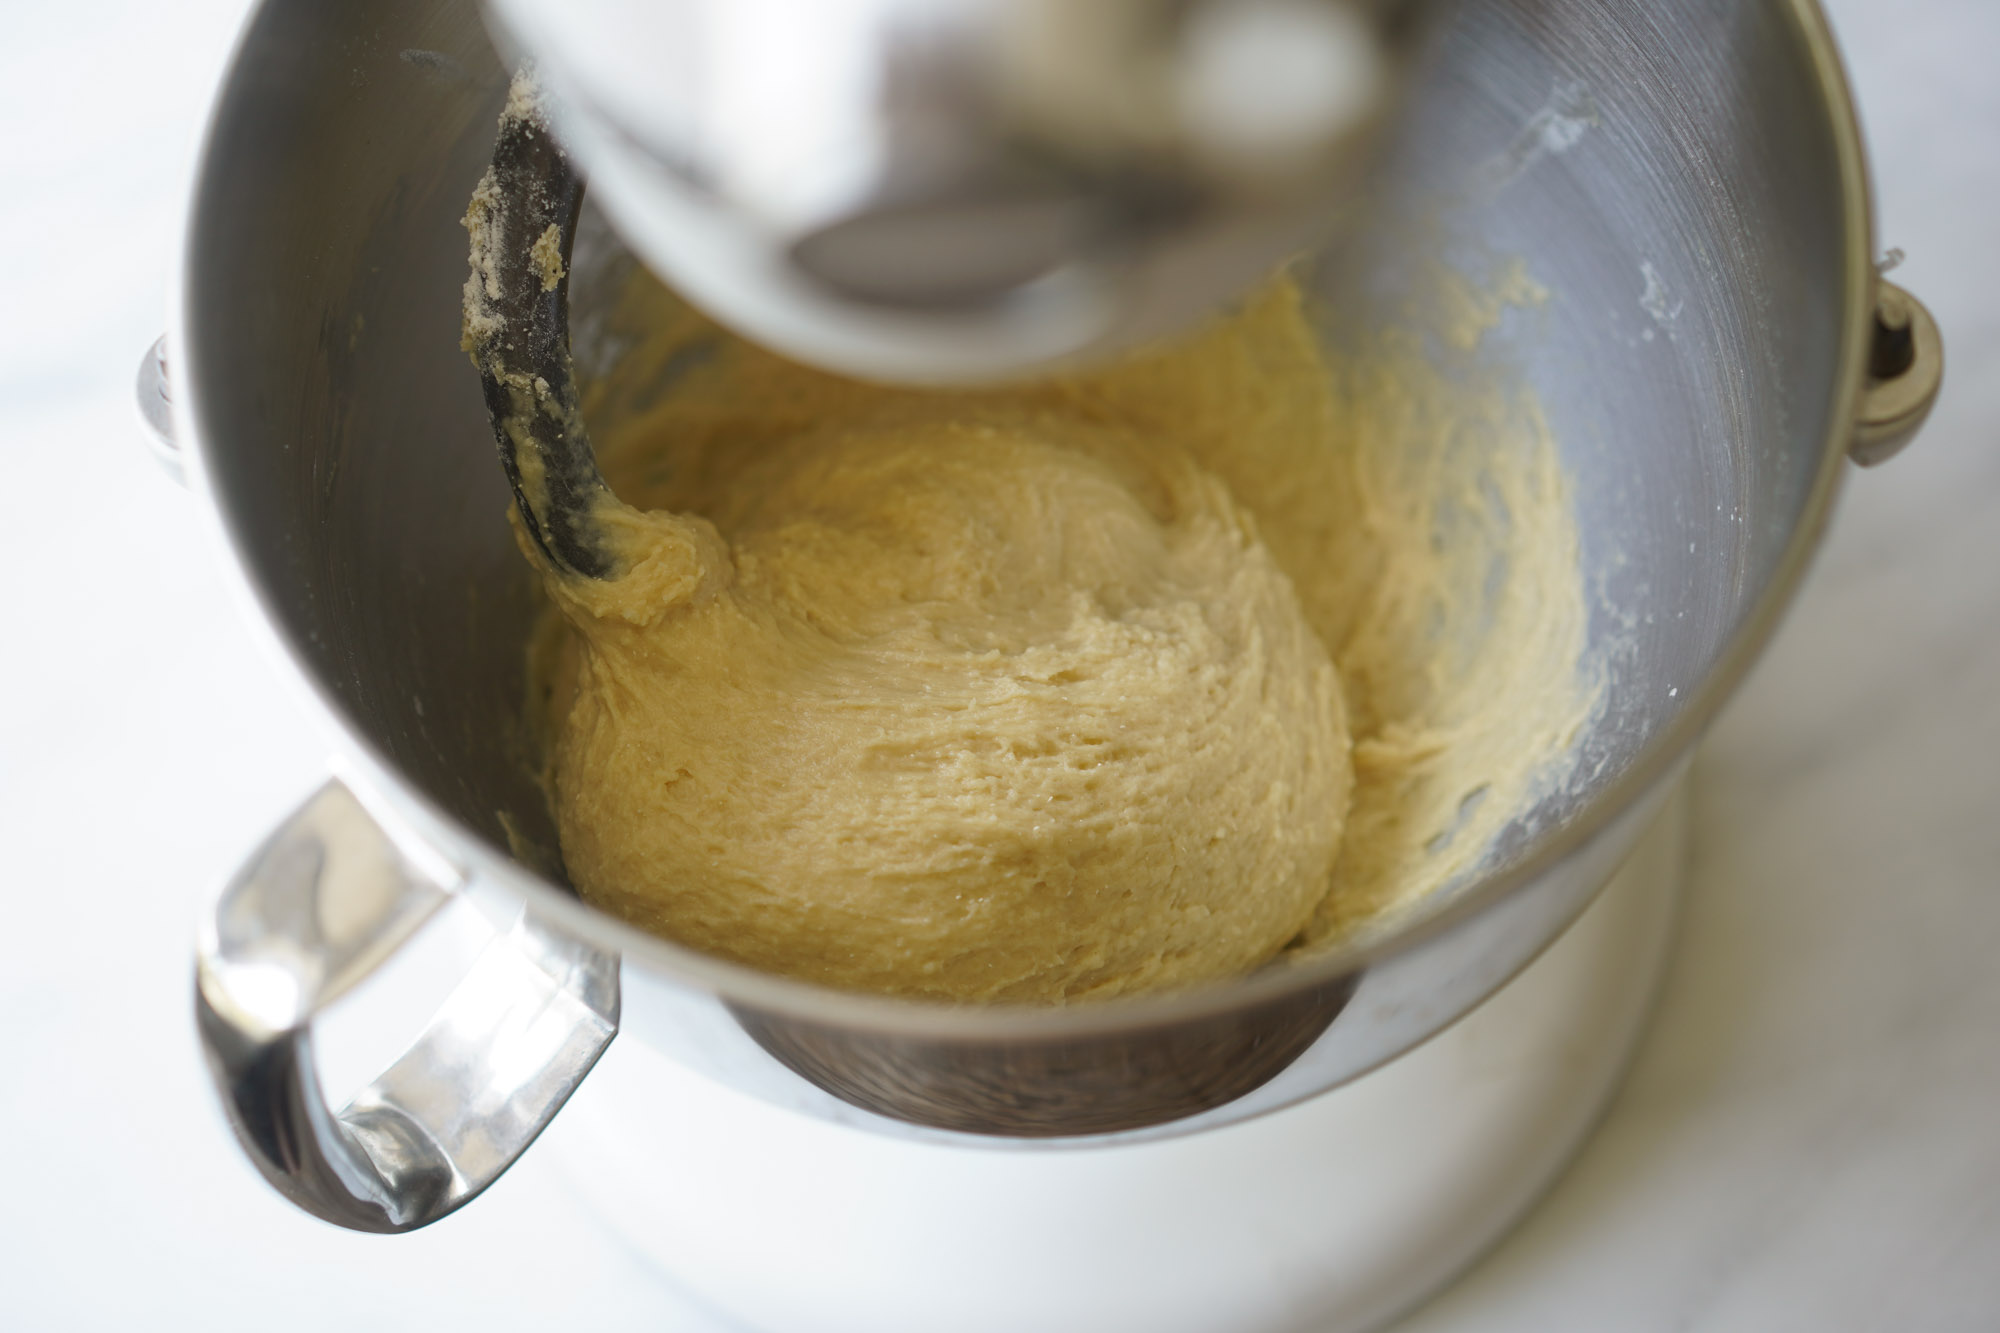
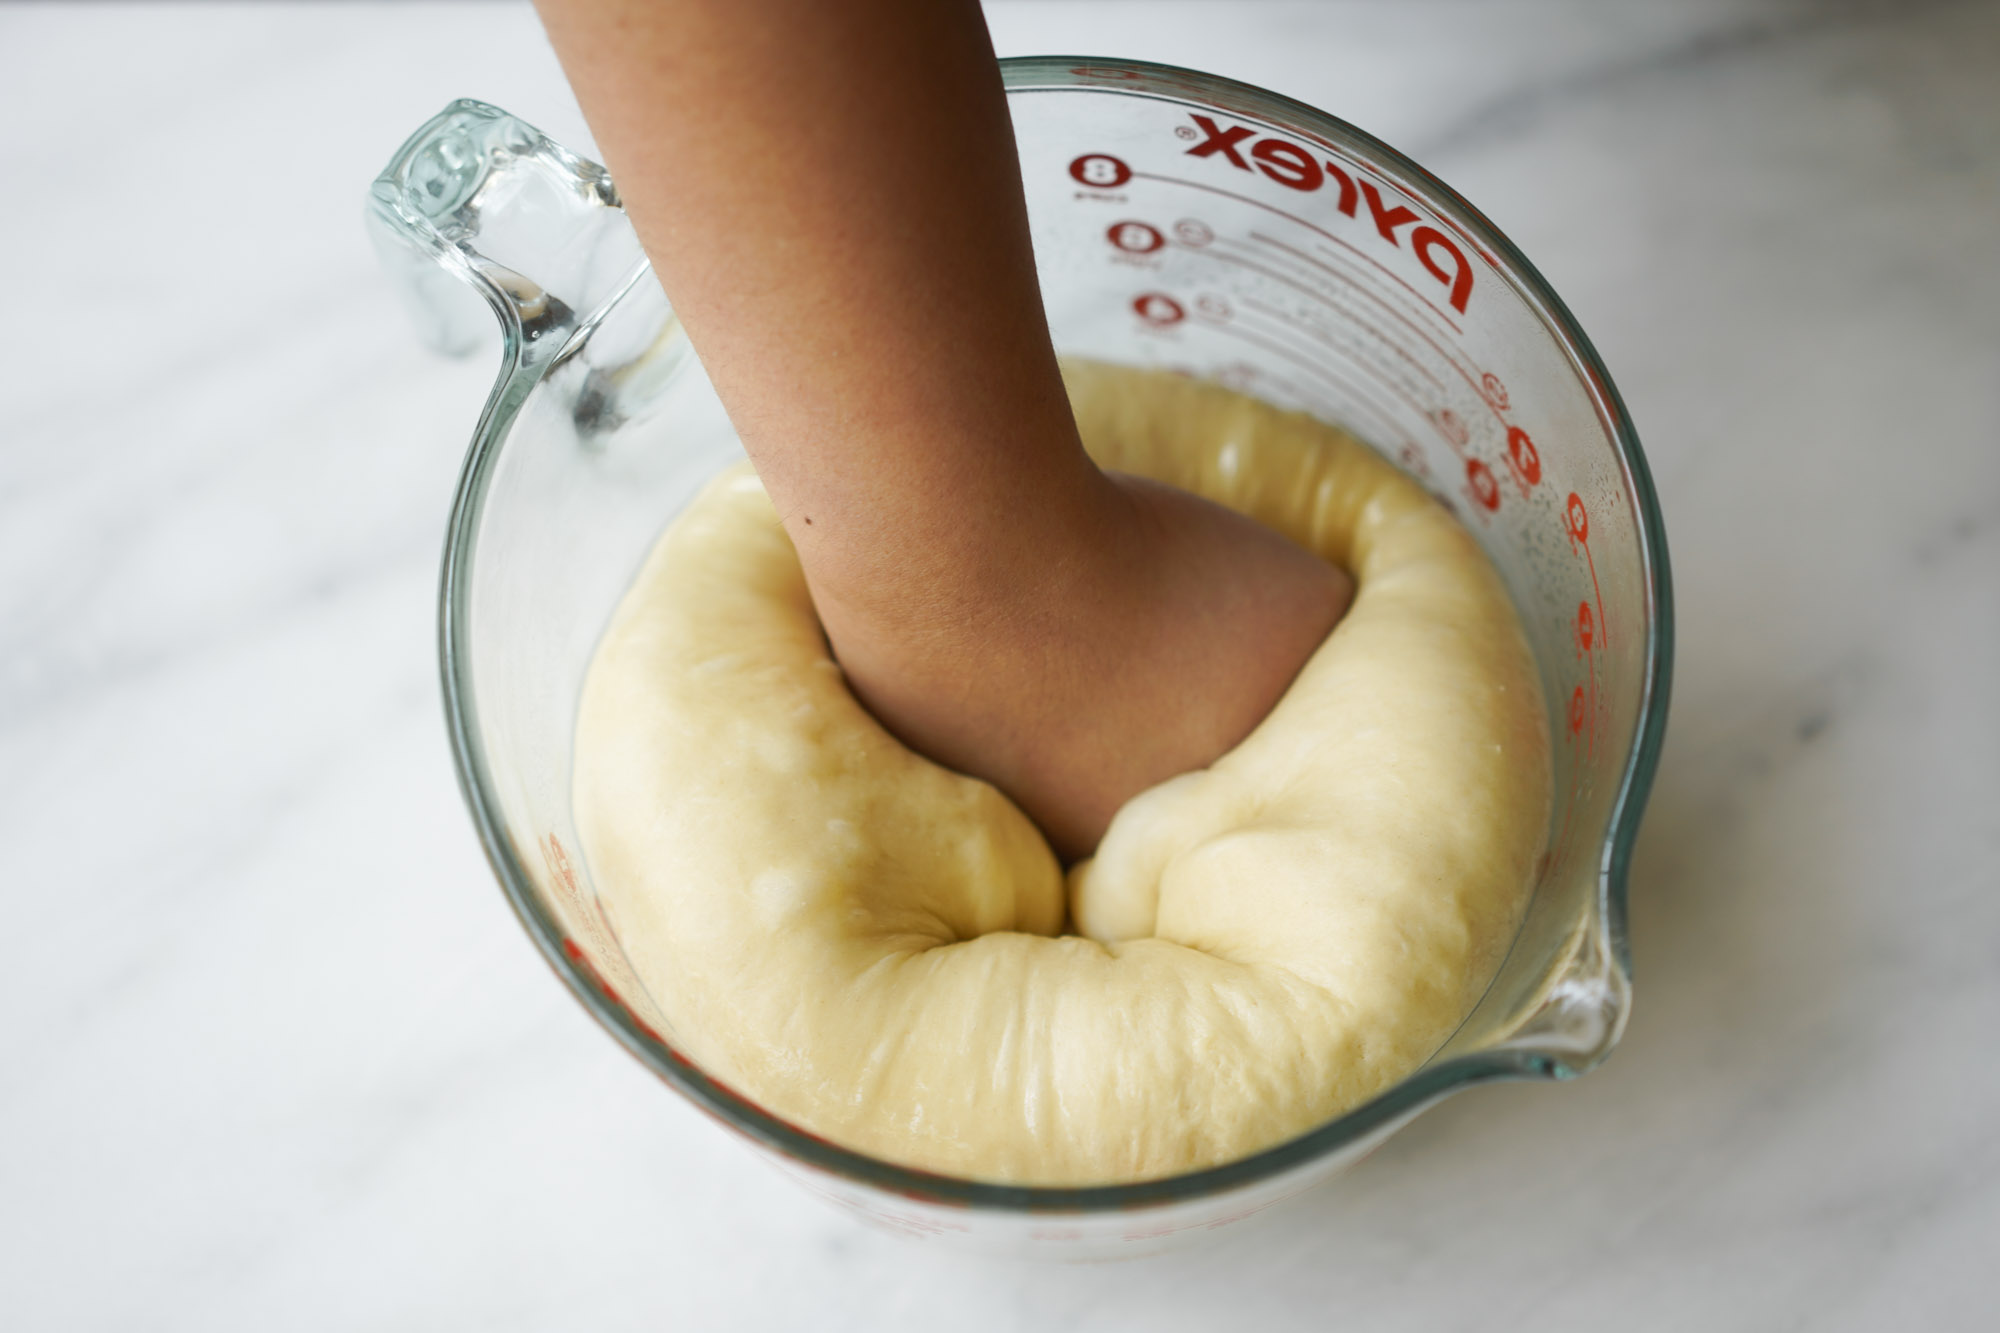
- Oil a mixing bowl and place the dough inside with a cover. Proof the dough for 1 hour or until the dough has doubled in size. See picture here for what it looks like after proofing.
- Carefully punch your dough in the bowl to remove the excess gas inside the dough.

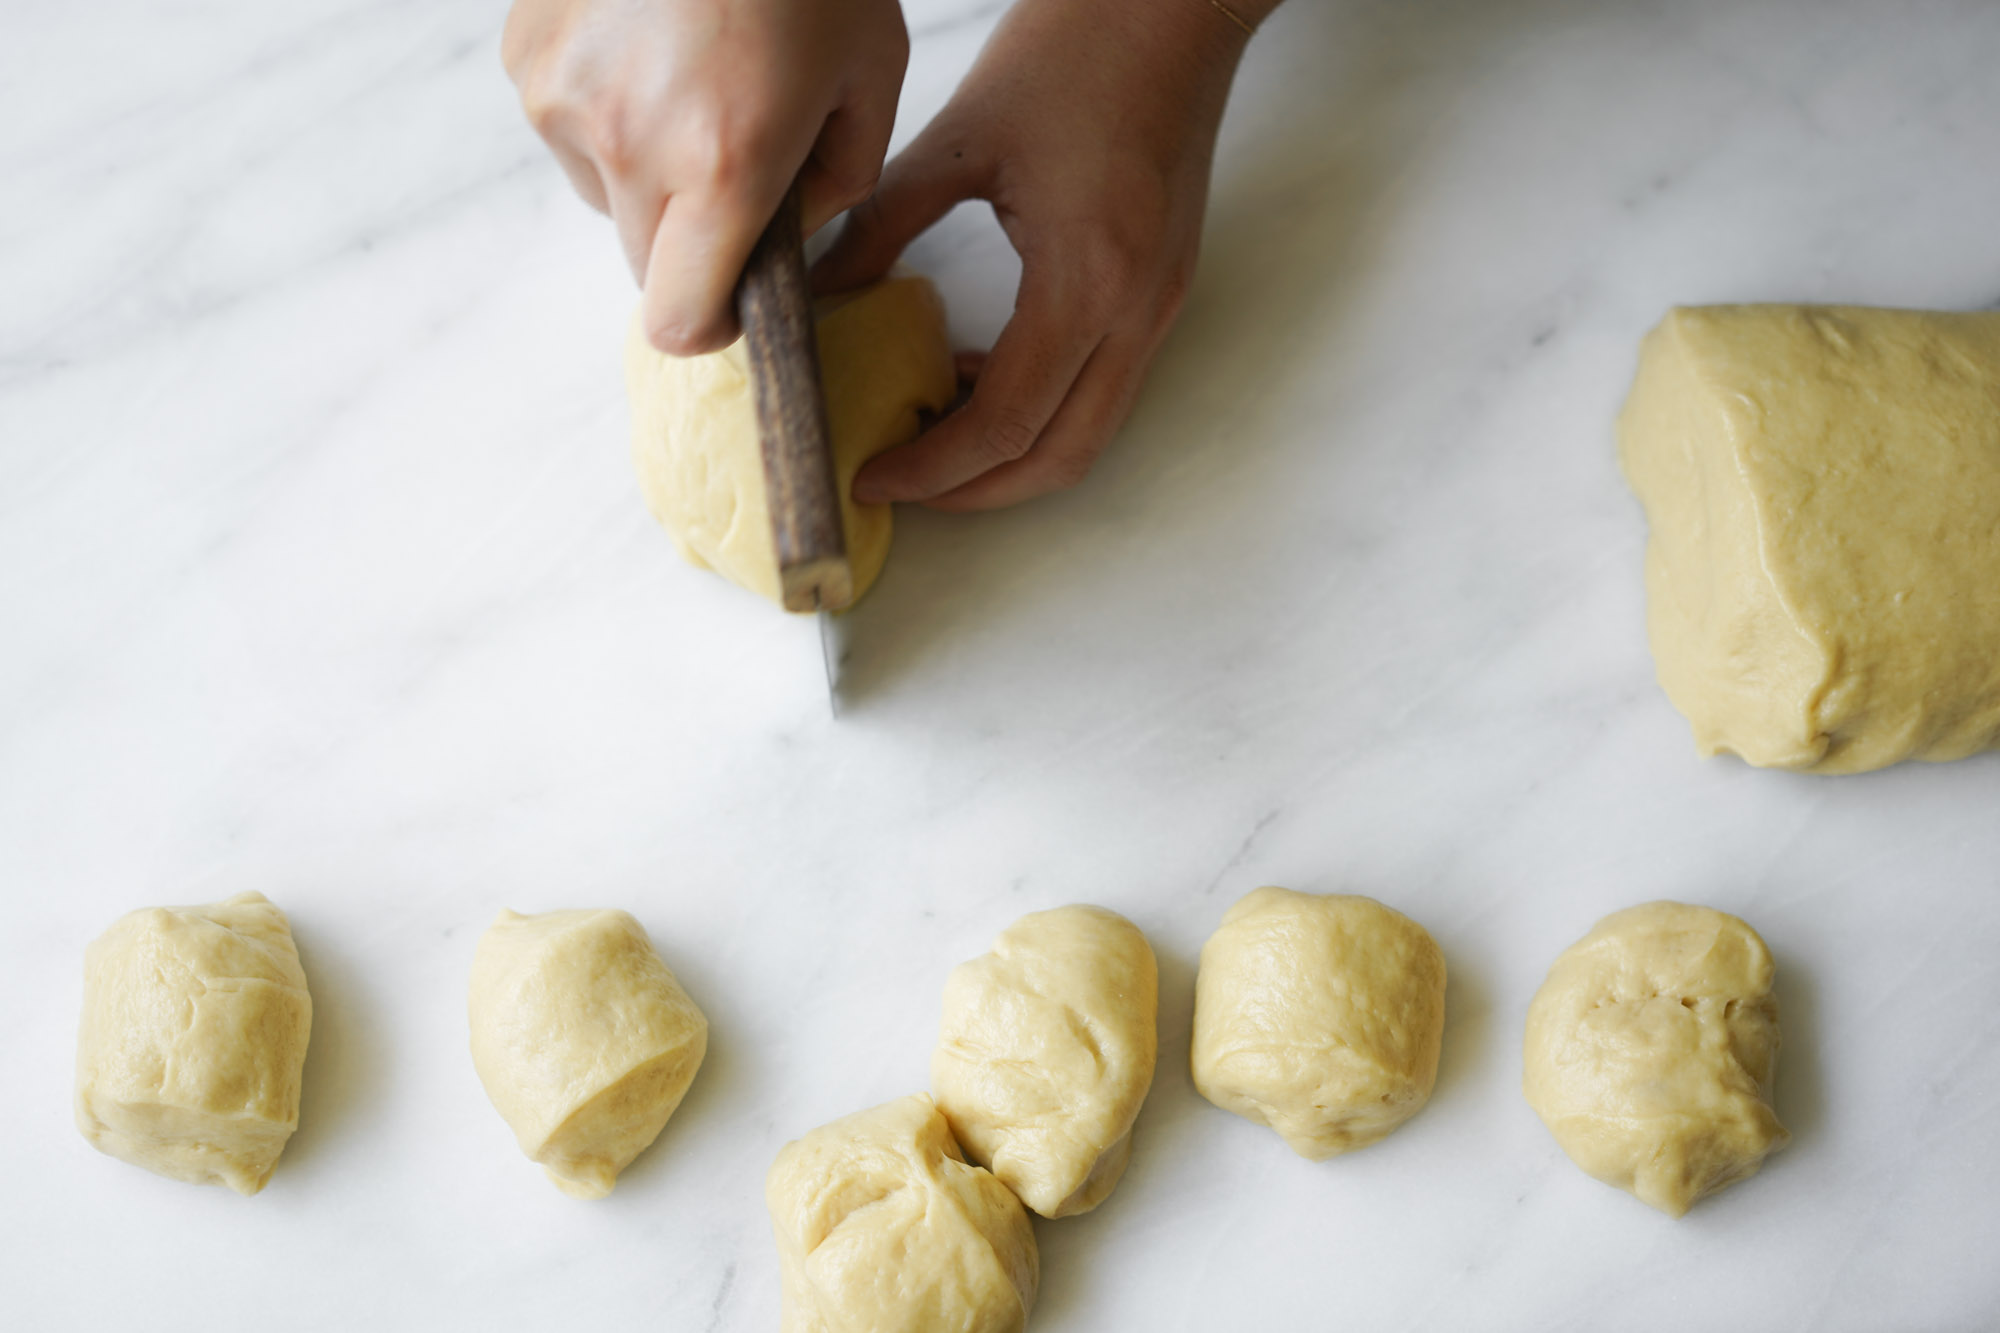
- Cut your dough in half and set aside one half. With one half, use your hands to roll the dough into an 8 inch log and then use a knife or pastry cutter to split the log into 8 equal portions. Repeat with the other half of the dough. You should end up with 16 pieces.
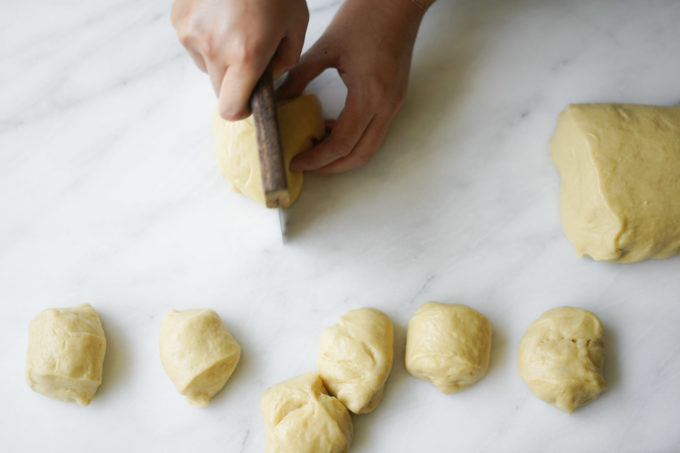
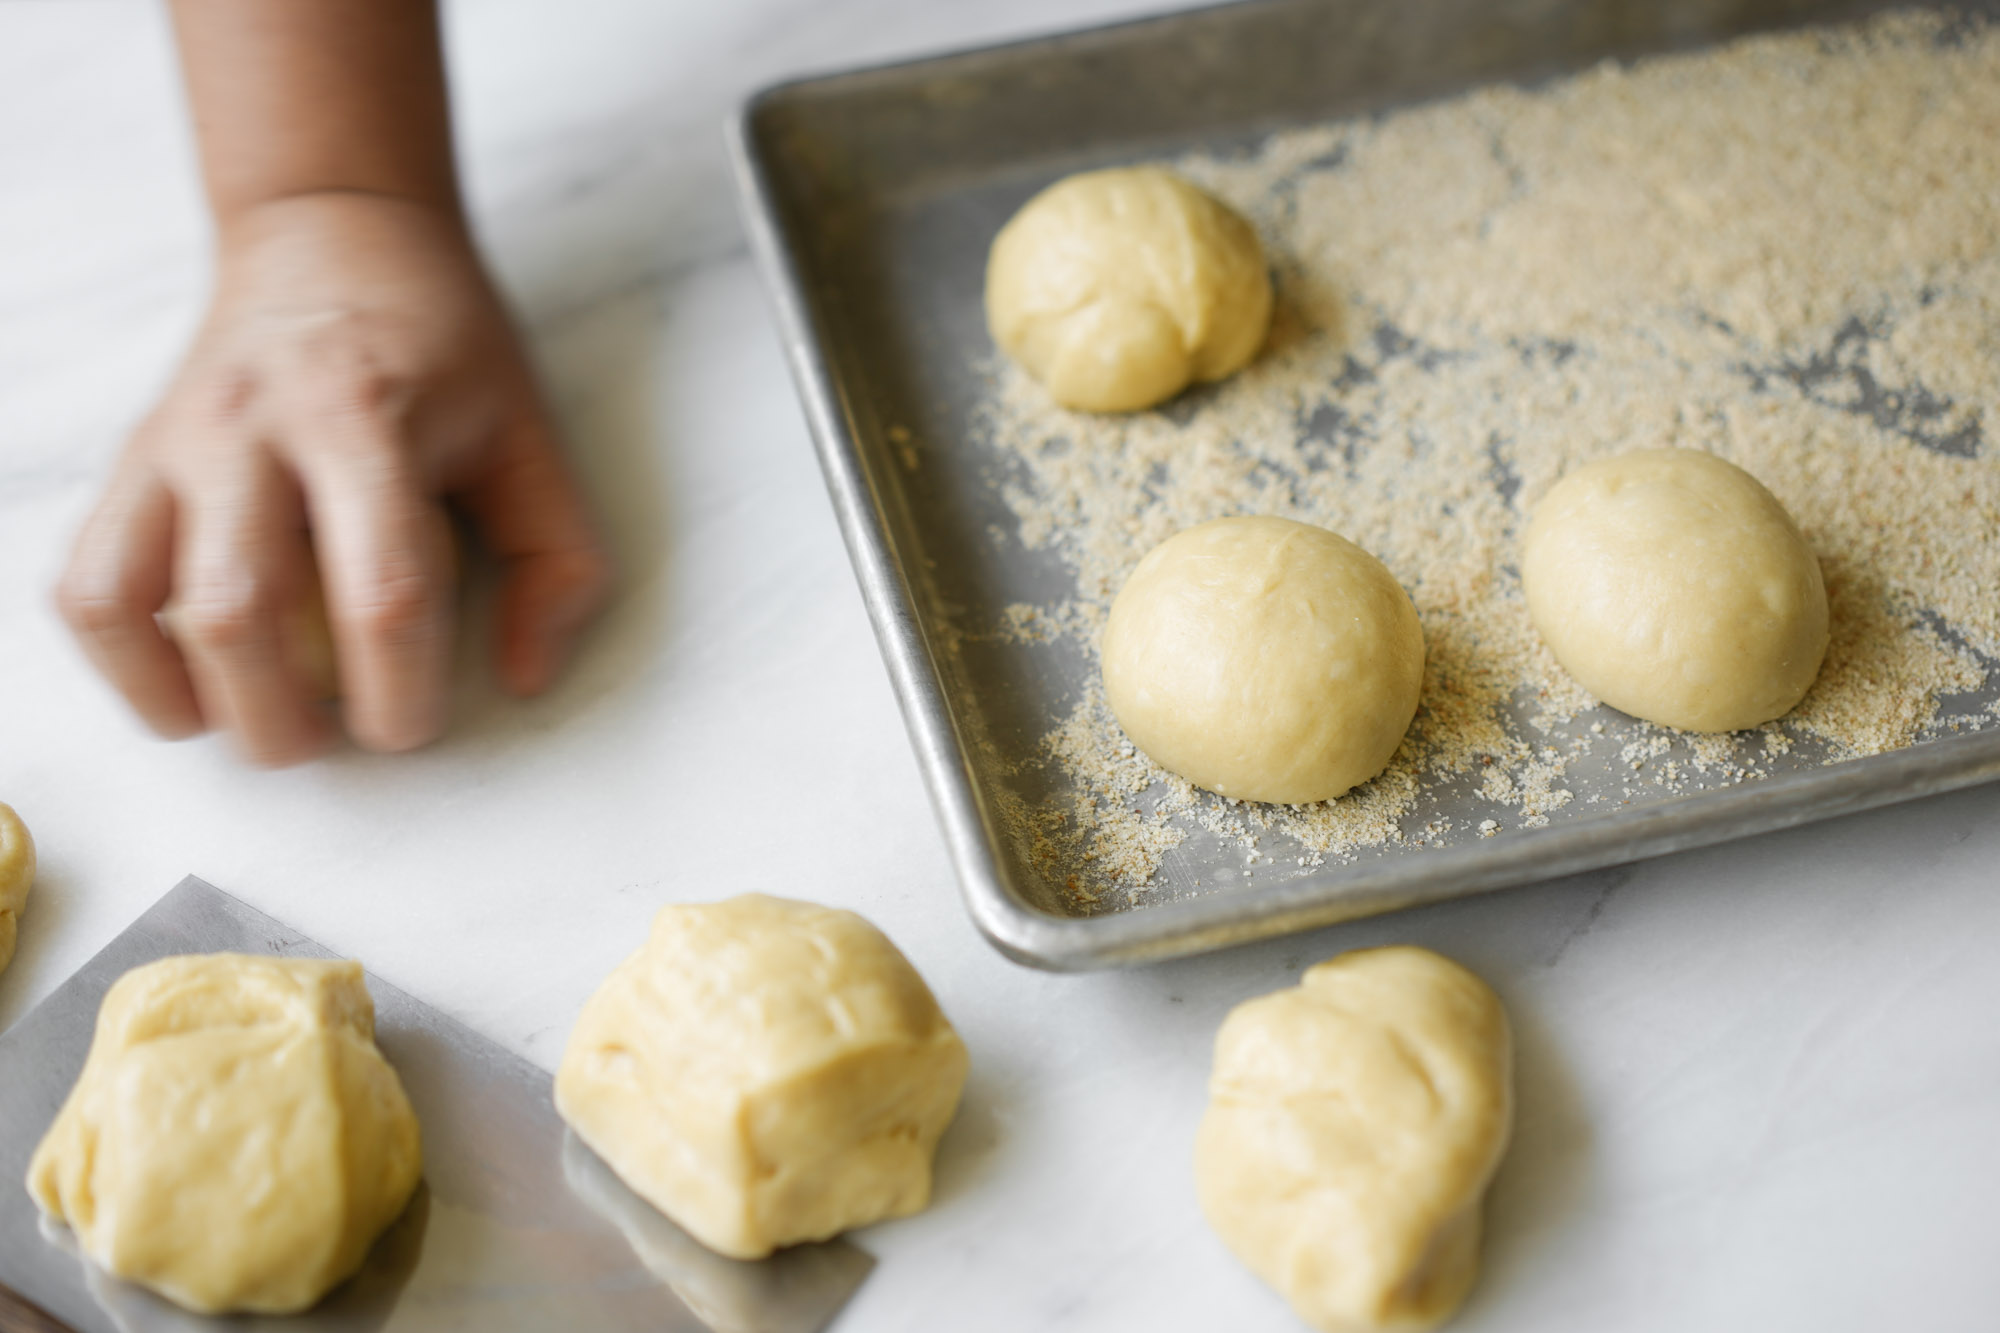
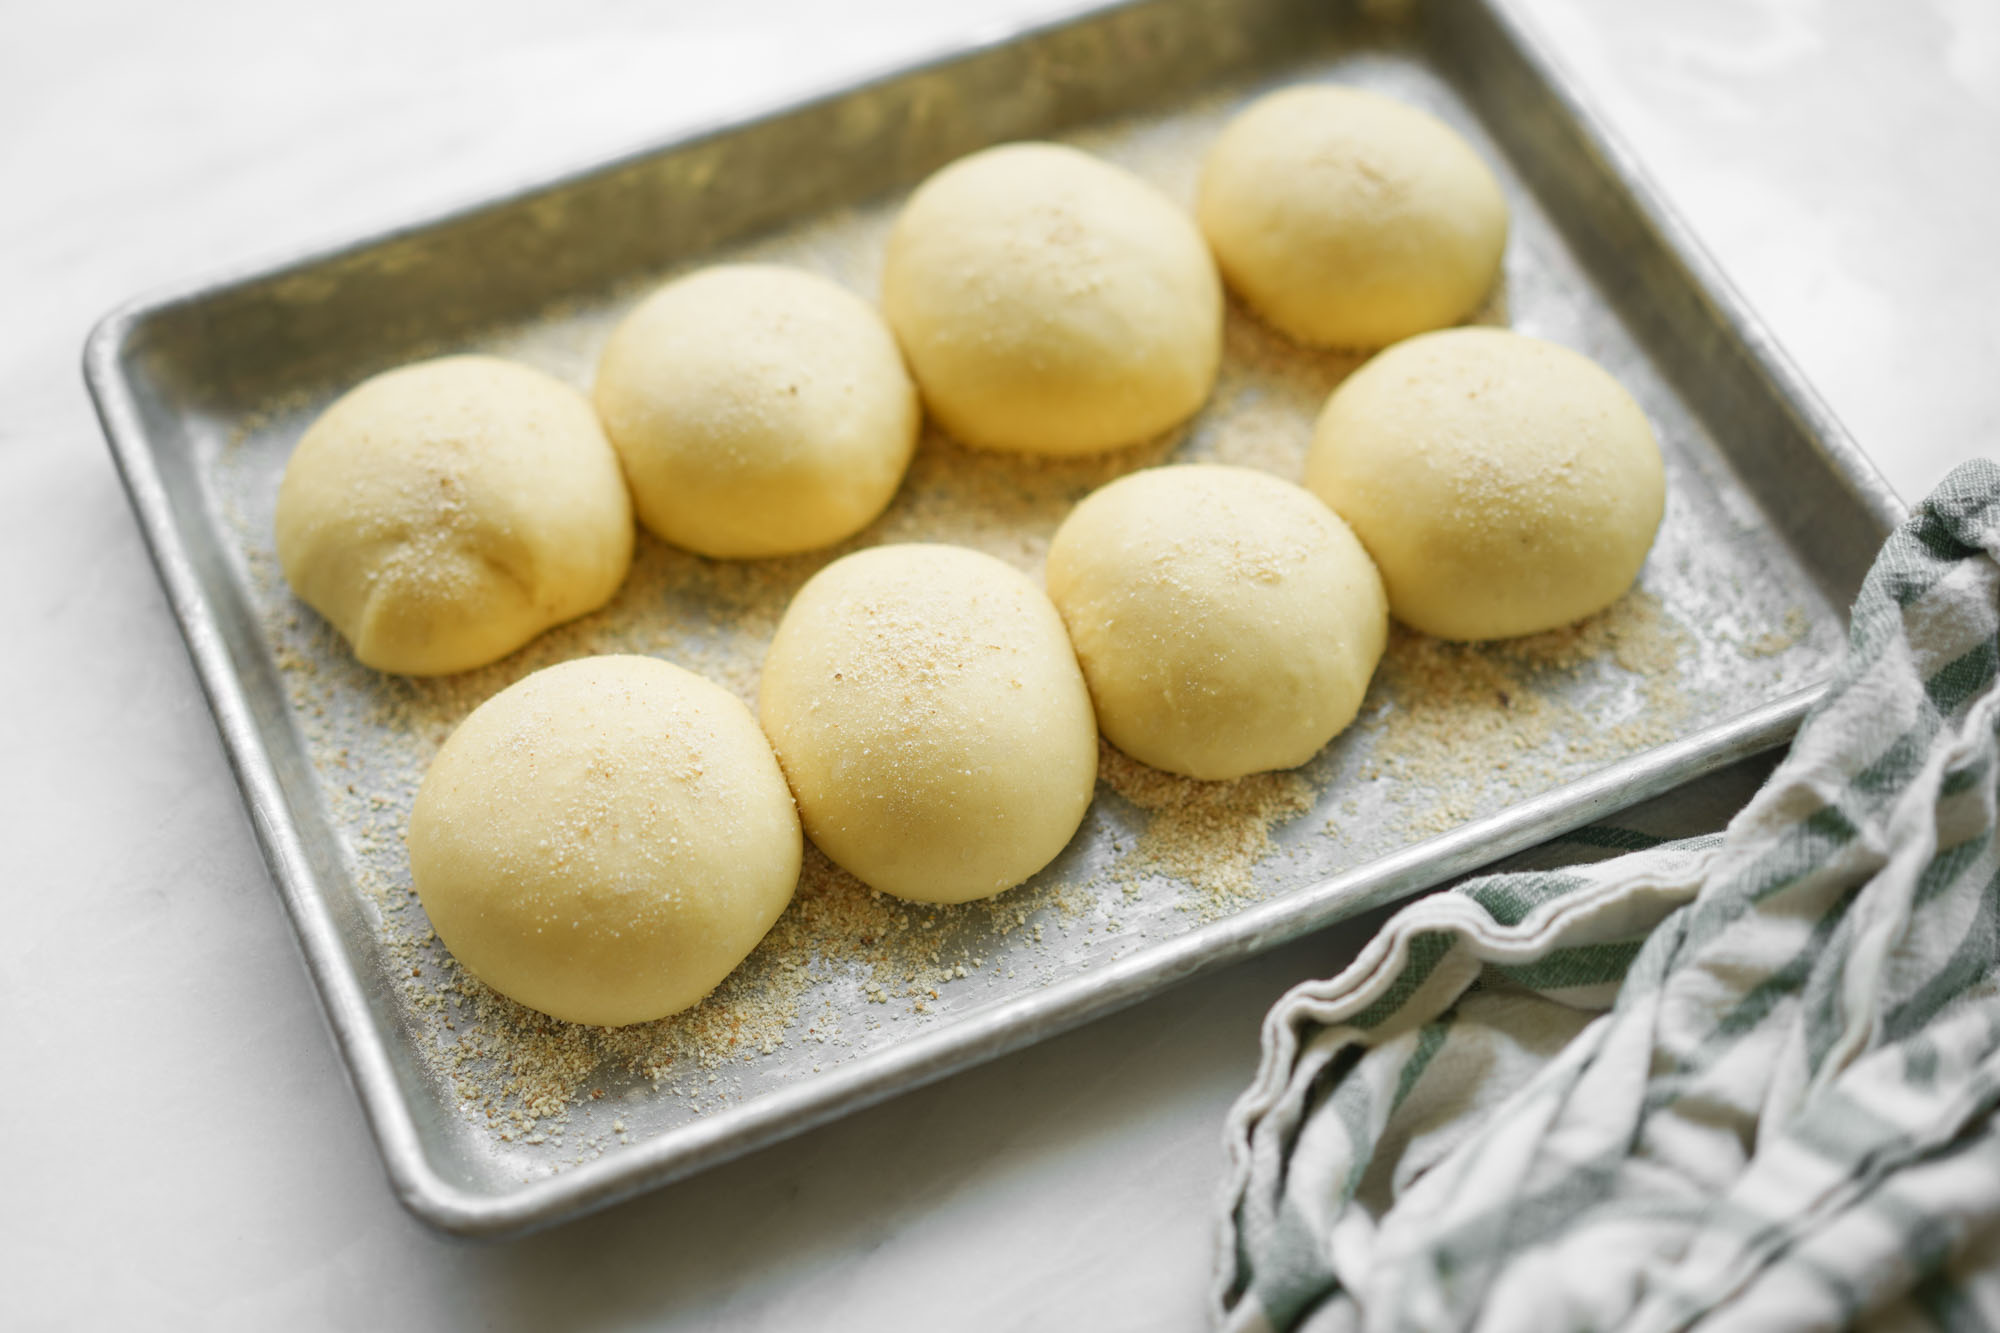
- In a baking sheet, sprinkle about 2-4 tbsp of breadcrumbs onto the bottom of the pan.
- Take one piece and use your hands to shape it into a ball. I also like to form my hands in a claw-like shape, covering the ball of dough, and roll it around to get a better round shape. Place the ball of dough onto the sheet pan. Repeat with all the pieces of dough.

- Sprinkle more bread crumbs on top of all of the pandesal balls.
- Cover with a towel and allow the pandesal to proof again for 1 hour or until they double in size. Here's what it looks like after proofing again.

- Preheat the oven to 375 °F. Bake for 10-15 minutes until it reaches a golden brown. Serve immediately and enjoy.


What is the vinegar for and when do you incorporate it? Thanks
Hey Katherine, did you mean to comment on a different recipe? There’s no vinegar in this pandesal.
I tried other recipes and this one is a keeper – This is the best pan de sal recipe. I made this recipe several times now and end product is consistent. Thank you for the tips and clear instructions.
Wow thank you so much Tin!
I’ve made this bread about four times and each time I follow the directions exactly. And they are the best roles! Everyone devours them. Thank you for this wonderful recipe
I’ve tried other recipes and this is the first one that came out perfect. If you follow the directions exactly, you can’t go wrong. It is messy, but worth it!
Great to hear it worked for you Cathy 🙂
Just two of us now. Any trick to freezing them or the dough?
I haven’t tested this, but if you must, I’d freeze the rolls after baking and not the dough!
I tried four pandesal recipes and yours is the best. I think the combination of bread and all purpose flour makes a big difference with the texture. Thanks for sharing.
Thank you Betty!